
Time: After baking cupcakes, it took me about 20-30 minutes to decorate.
Mess/Cleanup: I did most of the work on these cupcakes, while my son placed some on the "buttons" on. I was much messier than him. I managed to get frosting all on my hands. But the cleanup was pretty simple.
What You Need:
- Un-iced cupcakes (I colored mine with gel food coloring to make them extra cool)
- Pepperidge Farms Milano Cookies
- White Frosting. Personally I don't like the taste of frosting from the can, so I did make my own buttercream. Making your own icing is VERY easy and only requires a few ingredients (butter, confectioners sugar, vanilla, and a little coffee creamer). You could easily use store bought frosting.
- Food Coloring (Colors Needed: Purple, Green, 'Flesh'). I like the Wilton Gel Colors. You can also buy Disney Wilton Colors. They pre-package the colors you need. There is a Toy Story theme, like this one.
- Black Edible Color Marker like this. I bought mine at the grocery store.
- Blue Icing Gel
- RedHot Candies
- Sprinkles or Mini Candy Coated Chocolate Chips (need red, blue, and green)
- Sandwich baggies
- Scissors

Making these Buzz cupcakes made me a rockstar in my son's eyes. Enough said.
Step 1:
Mix your frosting colors. You will need the majority of Green and Purple. For the piping, you may need to microwave your frosting for a FEW seconds.
- White - for the mouth and eyes. You could also use white chocolate chips for the eyes.
- Purple - for Buzz's helmet thing and the center of each cupcake.
- Green - for the perimeter of each cupcake.
- Flesh - for the nose
Place each of your colors in a baggie. Right before you use each color, snip a tiny corner off of the bag. Keep the hole pretty small for the purple, white, and flesh colors. This will allow us to easily pipe on the face features.
Step 3:
Lay out all of the cookies. Using the purple, pipe on the helmet thing on each cookie.

Using the Food Writer, draw a swirly to make Buzz's chin.
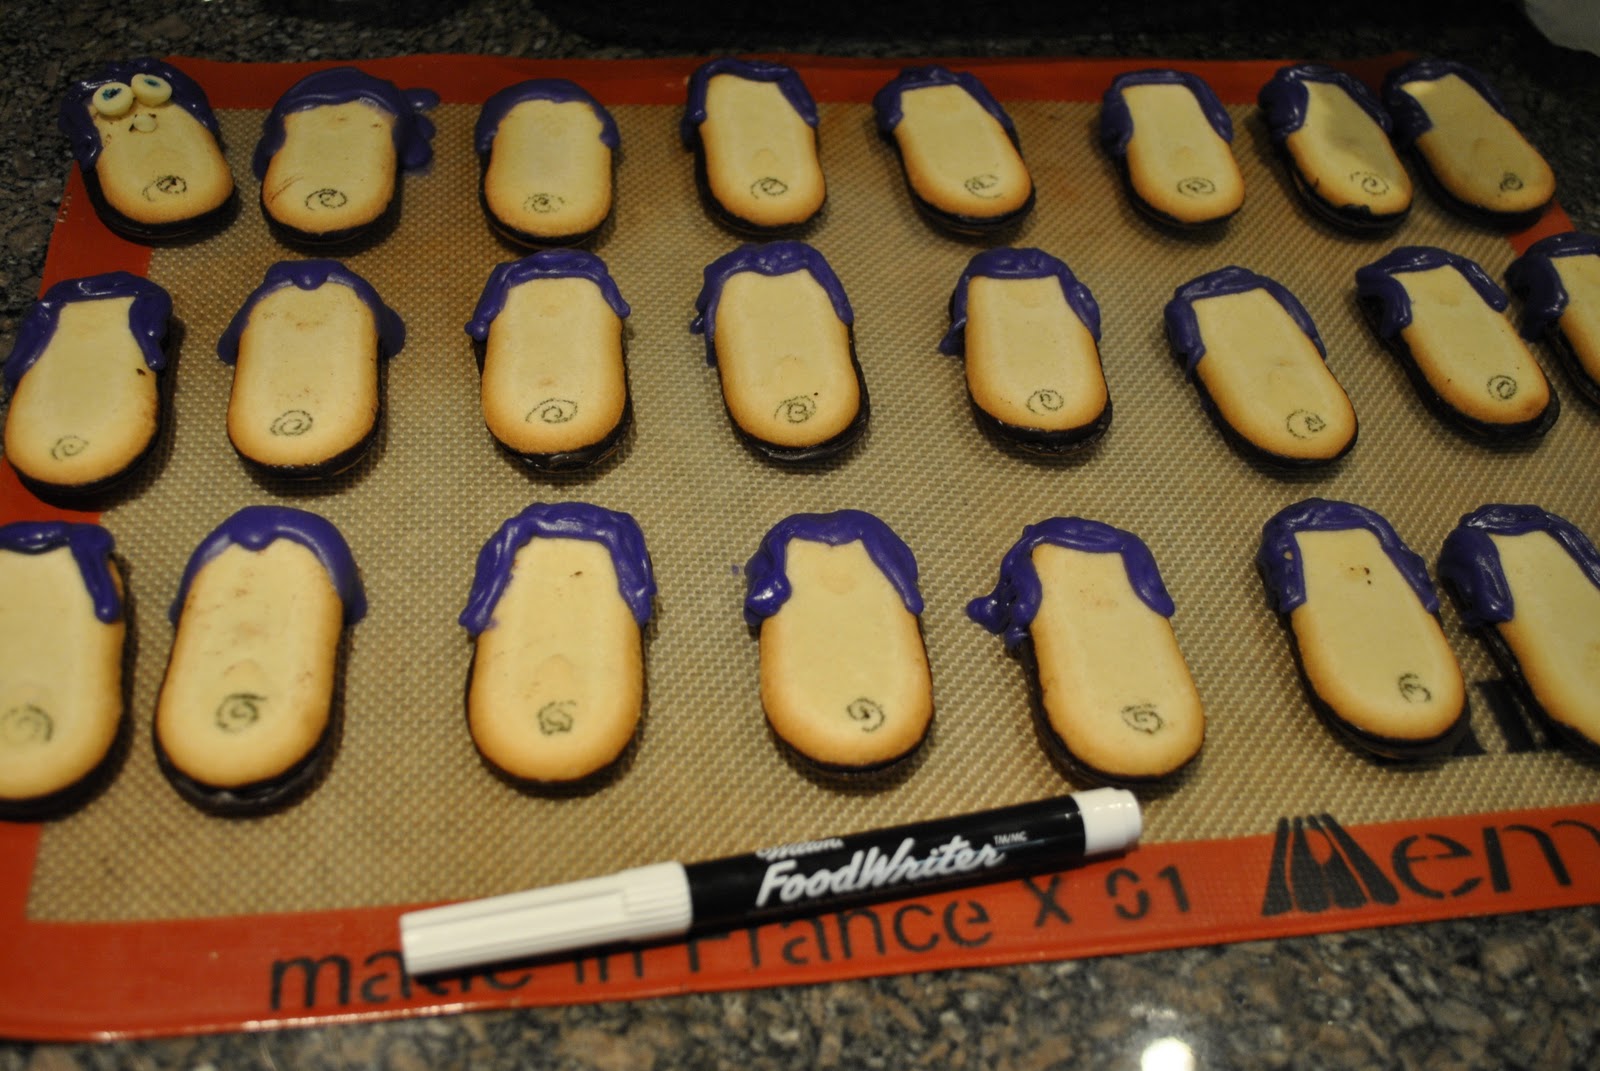
Using the white frosting, make the eyes and mouth.
Step 6:
Using the flesh-colored frosting, draw the nose.
Step 7:
Using the blue gel, put a little dallop on each eye.
 |
| I know, some of these Buzz's look a little goofy. |
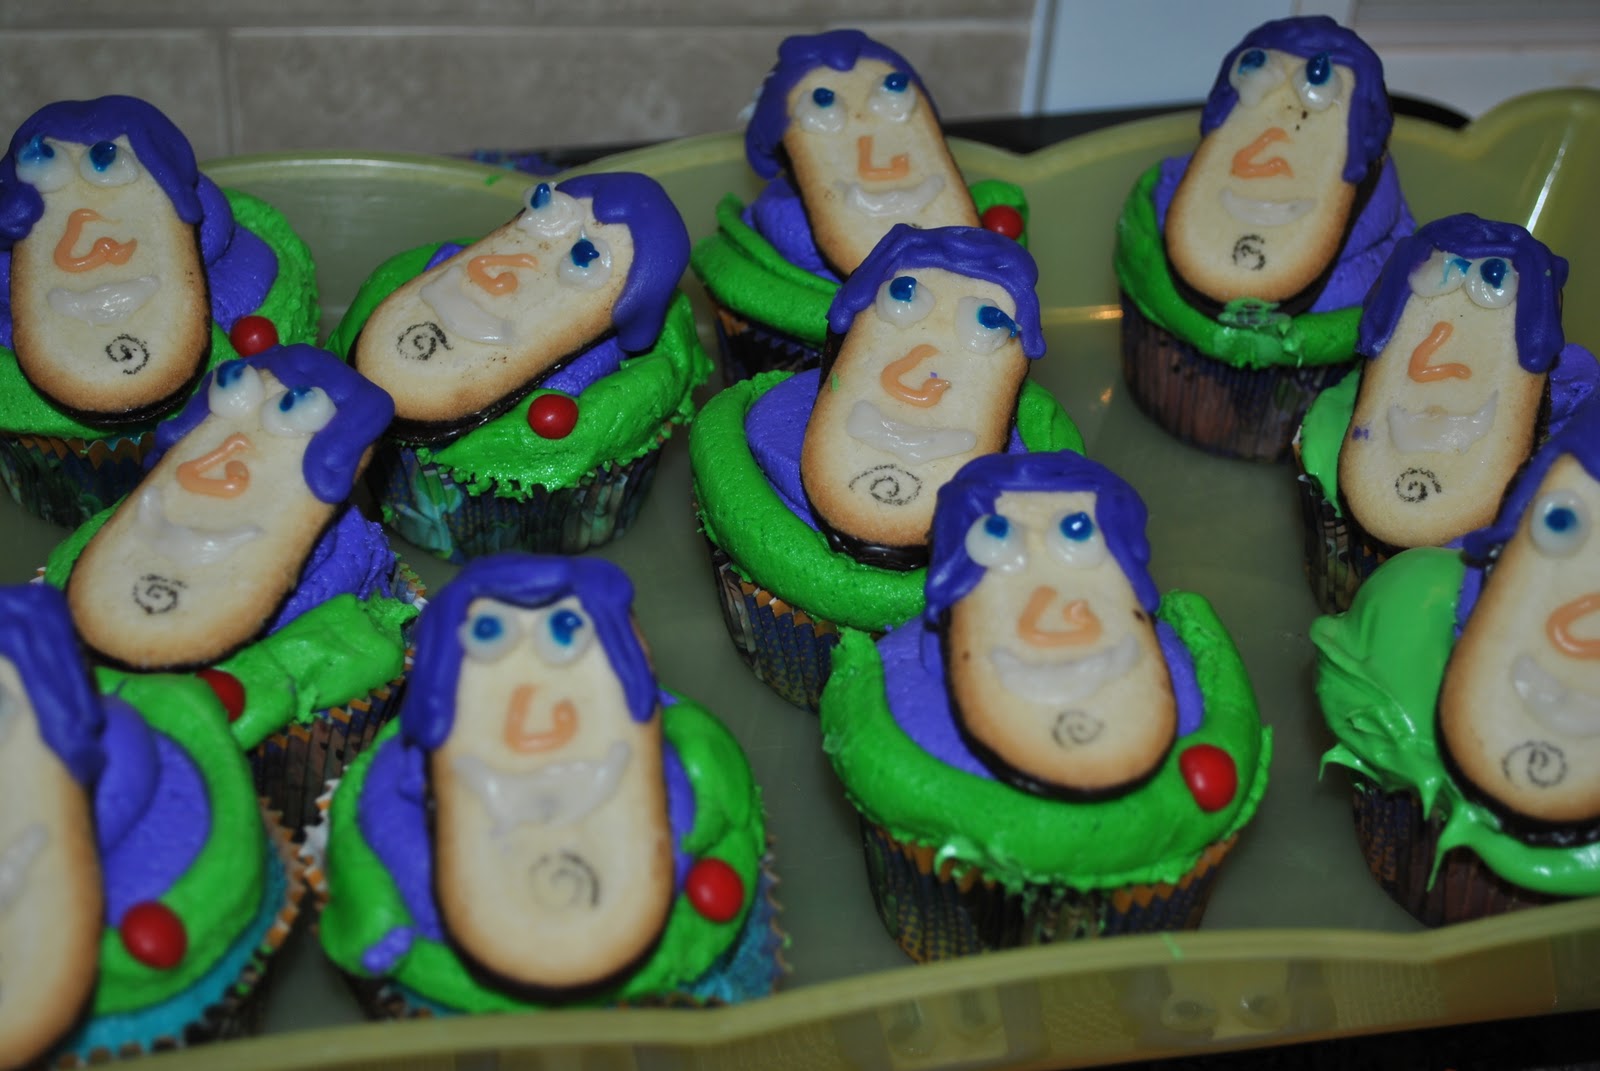
Using the purple icing (snip the open corner again to make the hole in the baggie a little larger), make a swirly in the center of each cupcake. Use the same technique you would use to serve yourself some soft-serve ice cream.
Step 9:
Using the green icing, edge the permiter of each cupcake.
Step 10:
Place the Buzz cookies in the center of each cupcake.
Step 11:
Arrange the sprinkles/candy-coated mini chocolate chips to make Buzz's control panel.
- Blue, Green, Red 'buttons' on the left
- Big Red button (Red Hot candy) on the right
-Rose @-}---
Love them! Jake's b'day is next month, so I may try these. He'd think I was a rick-star Mom too. And you're right...that's the only motivation needed!
ReplyDeleteWow! These are amazing! Such a clever idea :)
ReplyDeleteThanks! I also came across this site where she used 1/2 of a plastic ornament to use as Buzz's helmet: http://www.thepartyanimal-blog.org/buzz-lightyear-cupcakes/. Such a great idea!
ReplyDeleteThese are the answer to my prayers. I have been planning a Buzz cake, and at the last minute have decided to have my son's party at an amusement park, and the cake I have planned will not transport easily... so now it needs to be cupcakes. And that link from the commenter for the ones with the ornament helmet.... exactly what I need! Thank you!
ReplyDelete