Monday, December 17, 2012

Mirror Mirror Who is the Ferris of them All?


Our latest craft project was to create a super fantastic fancy wonderful hand-held mirror. (Actually that's a lie.  Our latest craft was making a penguin I cut out with my FANTASTIC SILHOUETTE CAMEO cutter, but since most people don't have one of those I didn't document it on the blog.)

Why I like this craft: My kid thought of this one all by herself.  Kid tested, mother approved.

I also like this because it's a way to use up those pesky cake pop sticks taking up room in your kitchen or craft room because you HATE how much time and effort it takes to make stinkin' cake pops that never turn out as cute as the photo.  Unless your name is Rose.  Then your cake pops turn out even better than the photo.  Sorry, Rose, I'm a prolific but lazy crafter at heart.   

I also also liked using up the leftover little glittery things that were floating around in the bottom of the paper drawer.

I also also also also like this because you can easily make this for a boy if you decorate the edges with stuff the boy likes (gems (boys like gems!) or other things your boy likes).

Age: 3+

Time: 10 minutes  

Mess/Cleanup: Low mess, especially if your kid is good with glue  

What You Need:
  • Something non-breakable and reflective for the mirror part-my kid cut off the cover of a notepad that had a mirror-like reflective surface on one side.  You can use aluminum foil in a pinch. If you look around your house I guarantee you will find something reflective within the next 10 days without buying anything.  
  • Paper
  • Glue
  • A stick-a real stick, a cake pop stick, popsicle stick, anything along those lines will do
  • Glittery things-beads, buttons, gems, stickers, and other random stuff to decorate the mirror
  • Fancy Tape-I used fancy Washi masking tape (my new favorite craft item) or you could substitute strips of colored paper
  • Transparent tape
  • Scissor
  • Markers and/or stamp pads to color the paper frame
We didn't use the heart shaped paper but we did use the stickers and other stuff. 

Canibalized notebook with the mirror cover (sorry notebook!) and washi tape (which makes me feel odly guilty for owning. It's cheap!  Go get some and stop making me feel badly!)

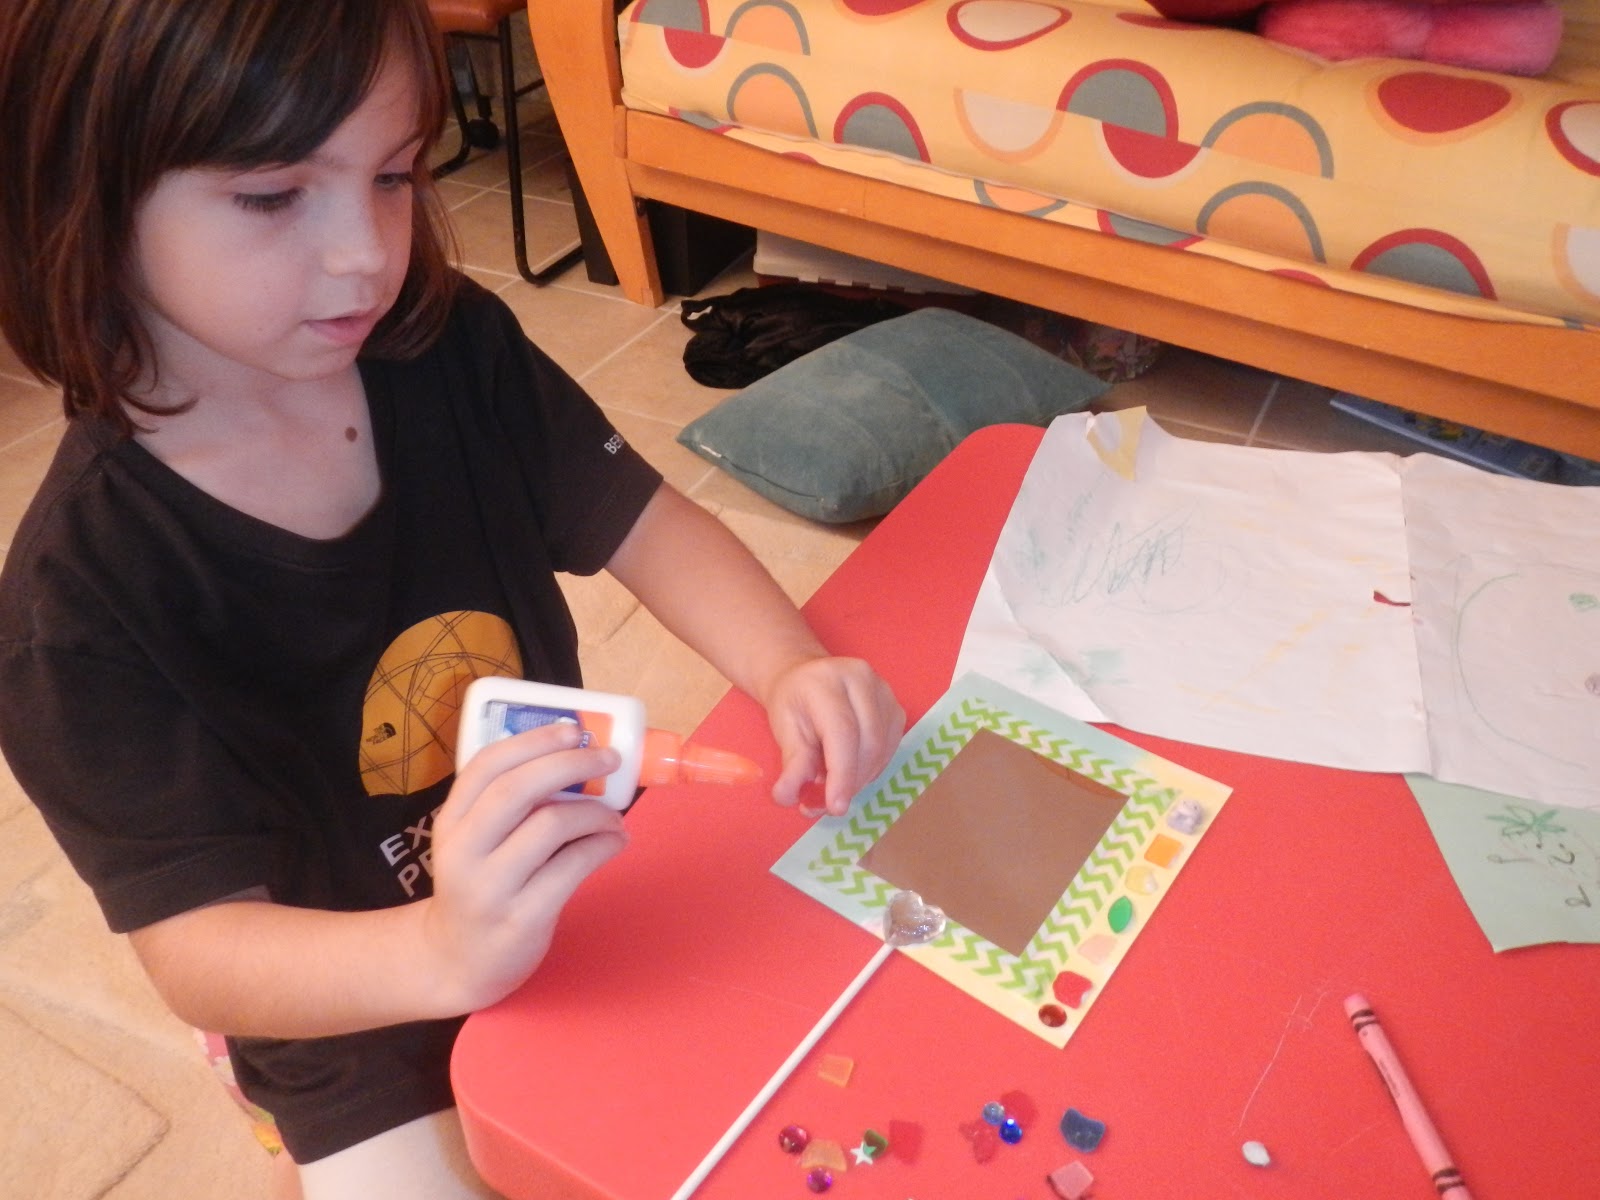
Step 1: Cut out your "mirror" and a piece of paper to go behind it.  It can be rectangular like the example or any shape you like.  If you want to paint or use stampe pads to color the frame do this before you glue on the mirror so you get right up to the edges.

Step 2:  Glue the mirror to the backing frame. 

Step 2 optional:   If you have Washi tape put it on top of the mirror after it is glued on.  You could substitute strips of colored paper to make a frame, too. 

Step 3:  Embellish with gems and glittery things (or non-glittery things if that is what your kid likes).  Really dig around in your craft drawer to find weird stuff.  Did you notice the fuzzy monkey on our mirror?  That is from a broken hair clip.  Score!

Step 4:  Tape the stick to the back of the mirror. 

Enjoy!

Friday, November 16, 2012

Giant Gumdrop Lights

Six months ago we move our little family into a new house.  Almost since move-in day I've been dreaming up the layout of the interior and exterior Christmas decorations.  For years I've been wanting to decorate the outside in a gingerbread house theme, and this year I finally started gathering my ideas and material before December.  Here's our first, very kid friendly, holiday craft of the year.  Giant gumdrop lights that will eventually line the walkway to our house.  It's only November, so I have to wait a few more weeks before I can pull it all together.

Age: 3+
Time:  10 minutes per bowl + drying time.
Cleanup:  Just had to clean up the brushes.  With my kids getting older, the mess isn't as bad as it used to be.  However, I had to keep my eye on swinging paint brushes.
What You Need:
  • Clear, acrylic salad bowls (I bought mine at the Dollar Tree)
  • Paint (I used Crayola's Washable Paints)
  • Paint brushes
  • Mod Podge
  • Paper bowl/plate (for mixing Mod Podge & glitter)
  • Glitter
  • Shellac
  • Christmas lights
  • Duct tape
  • Lanscaping stakes (something like this)
Step 1.
Paint the INSIDE of the bowl your desired color.  My kids easily accomplished this task without much direction or interference from me.

Step 2.
Mix together lots of glitter and Mod Podge in a bowl, cup, or plate.  Stipple the mixture on the OUTSIDE of the bowl. 


Step 3.
Let dry.  Mod Podge will dry clear and your glitter will sparkle!  Here are mine lined up in the bay window.  It's hard to see the glitter in this picture, but trust me they sparkle!

Step 4.
When completely dry spray with shellac (inside and out) to waterproof the glitter.

Step 5.
Arrange the gum drops on top of the Christmas lights.  I bunched a group of LED light under each bowl.  I secured the lights to the bowl with a little bit of duct tape.

Step 6.
When I arrange them in the yard I will use some landscaping stakes on either side of the bowl to secure the lights to the ground.  I don't want the wind to blow the bowls and strings of lights.  I just have to make 24 more!

Enjoy your Giant Gumdrops!  Once my entire house is decorated I will post more pictures on the final results of the gingerbread theme.

-Rose
@-}---

Monday, October 29, 2012

Spooky Skeletons

Cotton Swab Skeletons

I saw this craft in several places online and in magazines so not quite sure where to give credit.  Just go do it, it's fun!
Skeleton before we cut it out.  Sorry there isn't an after photo yet.  Just leave about half an inch around the edge and tape it to your window old school style.  

What you need:


  • Cotton swabs (Q-tips)
  • Glue
  • Wax paper or other paper
  • Scissors
  • Marker or black scraps of paper


Directions:

Lay out the cotton swabs on the wax paper or other paper and arrange into the shape of a skeleton as shown in the picture.  Dab glue at the joints.  Add a face with black marker or little pieces of black paper ( you can even use black parts of magazine photos if you don't have craft paper).

Cut out along the outline and hang it in a window.  

Spooky!

Happy Halloween!!!!  -Nancy

Wednesday, October 17, 2012

Easy Rainbow Layered (Square!) Cake Pops

Ok.  I know this blog is supposed to promote crafting with our kids, but I can't hold back this little tip I figured out tonight.  I had grandiose visions of making these fabulous rainbow layer mini cakes (<--check out this link) for a bake sale this Friday.  I made all of my layers last night using some homemade marshmallow frosting for the filling.  Epic fail!  When I pulled my cake out of the freezer today (see tips below), all of my frosting had been absorbed into the cake.  Which makes the cake layers super delicious, but I still had nothing to hold the cake layers together.  Trying to avoid a trip to the grocery store, here's what I came up with ... square (well, rectangle) cake pops!
 

Now, I love cake pops.  I've been a fan of Bakerella for quite some time.  However, my mediocre culinary skills always resulted in lumpy pops that always seem to fall off the stick when I swirled the excess chocolate coating.  Cake pops have become my nemesis, until today. 

1. Make 4 cake layers (1 batch of batter = ~ 4cups.  Each layer was made with 1 cup of colored batter).  I followed all of the directions for the "Teeny Tiny Rainbow Cakes".  Use the parchment!  And best tip ever -- freeze the cake!!  It makes cutting much easier.

2. Pull the cake out of the freeze and cut it into squares.  When frozen the cut cuts fairly cleanly.

3. Insert one popcicle stick per square.

4. Melt down some candy melts/chocolate coating.  I ALWAYS have bags of this stuff in my house.  I seem to find a million goodies to coat with chocolate!  I chose to use vanilla candy melts because I wanted the coating to be somewhat transparent so you could see the rainbow cake.

5. Using a silpat mat or parchment paper as your base, place a dollop of chocolate on the mat.  Place your upsidedown cake pop on the dollop.

6. Using a butter knife, scrap the chocolate up the sides of the cake.  When the chocolate hardens, it will hold all of the layers together (which is just what I needed!).

7. Spoon a little dollop of chocolate on top of the cake, and smooth is down the sides.

8. Add a little decoration and let dry.

9. Using a serrated knife, I made all of my edges nice and clean. Well, cleaner and nicer than it was in this picture.

10. I used little treat bags to wrap these puppies up!  Off to the bake sale!  My kids thought these were pretty cool.  So, I'm going to take that as a win for me!


Good luck!
-Rose

Wednesday, September 12, 2012

Glitterfying with Mod Podge

Summer has come and gone and I have yet to post any of the activites and crafts we've done the past few months.  But I knew I had to get this little sparkly activity out there to share how easy this craft is with great results .... and these great results can be achieved by your 3 year old!  Anything on Pinterest that includes a little glitter catches my eye, and lately all of my "pinnings" have something to do with Mod Podge.  This past weekend my kids and I hit up Michael's with one goal in mind -- buy Mod Podge!  And here's what we made, super sparkly little sneakers!

The camera of my iPhone does not give the glitter justice. 
Very cute way to repurpose shoes!

 
Age:  3+

Time:  20 minutes + drying time.

Cleanup:  We did this outside, but it's pretty easy to keep the mess contained.  Just have some paper towels handy.  I also score 5 cent foam brushes at Michael's, so I didn't even bother to clean them. 

What you need:


  • Mod Podge (We used the Glossy kind.)
  • Glitter (We used Martha Stewart's ultra fine glitter.)
  • Masking tape
  • Paint or foam brushes
  • Workspace "mat" (we used a piece of brown paper)
  • Something to glitterfy (We used some hand-me-down sneakers.  My daughter previously thought these were 'boy' shoes and refused to wear them.  Now, it's a completely different story.)

Directions
1. Clean off your object to Mod Podge.  I also glittered the top of my keys (thanks to Pinterest for the ideas), and cleaned the metal with rubbing alcohol.  For the shoes, I just brushed away any loose dirt.

2. Using the masking tape, tape off any areas your don't want covered.  My 3 year old did the majority of this craft by herself.  With the help of masking tap, she really only painted the canvas of the shoe.

 
3. On the workspace mat (or in a cup), mix together Mod Podge and glitter.  When mixed together, I had about 80% glitter.  I made a number of batches.  I didn't want to waste my expensive glitter.

4.  Brush on the glitter mixture.  We did about 3 coats with only 5 minutes between each layer.


6.  Peel off the tape and clean up any edges.
A little messy, but the coating will dry clear.  I used a paper towel to touch up the edges.

7. Let dry and enjoy!
My son decided to jump in and help us paint.


FYI ... this isn't water proof.  My daughter also decided to make Hello Kitty a little more sparkly.  Later on the Hello Kitties joined her in the bath and the Mod Podge coating dissolved.
If it didn't start raining, I'm sure we would have spent all afternoon finding more things to glitterfy.

-Rose
@-}---

Wednesday, March 14, 2012

Ooey Gooey Goobleck

Is it a liquid?  Is it a solid?  No, it's ooey gooey!

This is one of the strangest things I have ever made with my kid. 
Weird things happen when you mix cornstarch and water.

Squeeze it to make it solid

If you press your finger tips down on it or try to grab a handful it feels like a solid.  As soon as you let go it drips from your fingers like a liquid (especially when you are trying to take a picture of the solid phase)!


Age:  2+

Time:  5 minute tops to assemble.

Cleanup:  Very easy.  Even easier if you let it dry so you can sweep it up.  Start with a dry towel on countertops, then follow with a wet one.

What you need:
  • 1 cup of cornstarch + more to make it more solid in a hurry
  • 1 cup of water
  • large flat bowl or pan
  • spoon

Directions:
1) Mix equal parts of water and cornstarch in a bowl.  Add more cornstarch until it feels kind of thick when you stir it.  You can add more if you want it to be more solid (or only add half the water at first).

2) Now stick your hands in it and play!  Try to scoop up a handful and squeeze it or roll it to make a ball.  I like to let it drip from my fingers.  It kind of vibrates in a strange way.

Definitely liquid


Special thanks to Science World British Columbia for the inspiration!

Saturday, February 11, 2012

Egg Shell Sidewalk Chalk

In the past few months I've discovered Pinterest and now completely addicted and inspired to try lots of different crafts, but I only have a handful of free hours during the week -- so I've picked out some easy ones.  This is one of them.  I like to make crafts that I don't have to throw away.  I always feel guilty throwing a masterpiece in the trash, because I just don't have the room to keeps lots of stuff.  You probably have all of the materials in your house to make this craft.  You don't even need a trip to the craft store!

Age: 3+
Time: 30 minutes + 2 days to dry before you can use the chalk.
Cleanup: Manageable.  My kitchen was back to normal in a few minutes.  My son just had to wash his hands.
What I Like This Craft:  It's always to fun to use the stuff you make.  Especially when you're 5 years old!  Plus we already had everything in the kitchen.
What You Need:
  • Eggshells from about 6 large eggs (clean, dried, and without the inner shell lining)
  • 1 tsp flour
  • 1 tsp very hot water (water from my Keurig was perfect!)
  • Something to crush the shells (we used my kitchen mallet)
  • Bowl
  • Spoon
  • Ziplock bag
  • Paper Towel
  • Optional:
    • Petroleum Jelly
    • Cookie Cutter
    • Food coloring, tempura paint, or glitter

Step 1:
Put the egg shells in the bag and smash them until they become a fine powder.  It took us a good 5-10 minutes to get the shells pretty fine.  We also had lots of the egg lining to sift through.  I ended up using a small strainer to push the shells through.  This separated the egg from the lining and crushed up the shell a little more.

Step 2:
Take one heaping spoonful (we used a large spoon/tablespoon) of the egg shells and mix it with one teaspoon of hot water and teaspoon of flour.  Using this ratio, mix in all of your eggshells.  Mix until well blended. In the end, we used 3 spoonfuls of shells, 3 tsp of flour, and 3 tsp of hot water.
Step 3: (optional)
Mix in a coloring.  We used a drop of poster paint.  We also decided to add in lots of glitter.

Step 4:
Spread the petroleum jelly on the cookie cutter.  On a paper towl, fill the cookie cutter with the mixture.  All of our egg mixture fit into this single cookie cutter.  If you are not using a shape, you can simply roll the mixture into a log.

Step 5:
Let dry for about 2-3 days on the paper towel.

That's it!  Note:  the eggshell chalk it a little scratchy.  I wouldn't use it on a chalkboard.  Save this for the sidewalk!

-Rose
@-}---