Now, I love cake pops. I've been a fan of Bakerella for quite some time. However, my mediocre culinary skills always resulted in lumpy pops that always seem to fall off the stick when I swirled the excess chocolate coating. Cake pops have become my nemesis, until today.
1. Make 4 cake layers (1 batch of batter = ~ 4cups. Each layer was made with 1 cup of colored batter). I followed all of the directions for the "Teeny Tiny Rainbow Cakes". Use the parchment! And best tip ever -- freeze the cake!! It makes cutting much easier.
2. Pull the cake out of the freeze and cut it into squares. When frozen the cut cuts fairly cleanly.
3. Insert one popcicle stick per square.

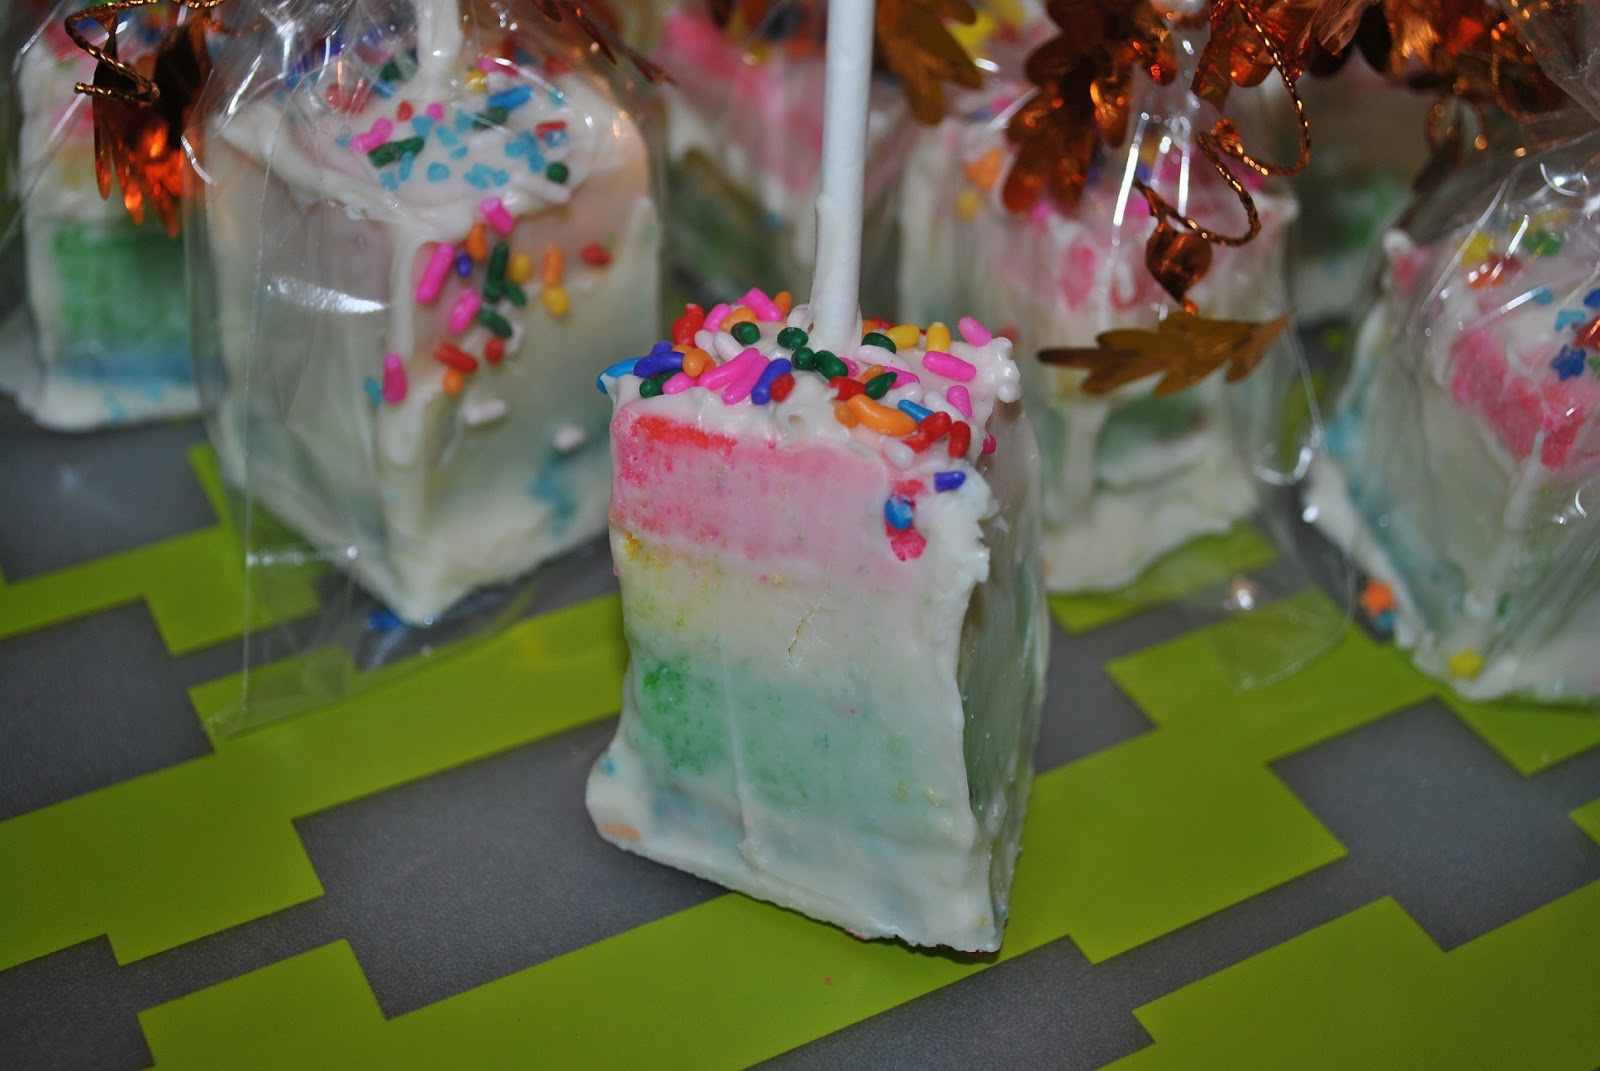
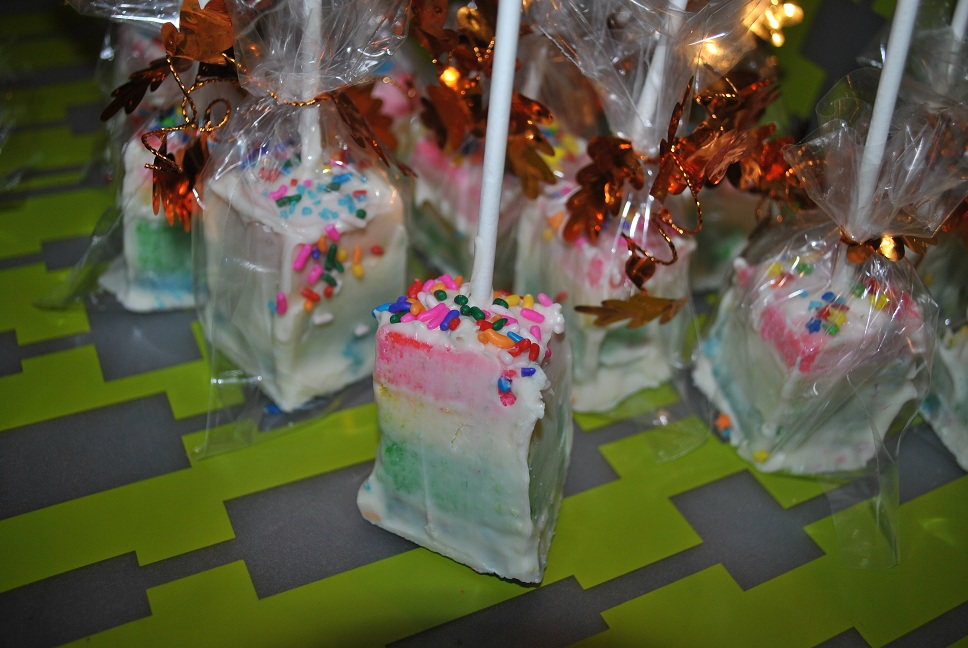
4. Melt down some candy melts/chocolate coating. I ALWAYS have bags of this stuff in my house. I seem to find a million goodies to coat with chocolate! I chose to use vanilla candy melts because I wanted the coating to be somewhat transparent so you could see the rainbow cake.
5. Using a silpat mat or parchment paper as your base, place a dollop of chocolate on the mat. Place your upsidedown cake pop on the dollop.

6. Using a butter knife, scrap the chocolate up the sides of the cake. When the chocolate hardens, it will hold all of the layers together (which is just what I needed!).
7. Spoon a little dollop of chocolate on top of the cake, and smooth is down the sides.
8. Add a little decoration and let dry.
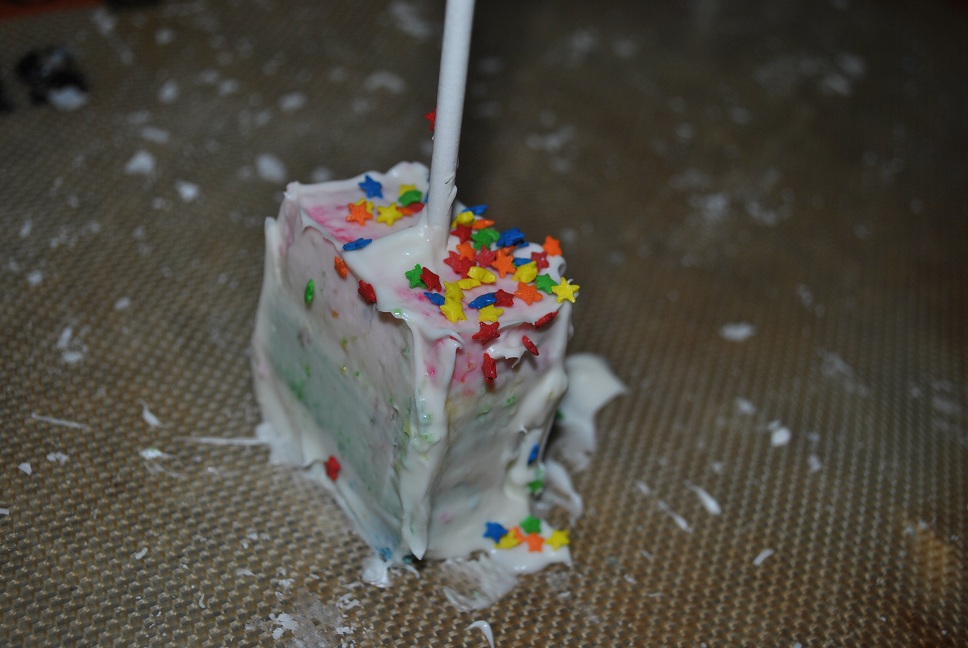
9. Using a serrated knife, I made all of my edges nice and clean. Well, cleaner and nicer than it was in this picture.
10. I used little treat bags to wrap these puppies up! Off to the bake sale! My kids thought these were pretty cool. So, I'm going to take that as a win for me!
Good luck!
-Rose
No comments:
Post a Comment