 |
| OK, the rainbow is a little ugly -- but lesson learned for next time. Use piping gel or icing for a cleaner look. |
Time: About 4 minutes per cupcake. But if you do an assembly line, it would be much quicker.
Mess/Cleanup: Surprisingly clean. I did not mix any icing colors and used store bought icing. I just had a few knives, spoons, and sticky kids to wash up.
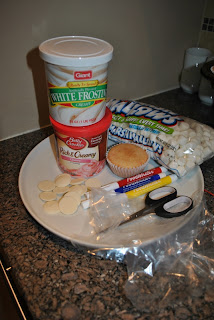
What You Need:
- Cupcakes. I used a white cake mix, but substituted applesauce for the oil (1-1). I also added about 2 tablespoons of watermelon sugar sprinkles. I wish I added more. There was a slight hint of watermelon, but I think 4+ tablespoons could have made these super fabulous.
- Pink Icing (Betty Crocker makes a pink cherry icing that is pretty yummy)
- White Icing
- Mini Marshmallows (about 2 per cupcake)
- Edible Color Markers (Red, Yellow, and Blue - like these)
- White Candy Melts (1 per cupcake, like these)
- Scissors
- 1 Baggie (I like the non-zippered gallon size)

Moms like to craft too! Since our Buzz Lightyear cupcakes are such a hit, I wanted to try to make another character cupcake. I happen to have much love for Care Bears (circa early 80s) and my daughter was the cutest Care Bear for Halloween, how could I not try to make this treat?
 |
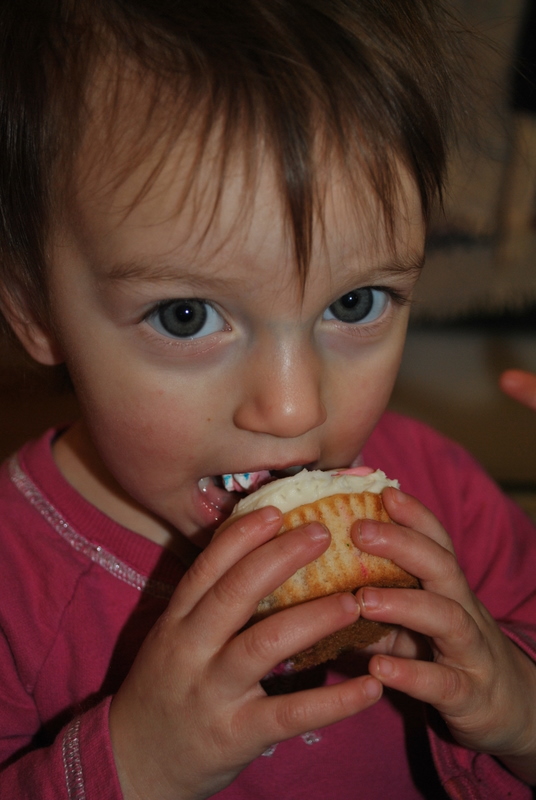
| I think the cupcakes made her happier than wearing this costume! |
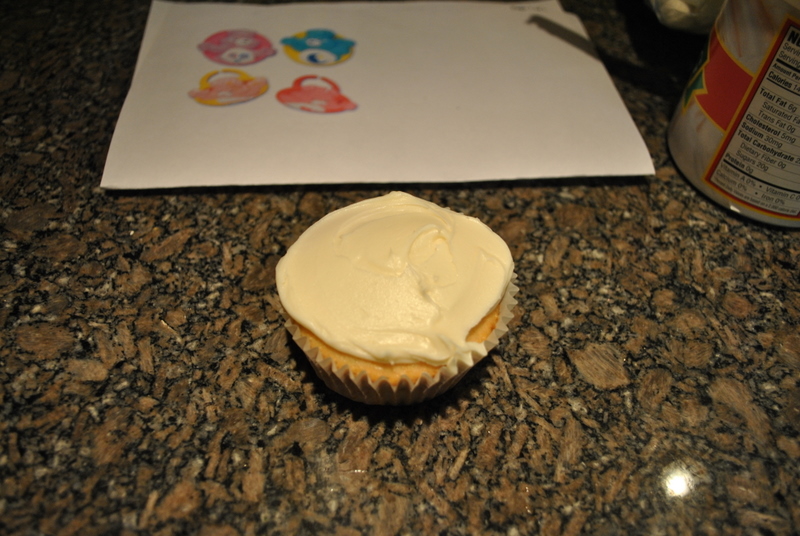
Frost the cupcake white.
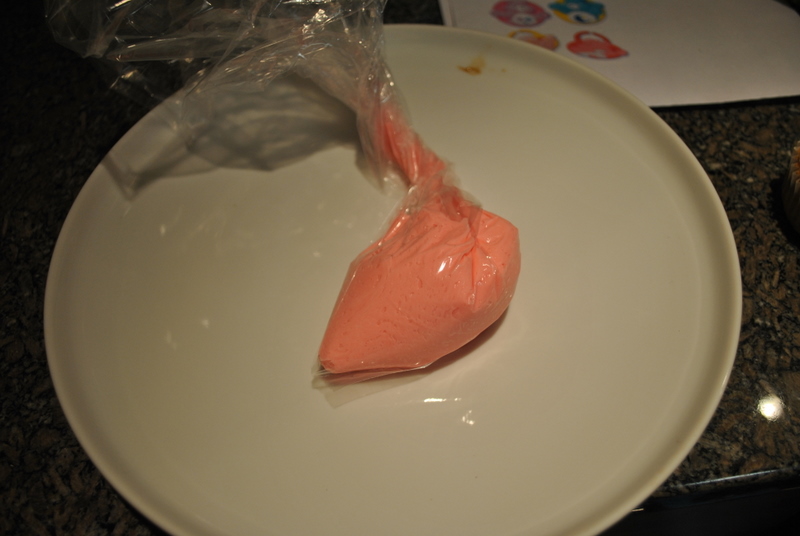
Add pink frosting to the baggie. Twist the open end and squish all of the frosting to a bottom corner of the bag. Snip a small corner off the baggie with scissors.
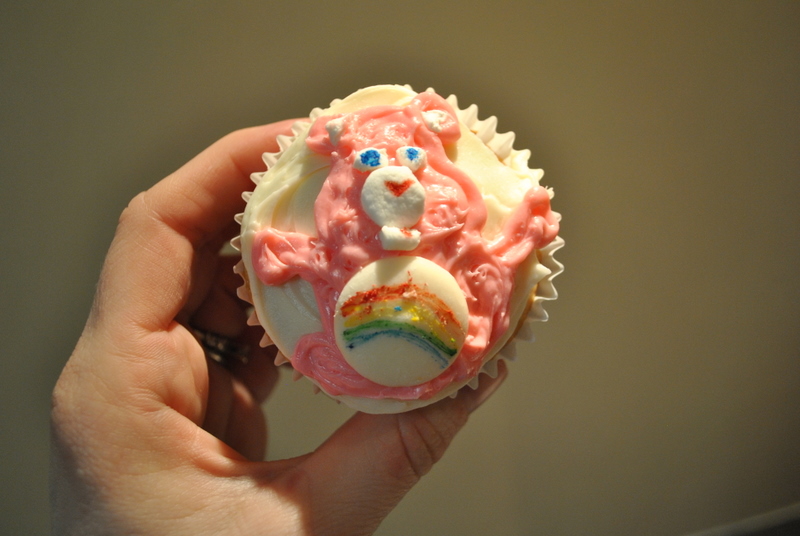
Freehand a Care Bear head. It's not that hard. Really.
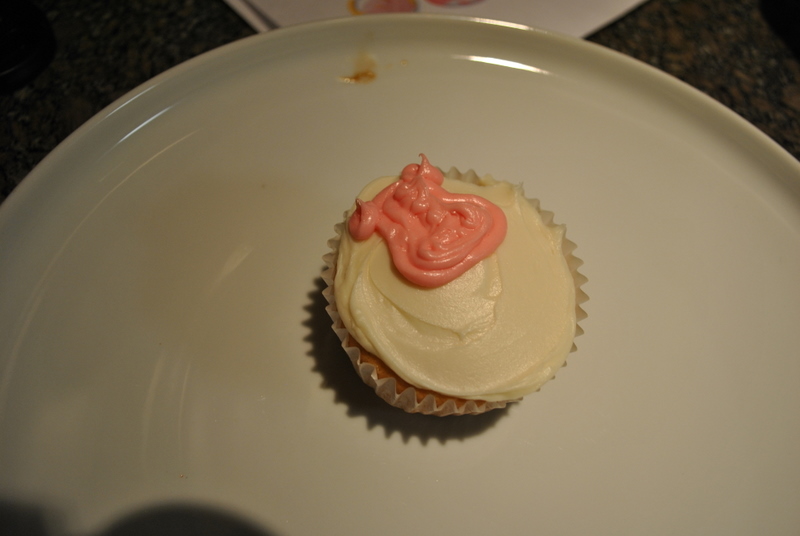
Add some arms and a belly. You can use a toothpick to smooth out the squiggly lines of the frosting.
Step 5: Make the Nose, Chin & Eyes
Snip a mini marshmallow in half lengthwise. Reserve the half for the nose. Snip the remaining piece in half again (1/4 of the marshmallow). Reserve one quarter for the chin. Snip the remaining piece in half again. You now have 2 eyes. You may need to reshape some of the pieces to make them work on each cupcake.

With the nose piece, use the red food marker to make a small heart near the top of the marshmallow. With each of the eye pieces, use the blue food marker to make a small blue dot.
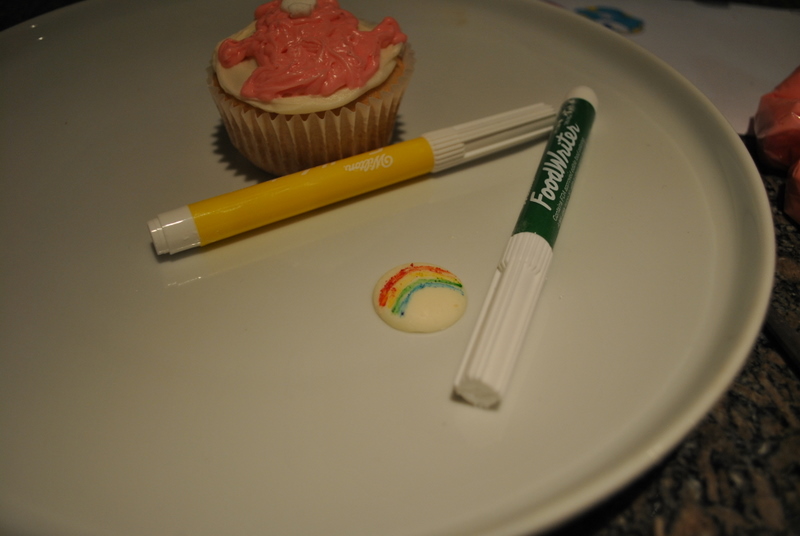
Step 7: Make the Belly Badge
Using the color markers, draw a rainbow on the white candy melt. My markers were a little dry. I think if I had piping gel or royal icing on hand, I would have used that to make a much prettier belly badge.
Place the pieces on the cupcake to make the Care Bear's face. Add the belly badge. Voila! In this picture I also added to little marshmallow bits for the ears. I guess they're optional.
 |
| (Yes, I do need to learn how to use my camera.) |
Step 9:
Enjoy the cupcakes! Our, as my kids do, enjoy licking off just the icing and put the sticky cupcake on the couch.

No comments:
Post a Comment