
Time: 20+ minutes for the decorating, about 20 minutes to make the candy decorations.
Mess/Cleanup: Typical kitchen mess when it comes to cupcakes. I used store bought frosting, the cleanup was minimal. I just tossed the baggie in the trash.
What You Need:
- Cake Mix (make according to package instructions)
- Cake Ice Cream Cones. I just used a box of mix, which makes about 20 cupcakes in the cones.
- 2 - 16 oz cans of frosting. I use a lot of frosting for these cupcakes to get the effect of an ice cream swirl.
- Plastic Baggies. I like to use the gallon non-zip baggies.
- 2 cereal/cone boxes. I used the cone boxes. They were the perfect size.
- Cupcake decorations
Why I Like This Craft: I love making cupcakes and for years this has been one of my favorite. Minimal effort for a big impact.
Step 1:
Prepare cake mix and fill cones. Fill to about 1 inch from the top edge.
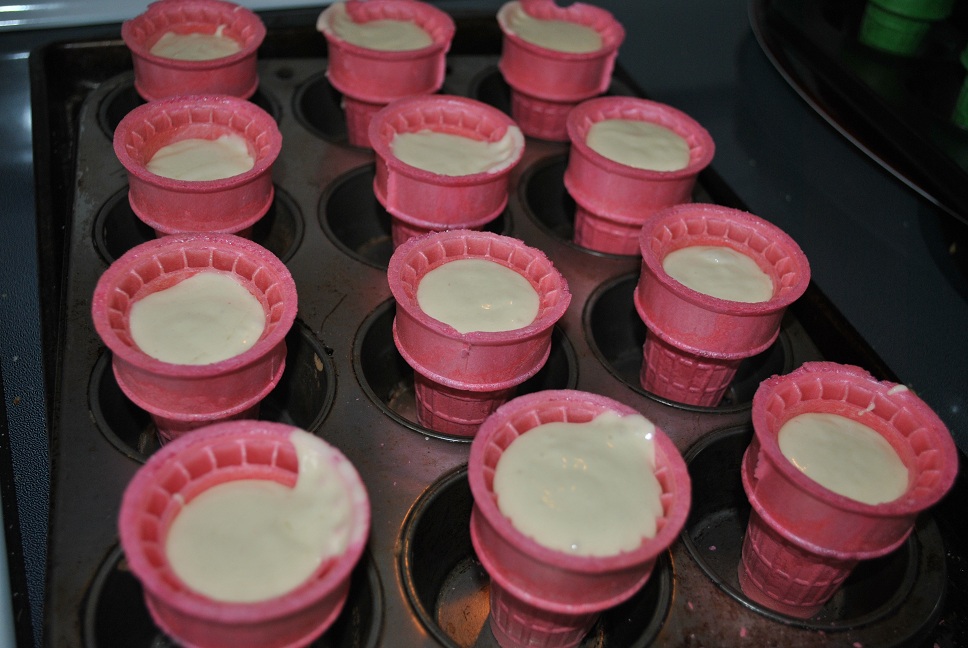 |
| Don't fill the cups too much. As you can see below, I had a few over topping after baking. |
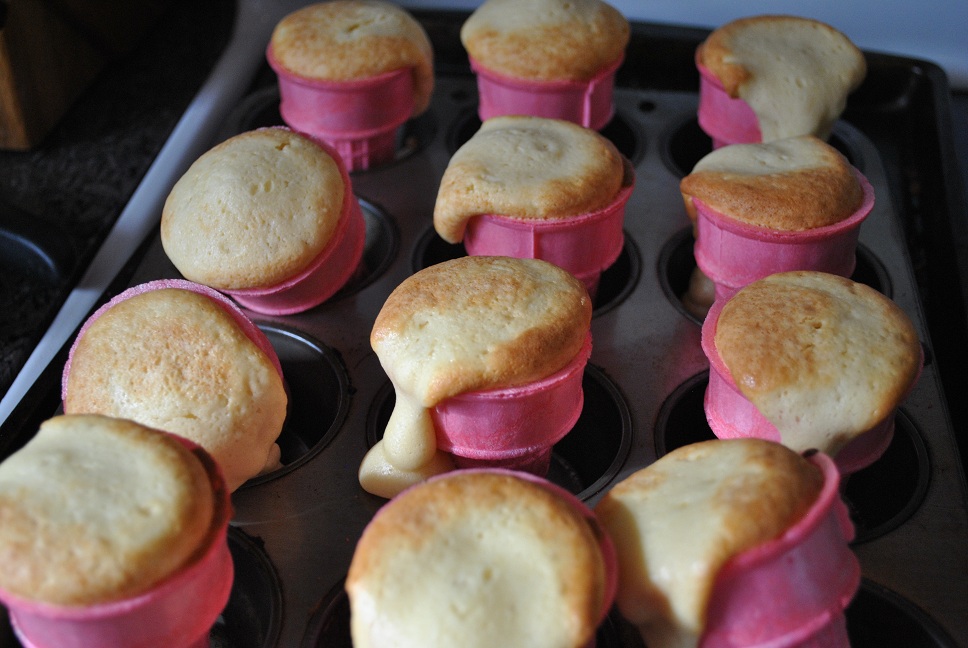 |
| If this happens, while the cake is warm pull off the goop that spilled over. |
Bake cupcakes according to box instructions.
Step 3:
While the cupcakes are cooking or cooling, make the tray for the cupcakes. At first, I didn't have a special tray to hold the cupcakes upright. As soon as I moved the my tray almost all of the cupcakes toppled over, messing up the perfectly iced cakes. Uggh. But I'm sure the 4 year olds won't notice.
Here is my little solution for the cupcakes to survive the car ride. Using the cardboard boxes, trace circles a little larger than the diameter of the cone (I actually used a cap from one of my spices). Using scissors, cut out the circles.
 |
| I was able to fit 12 holes in each box. |
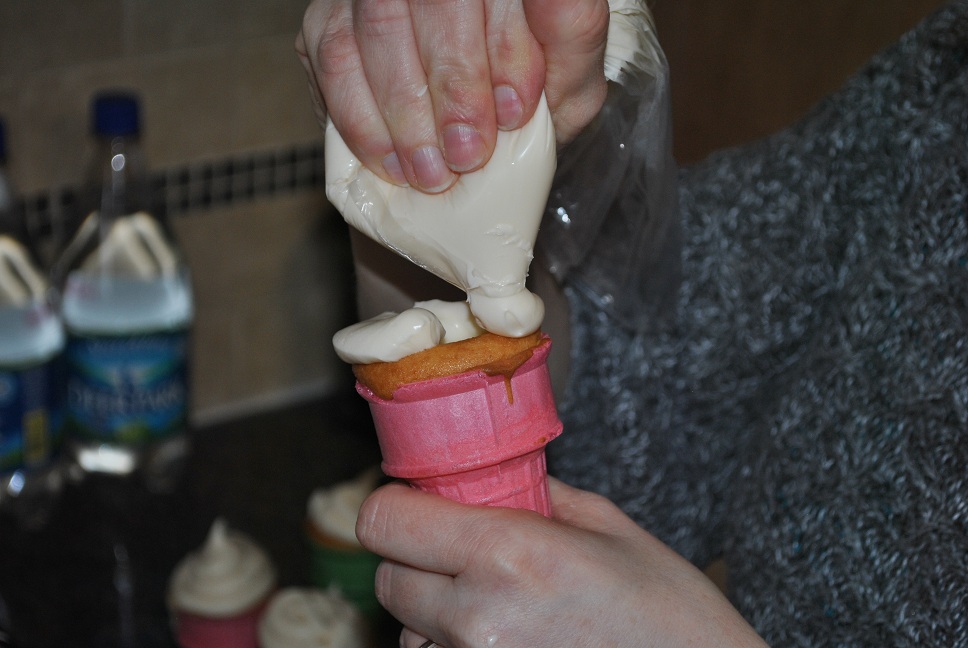
Once cupcakes are cooled, transfer icing into plastic baggie. Squeeze all of the icing to one corner of the bag. Snip off about 3/4 inch of the corner.
Step 5:
Ice the cupcakes. To get the swirl effect, use the baggie to ice the cupcakes. Starting from the outside edge, squeeze the frosting onto the cake. Swirl to the middle of the cupcake.
Step 6:
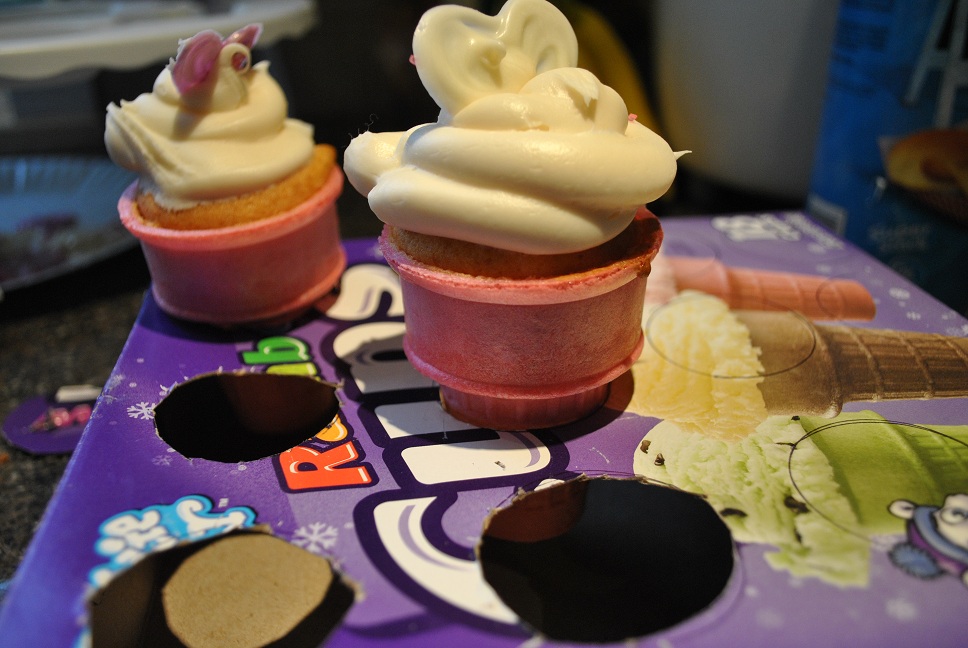
Place iced cupcake in the tray and finish the decorations. We created white chocolate hearts to top the cupcakes.
Enjoy!
--Rose @-}---
Don't they have carriers like they do with regular cupcakes? What if you want to keep the cupcakes covered?
ReplyDeleteI have this carrier: http://www.bing.com/images/search?q=collapsable+cupcake+carrier&view=detail&id=D07586AE92AF1F1FD1B2039472F6B27A28CBF08A&first=0 . I put the box of cupcakes inside the carrier to cover it; however I could only fit about a dozen cukcakes.
DeleteCustom boxes World UK is offering ice-cream cone hold cardboard at custom prizesCustom Boxes World is providing you best quality custom printed ice-cream boxes. Get in touch by click “Get Custom Quotation” form or find one of the experts on the live chat.
ReplyDeleteWe offering freeshipping fastest around time all over the Uk.
.