I recently found a new hobby of making my own slice-n-bake cookies. Land O' Lakes' recipe for Sparkling Candy Corn Cookies sparked this inspiration. You can make adorable cookies in vast amounts without having to spend a whole lot of time in the kitchen. Plus, you hardly need any ingredients. Ever since making Candy Corn and Frankenstein (see pictures at the end of this post) cookies for Halloween, I've started to conjure up ideas for Christmas cookies, but I still have a few weeks until I start that baking. However, this week is Thanksgiving and I wanted to try out an idea I had. Tonight my son and I made some Indian Corn cookies to share with his Kindergarten class.
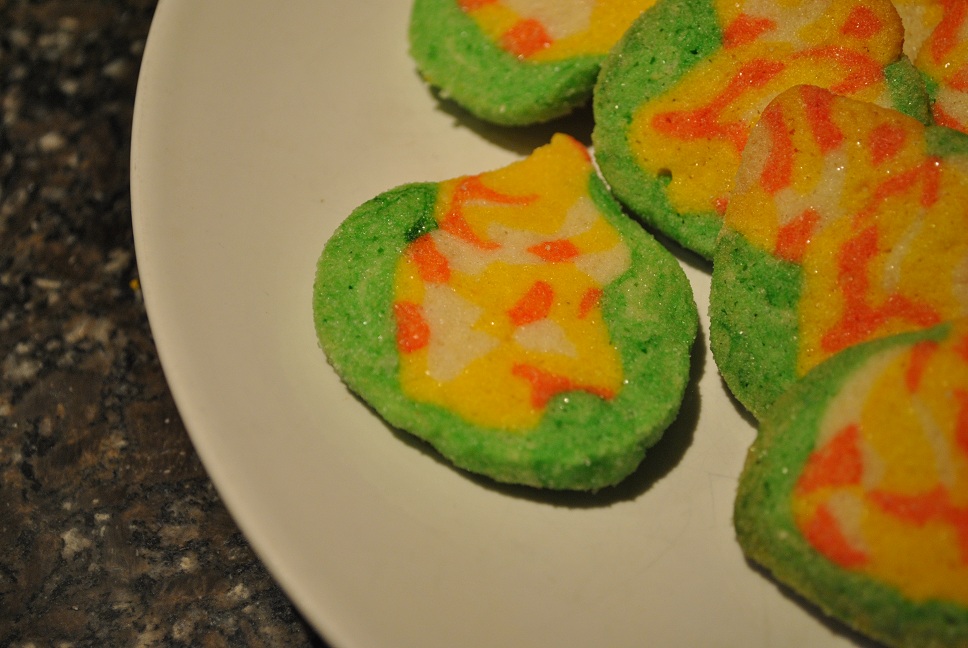 |
| I realize I really need to learn how to use my camera. But, you get the idea of how adorable these cookies are! |
Age: 5+
Time: 10 minutes to make the dough, 35 minutes to assemble the 'dough canes', at least 2 hours to refrigerate the dough, and 8 minutes to bake.
Cleanup: I think slice-n-bake cookies leave a whole lot less mess than your typical cutout cookies. 10 minutes to clean up the dishes, and a least 5 more minutes to get the food coloring off of your hands.
What You Need:
- Cookie dough (I really like this recipe from Land O' Lakes)
- Green, yellow, and red food coloring
- Plastic wrap
- Knife
- Oven
- Sugar
I am by no means a baker, as I always need recipes to bake sweet treats. However, I do love to get creative when making cookies. My kids both love helping in the kitchen, but cutout cookies are a bit fragile in the hands of a 2 and 5 year old. These slice-n-bake cookies let the kids play with the dough as if it was Play-Doh. What kid doesn't like rolling snakes?
Step 1: Dye the Dough
 |
| My son now requests to pose in the pictures. |
Step 2: Make a Bunch of Snakes
My son did the majority of this step. I did help him out, but he was more than eager and more than capable of making a bunch of dough snakes. Roll the snakes about 10 inches in length with about 1/4 diameter. Stack them randomly into 2 piles.
 |
| It's ok if the snakes break. Just pinch them back together. |
 |
| I know, these aren't pretty. |
Step 3: Smooth and Roll
Roll each of the logs (I think in the crafting world, these are referred to a 'canes') until the snakes become smooth and the log is about 18".
 |
| See, he loves the model his masterpieces. |
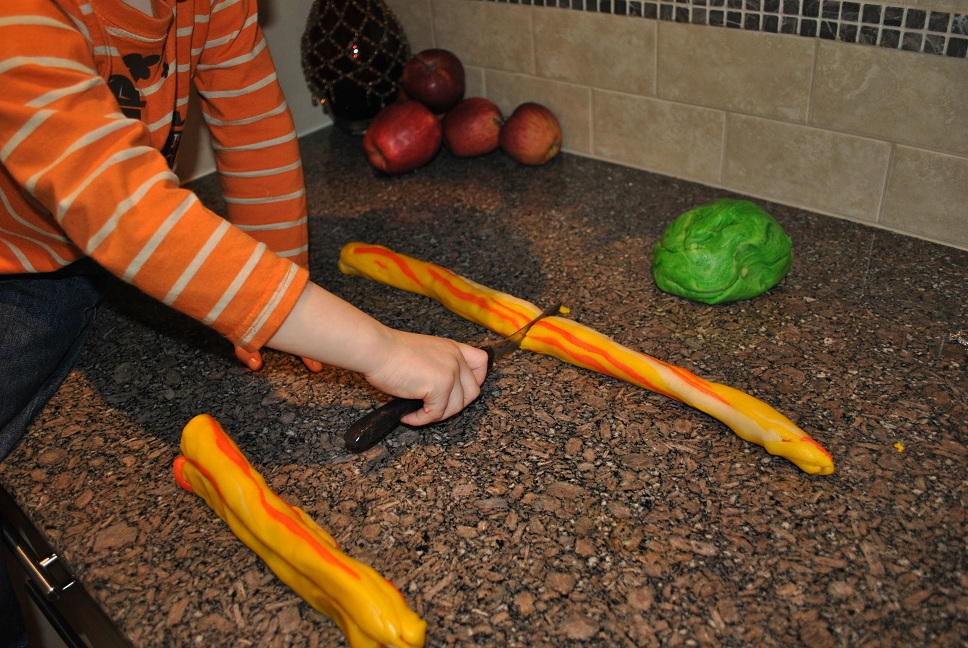
Step 4: Cut & Stack the Corn Cobs
Cut each of the logs in half and stack the halves on top of one another. You should still have 2 logs when complete.
 |
| 2 not so pretty logs. These are the corn cobs. |
Step 5: Add the Corn Husk
Split the green dough into quarters. Use 2 quarters per log. Roll each out into a fat snake and attach it to the yellow corn cob. Gently pinch the green dough so it completely covers the bottom of the yellow dough. I also slighly pinched the yellow dough to form a ridge along the length of the log.
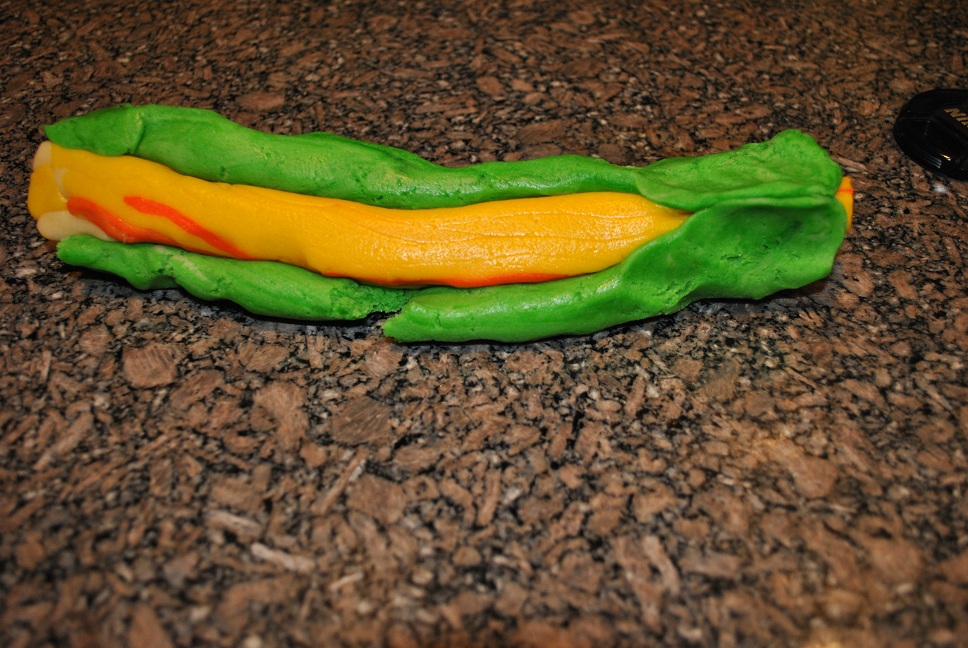 | ||
Pinch the green dough
|

Step 6: Wrap the Logs of Dough
Wrap the logs of dough in plastic wrap and store in the fridge for at least 2 hours. You won't be able to easily slice the dough if it's not firmed up. This dough is pretty soft.
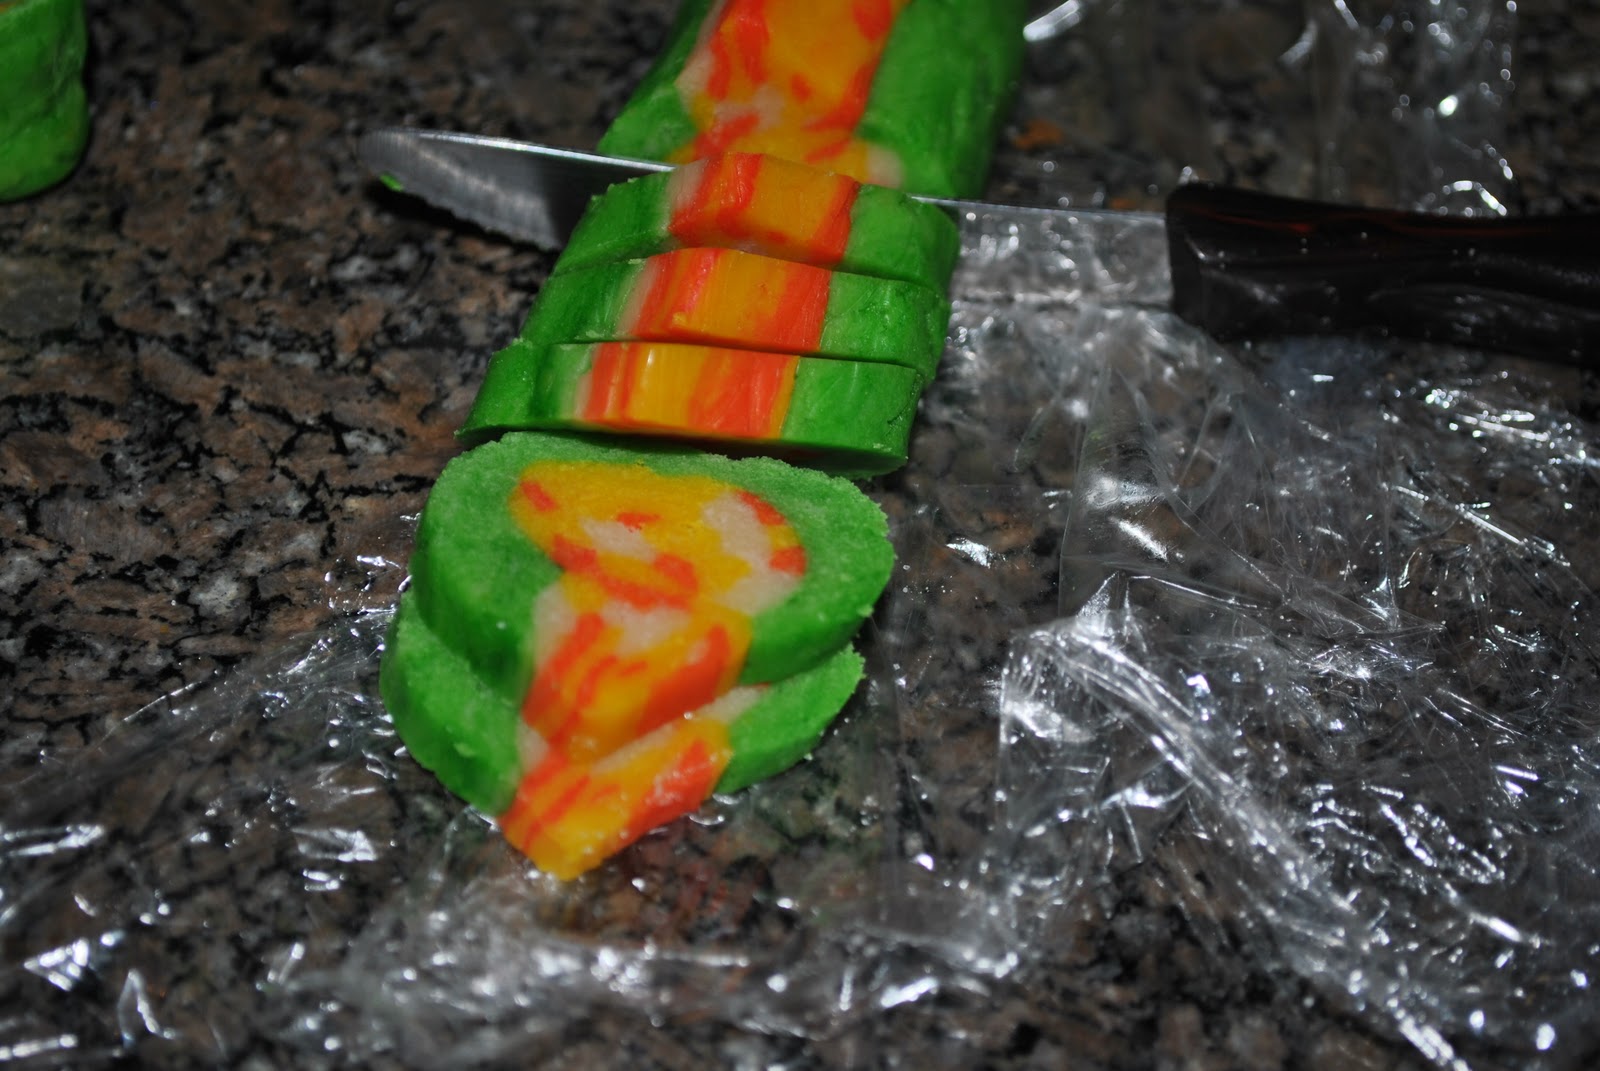
Step 7: Slice-N-Bake!
With your oven set to 375 degree, pull the logs out of the fridge and slice them into 1/4 inch pieces. Beware, the end pieces tend to look a little ugly. Toss each cookie into sugar and place on a cookie sheet. I like to use parchment paper to make sure the bottoms get perfectly golden. This single recipe makes about 8 dozen mini-cookies. I baked mine for 9 minutes.
 |
| 1/4 inch pieces |
 |
| Dusted in sugar and ready to bake. |
I might adjust my technique the next time I make these, but I think this was a good start. I think I need better shaping for the husks. Lesson learned for next time. Now, I can't wait to try out my ideas for Christmas designs! Here's what I did for Halloween:
 |
| Frankenstein and Candy Corn Slice-N-Bake cookies! |
Have fun and good eats!
-Rose @-}---
No comments:
Post a Comment