Monday, April 18, 2011

Easy Glitter Glue-Dot Easter Eggs

It's such a busy week!  Many doctor's appointments, 2 pre-schooler Easter parties (which I ambitously signed up to bring Cake Pops, because Nancy and Bakerella make it looks so easy), my toddler's 2 year birthday party and Easter on Sunday and I still have to work my day job.  Busy, busy -- but I still needed to have a little activity or craft for the toddler and pre-schooler party goers.  Fortunately, not long ago I was watching Valerie from http://www.frugalfamilyfunblog.com on The 10! Show and she was decorating Easter eggs with glue dots!  Genius!  Here's our variation:

Age: 2+
Time: 10+ minutes
Cleanup:  Glitter is always a little tricky to clean up.  But I never think a little glitter on the floor looks a mess!  Glue dots make the whole glue & glitter thing nearly mess-free.

What You Need:
  • Plastic Eggs (or real ones if you prefer)
  • Glue Dots (They also make glue lines, which would be perfect for Easter eggs.) 
  • Glitter (fine craft sand would work too)
  • Papper plates
  • Paint brush
Why I Like this craft:  Glue dots are so much fun to work with!  The cleanup is easy and the activity is easy.  I'm sure my 2 year old can roll the egg in glitter.  And since we're using plastic eggs - no gooey mess!

Step 1:
Pick out an egg.

Step 2:
Cut a strip of glue dots (or cut individual squares).

Step 3:
Adhere the strip of dots to the egg.
Step 4:
Pull off the paper backing.

Step 5:
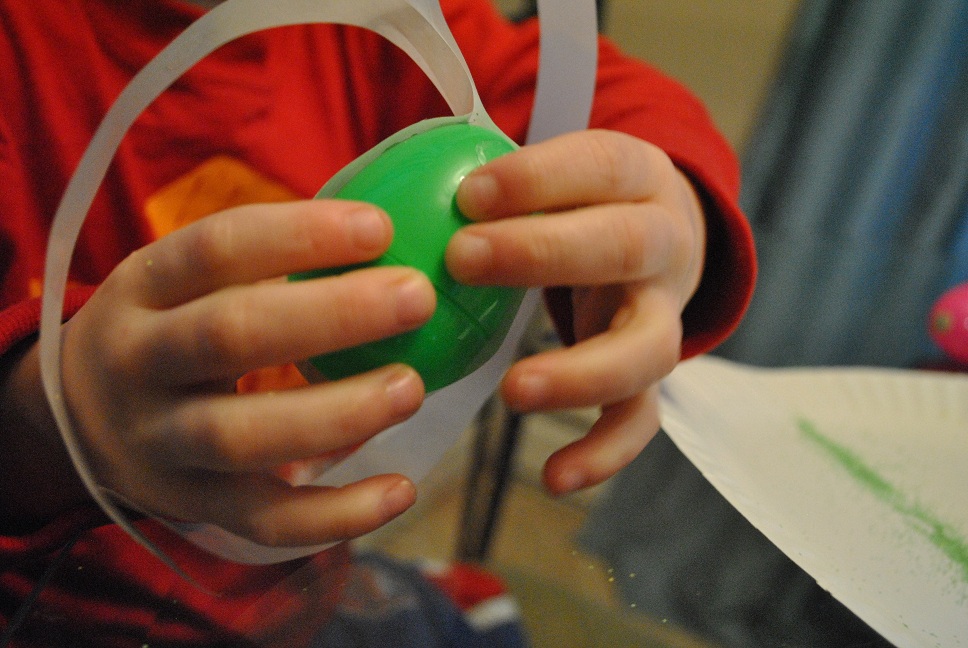
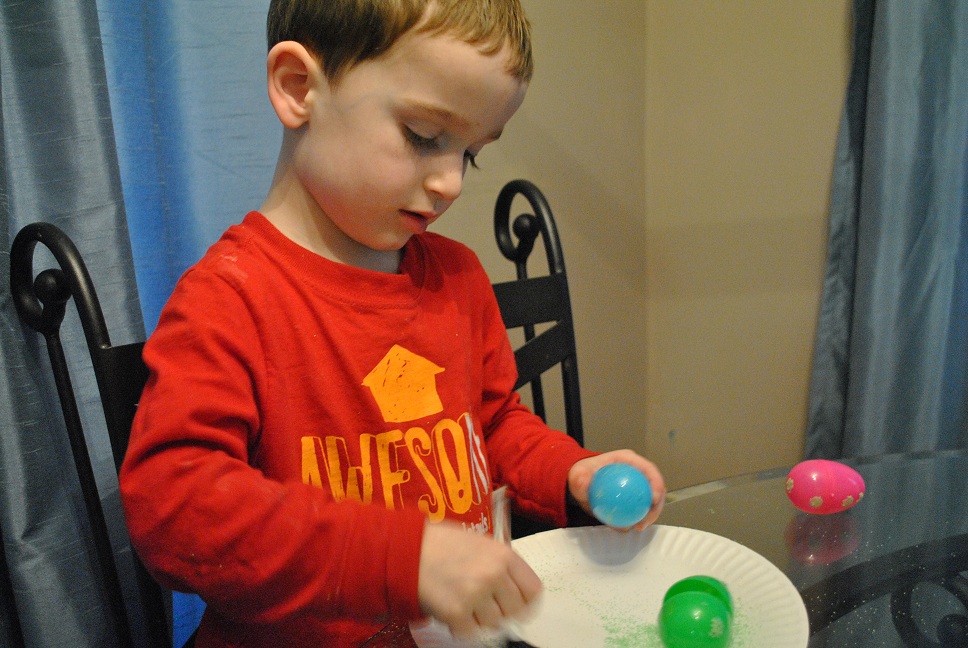
Pour some glitter on the paper plate.  Roll egg in glitter.

Step 6:
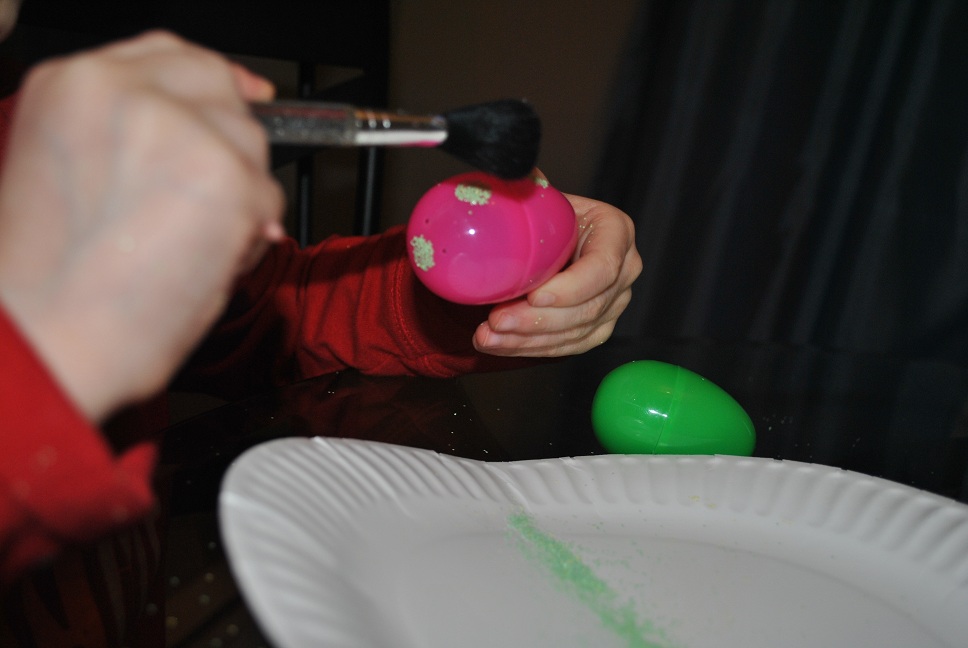
Take brush and dust of excess glitter from the egg.

Step 7:
That's it!  My son and I did a test drive of this craft tonight.  This is keeper.  It's pretty easy and takes no time at all.  Plus, since we're using plastic eggs - you can use the next year!

Happy Easter!
-Rose @-}---

Friday, April 15, 2011

Paper Barbie Doll Clothes

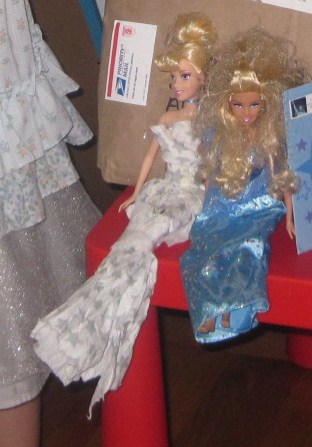
This Barbie dresses better than I do.
My pre-schooler daughter loves Barbies.

But the first thing she does with a new Barbie is peel the doll clothes off and play with them in the buff.  Then when she starts acting out stories with princes and princesses we need clothes but can't find any!  Here is how to make simple skirt and top for your Barbie, or pants and top for a Barbie that has to stand in for a boy character.

Why I like this craft:
This craft teaches that you don't have to buy things to let you imagination go wild!  You can make things yourself and improvise with whatever is at hand.

Warning:  These clothes won't hold up long during rough play or much bending.  It's ok.  You can just tape over the tears until it's too ratty, recycle them and start over.
This is my favorite "prince" outfit to date made from Ikea napkins.

Age: 3+ (3 year olds can do simple designs alone, more complicated ones need a lot of help from mom)

Time: 5-10 minutes per outfit (3 minutes for super simple dresses)

Mess:  Almost zero mess, just a few scraps of paper leftover.

Materials:
Paper (clothing catalogs, napkins, paper towels, tissues, and magazines all work well)
Tape
Scissors
We used the clothing catalogs that arrived in the mail today for this project

Instructions for short PANTS made from a page from a catalog:

Step 1
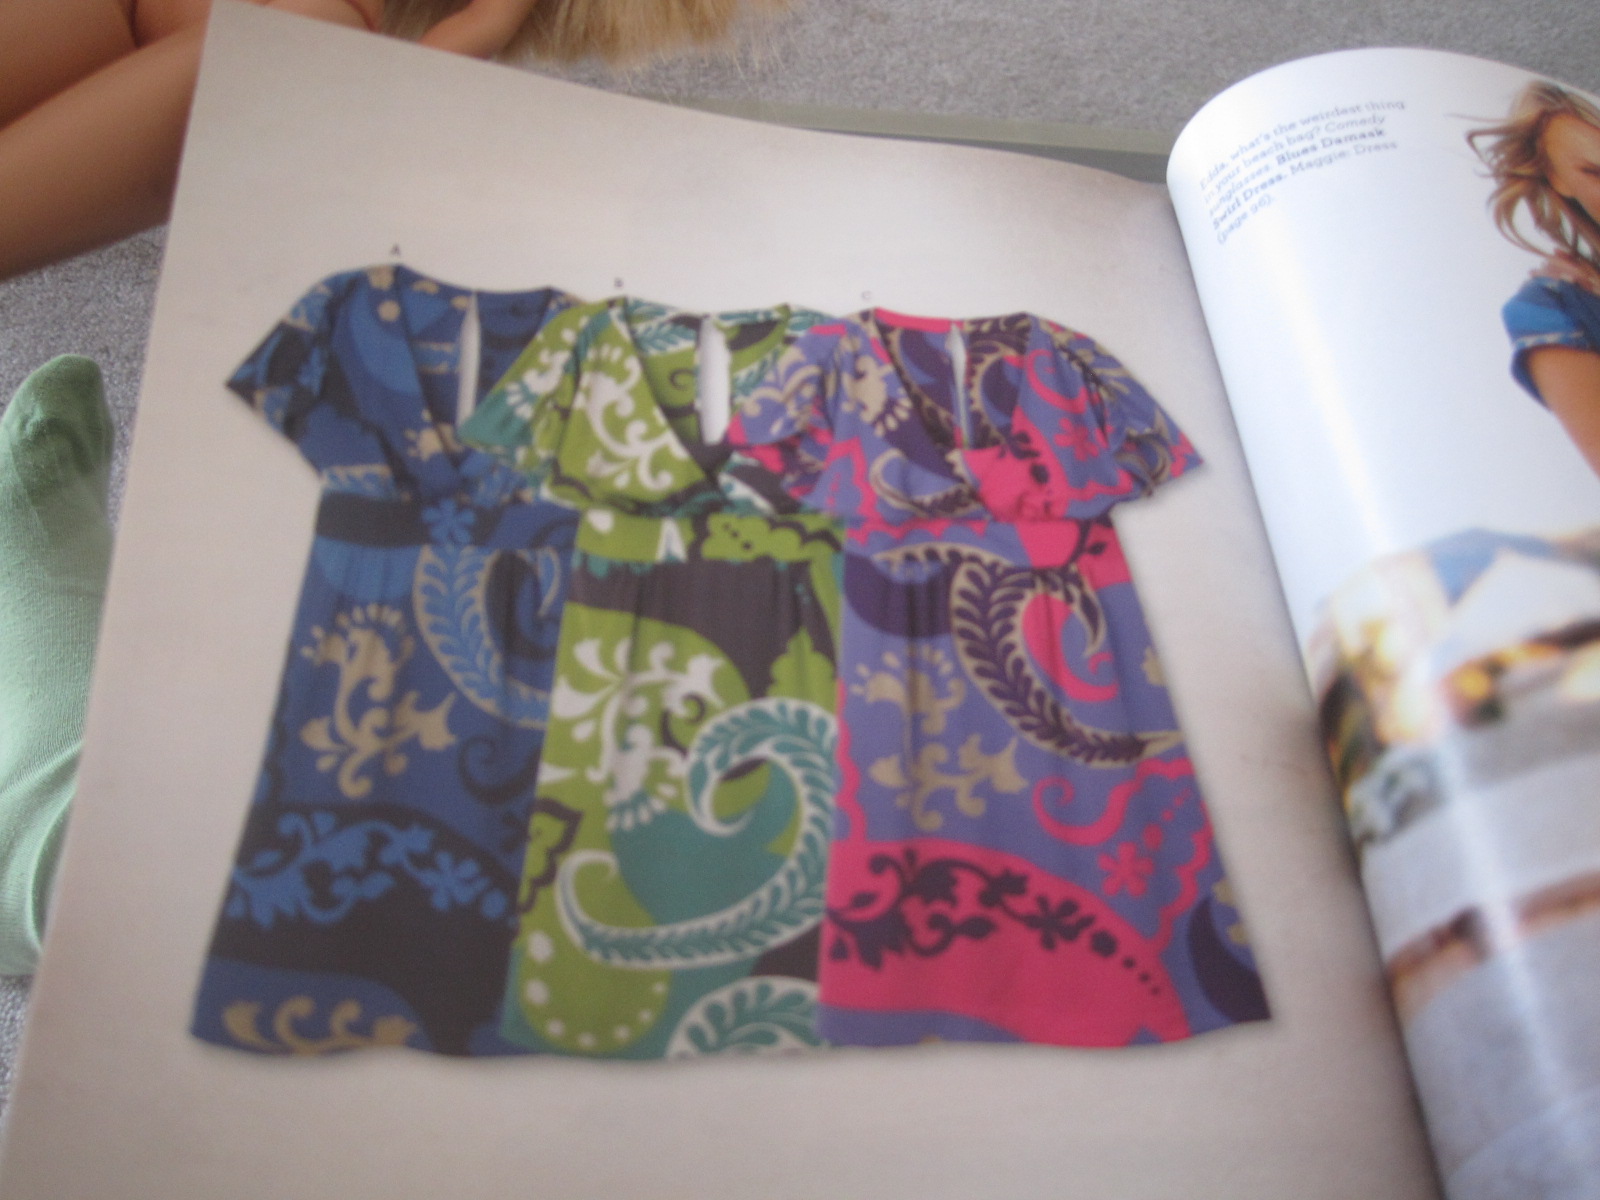
Choose a page that has a lot of colors together without a lot of skin or faces that will make good "fabric" for your pants.  It needs to be wide enough to wrap around the doll's hips.

This will soon become a pair of doll pants.

Step 2
Trim the paper to remove any writing or empty space you don't want to show.  Hold the paper in front of the doll to gage the size you need.  It's ok to keep it a rectangle even though you'll need less paper at the waist.  You can pinch it in place later.
Borderline creepy picture, but important for sizing up your model.  Let's keep it professional, people.

Step 3
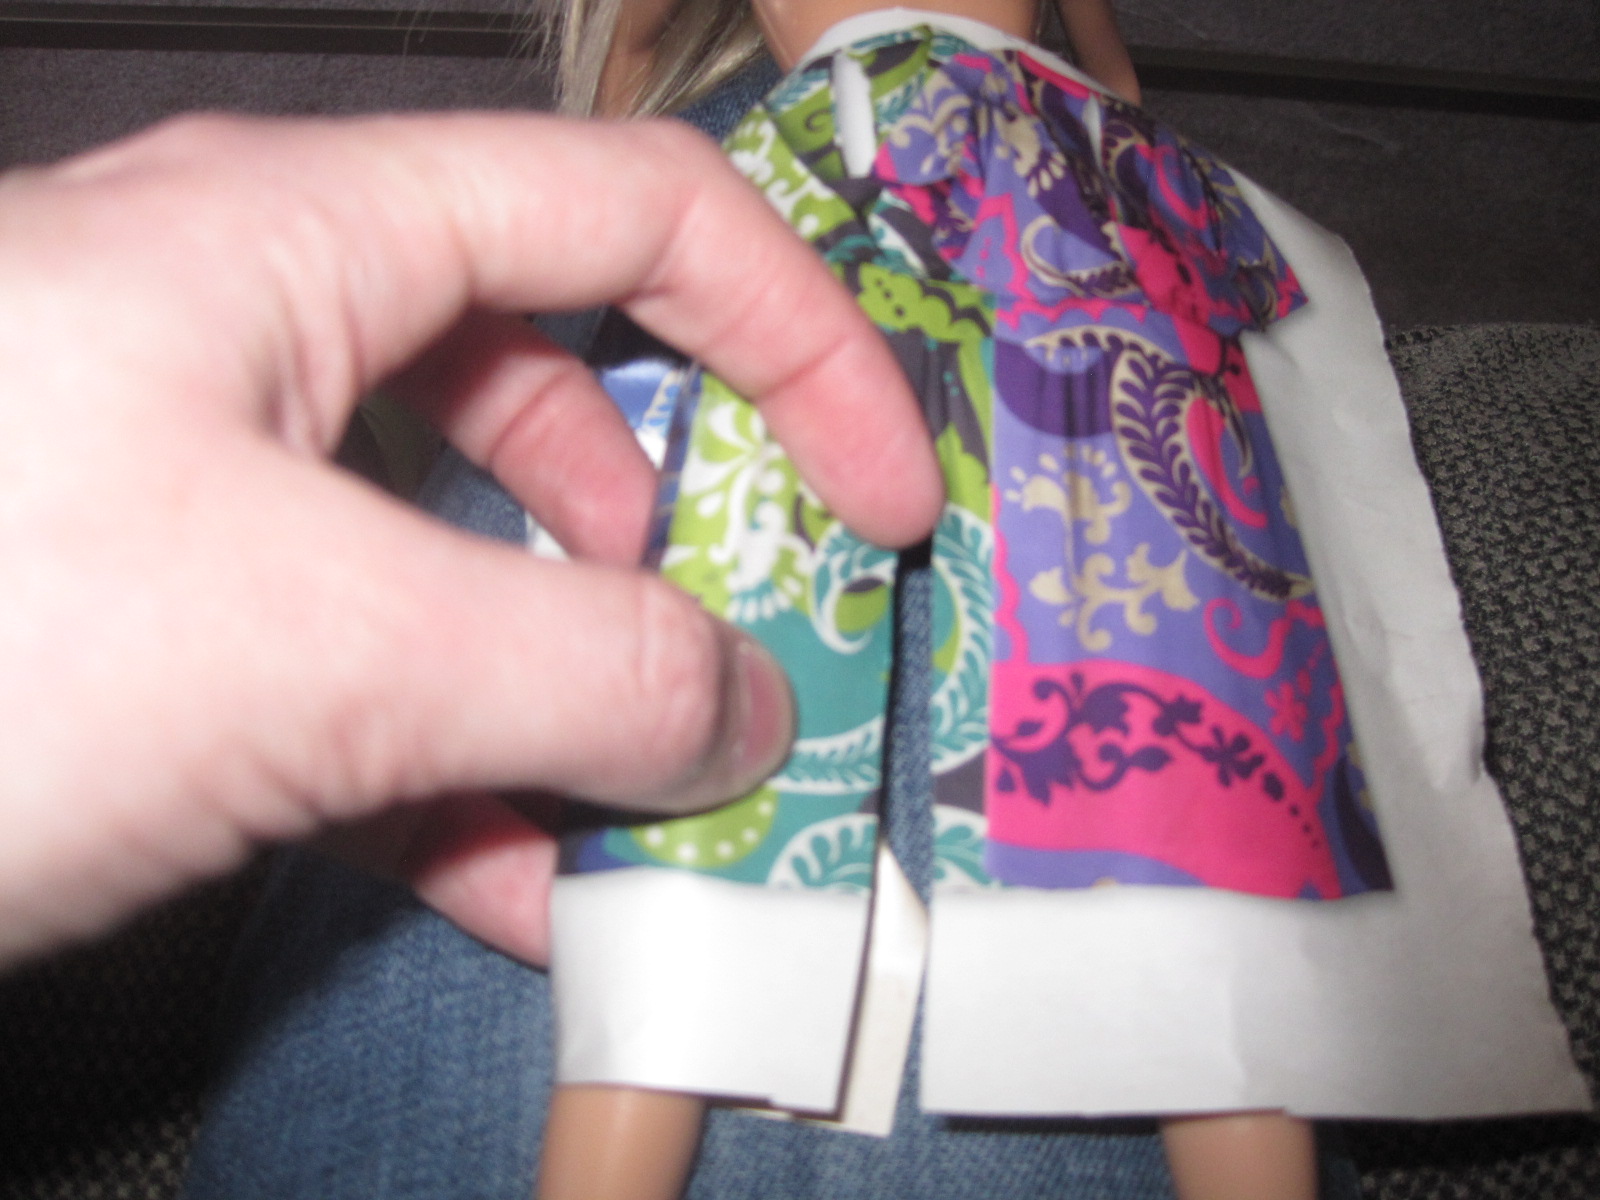
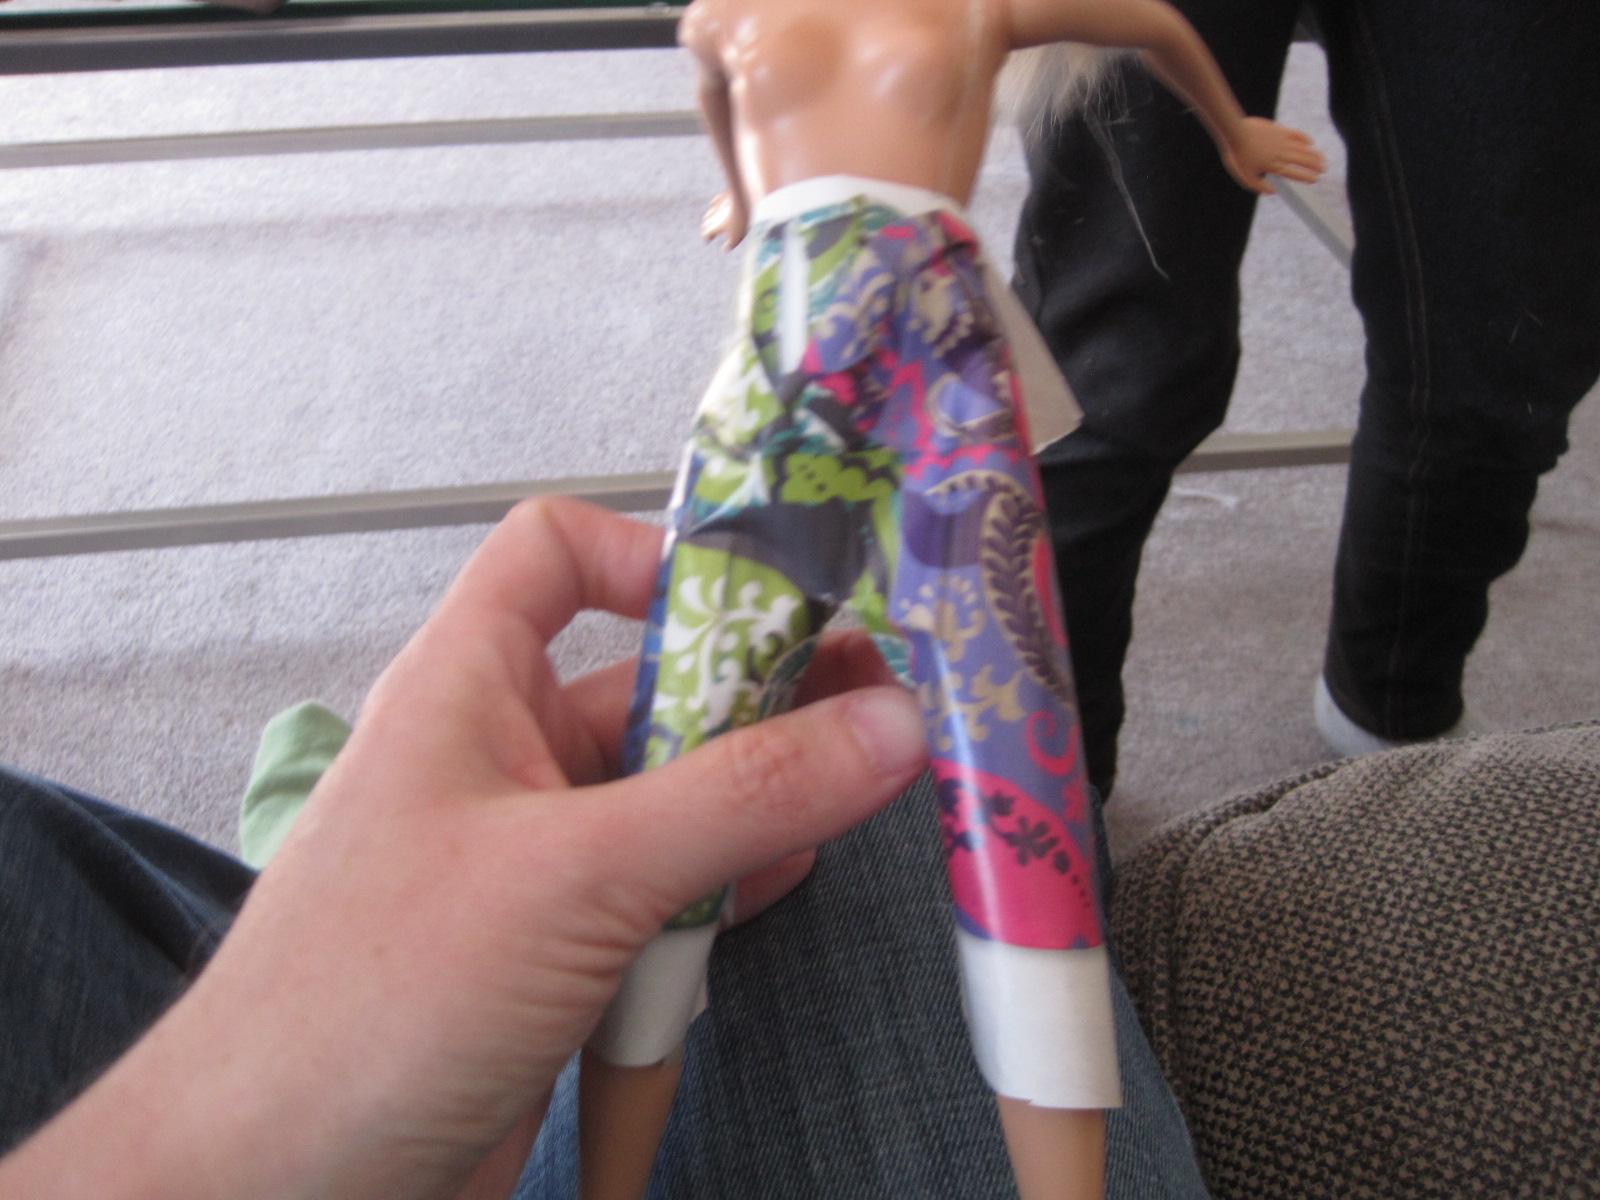
Cut a slit in the front of the paper for the pant legs from the bottom up to the crotch.  Wrap the paper around one leg and tape in place on the back.  Wrap the other leg and tape it at the back.

Step 4
Pinch the paper in the back around the bum so the doll's bottom is covered.  Tape a scrap of paper in place if you don't have quite enough paper, or trim excess (or fold it over) if there is too much paper.   Don't worry about the waist being too even if you make the tube top shown below.  Otherwise fold it down on the inside to make a flat waistband.
Taping pant leg #1


Both pant legs are taped and ready.  You could trim the white space off if you want.

Instructions for a TUBE TOP made from a page from a catalog:

Step 1
Select some nice "fabric" from a clothing catalog that coordinates with your pants.
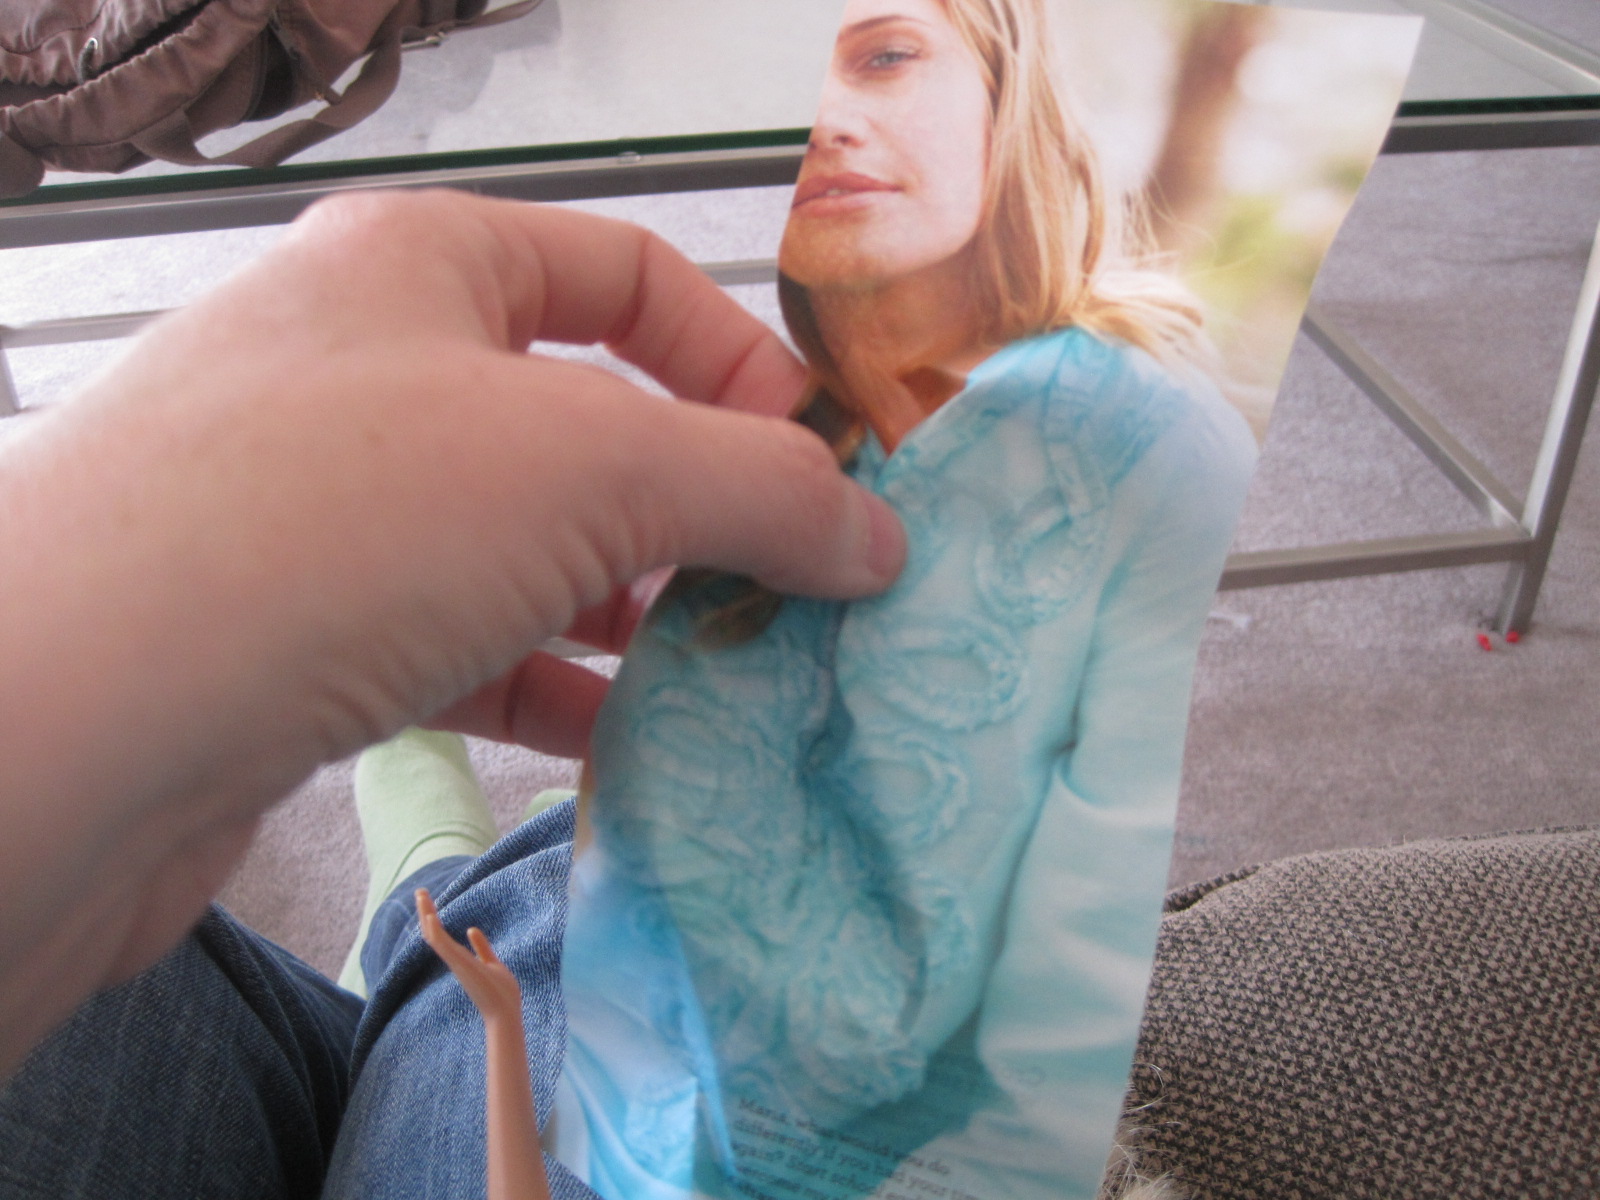
Here is a real, live 6 year old choosing the portrait on the right as material for a tube top. We folded the paper to hide the skin at the v-neck to make the tube top at the very beginning of this post. 

Step 2
Fold over the top to make a nice clean edge that won't give your kid papercuts.  Cut it short enough to look like a top but long enough to cover the messy waist of your paper skirt or pants.

Step 3
Wrap around the doll's torso and pinch at the waist, maybe adding a few folds around the bosom to make it fit (for you sewers you should fold it the way some shirts have darts sewn from the armpit to the nipple.)
Fold over any skin on the model and cut off the models head (hoo hoo hoo ha ha ha!) to make nice "fabric" for your top.

Step 4
Tape it at the back.  Use as much tape as you need to make it fitted to the doll's body.
Tape tape tape tape tape

Optional Step 5
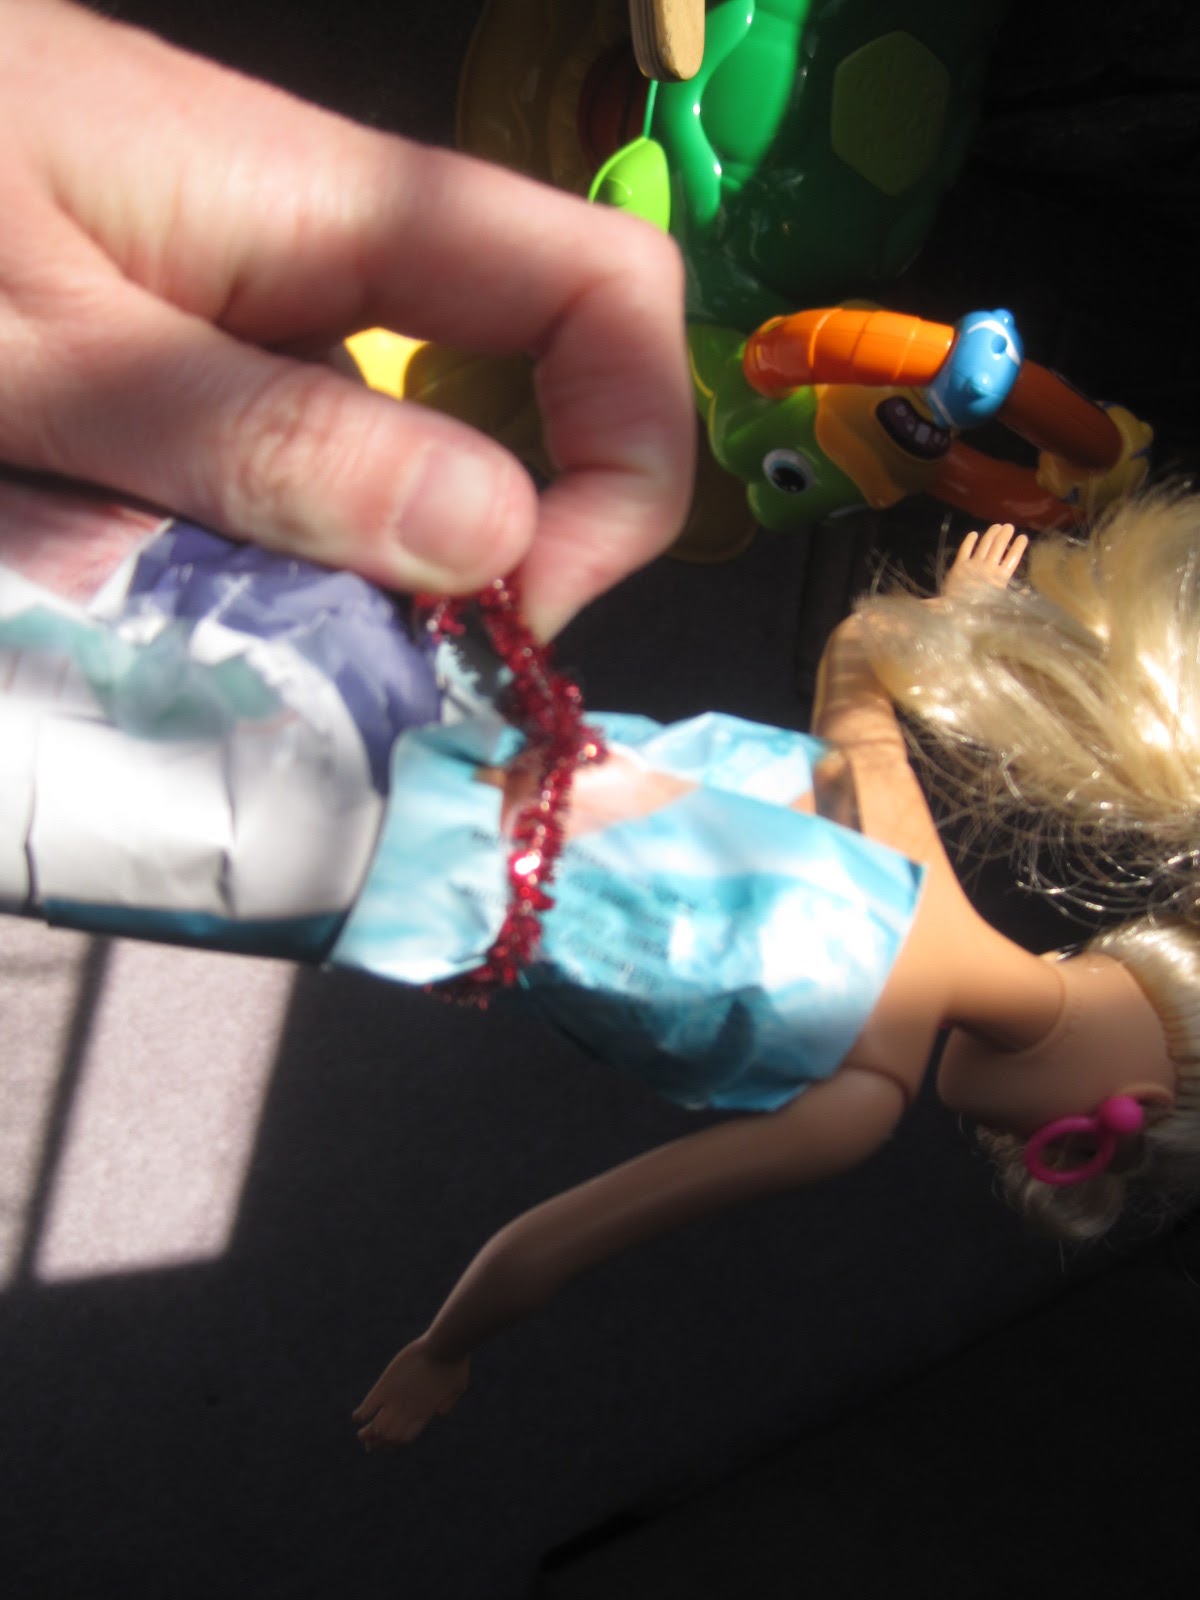
Add a belt by twisting a pipe cleaner around the waist (see photo with skirt below).  You can also add a folded piece of paper around the waist for contrast (not shown).  
 
Pipe cleaner belt back view at we twist it in place.  Be sure to fold over the sharp edges of the pipe cleaner so your kid doesn't get cut while playing.

Pipe cleaner belt front view


Instructions for a SKIRT made from a page from a catalog:


Step 1
Select some "fabric" from a catalog.  This example shows a page that had a lot of printed words and white space we didn't want to show.  You can fold the top, bottom, and middle to hide the part you don't want.  
I was very skeptical about this choice of pattern but it ended up looking fahb-yooo-lus!

Step 2
Tape the paper at the waist, pinching the paper so it fits around the waist and flares around the hips.  Note that our paper is not wide enough to cover the doll's hiney!  That's ok, we'll fix it in the next step. 


Step 3
Miss Z is deep in concentration wondering how I'm going to cover this Barbie's derriere
Cut a piece of paper wide enough to hide the doll's hind quarters.  Slide the strip underneath the skirt and tape in place.  Trim the top and bottom and cover all seams with tape. 

My 6 year old friend was an excellent tailor.
 Variations:
Napkins, paper towels, and tissues are fantastic materials to use for temporary Barbie clothes!  You can fold, pleat, and tuck away, and they are just the right size to not even have to snip away excess paper.  I have made halter tops, double strap dresses, elaborate bell sleeved jackets, pleated skirts with dolman sleeve tops, you name it.  Wish I had pictures to share of all the variations.  Just go crazy! 

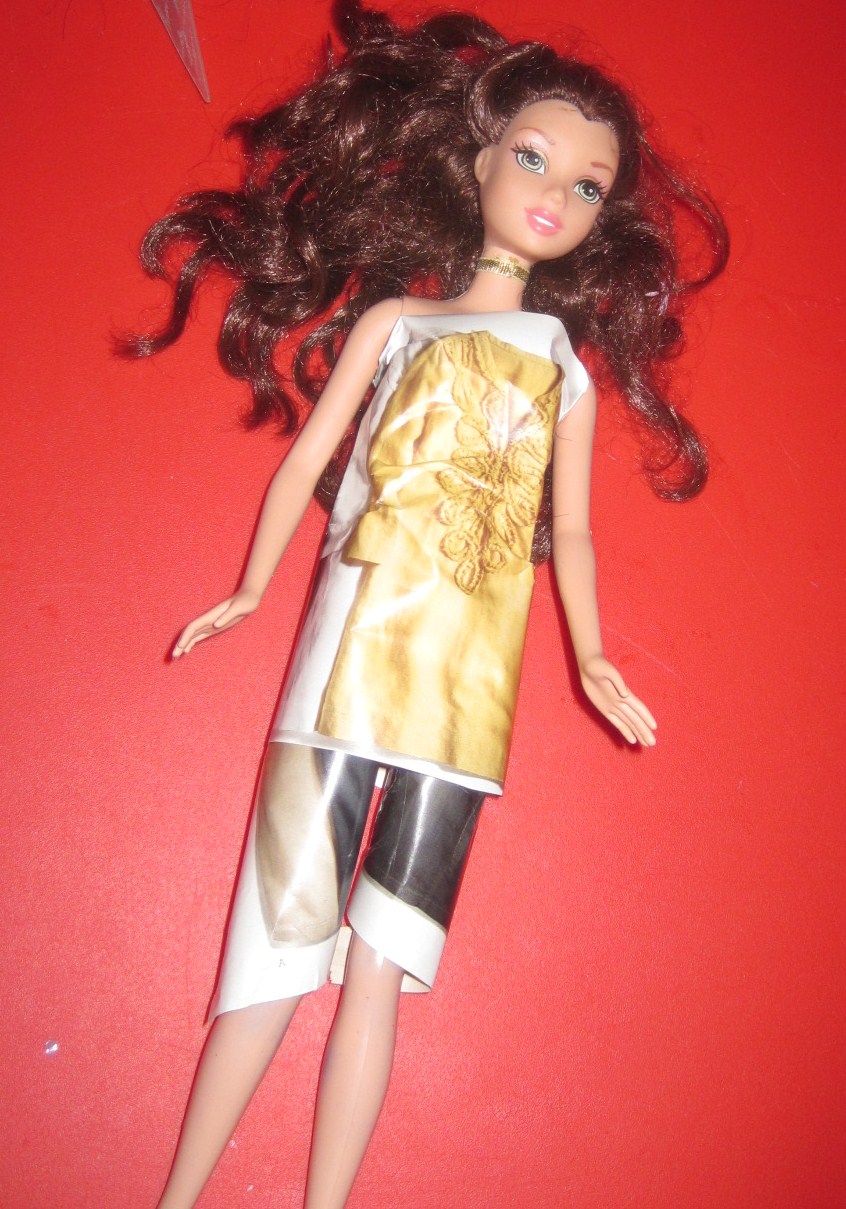
Check it out-we used a picture of a shirt to make a shirt.  Yeah!
Barbie's little sister needs clothes, too.


We made a one-piece strapless sheeth with a pipe cleaner belt for the little Kelly doll.
We made this white ballgown on the left.

 
Ready for action!
--Nancy

Wednesday, March 30, 2011

Handy Manny Toolbelts and Party Favors

I've been meaning to post this craft up here for awhile.  I made this craft a couple of years ago for my son's 3rd birthday and I think it's what sparked my resurgence in crafting.  This is half mommy-craft and half kiddo activity.  I think it came out pretty well and it was the perfect craft to do with a house full for 3-5 year olds.  It doesn't take too long for the kids part and it's something they can play with after they're all done.
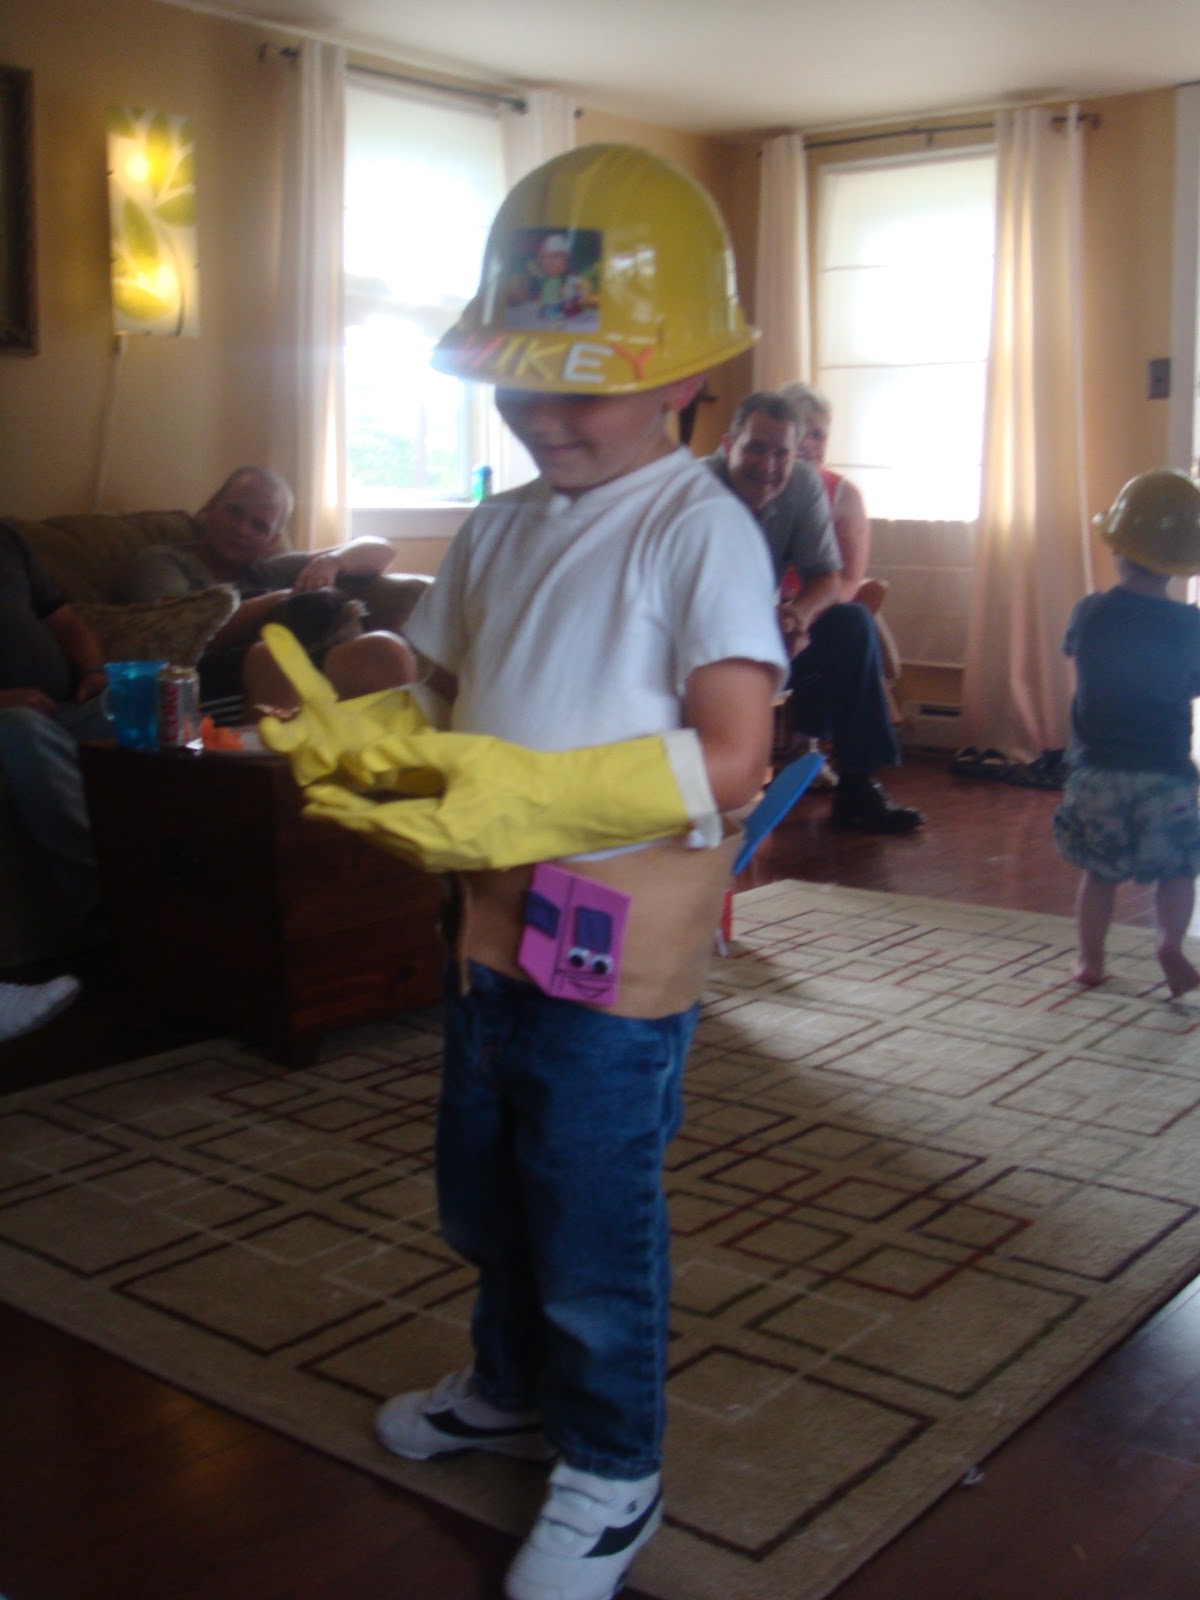
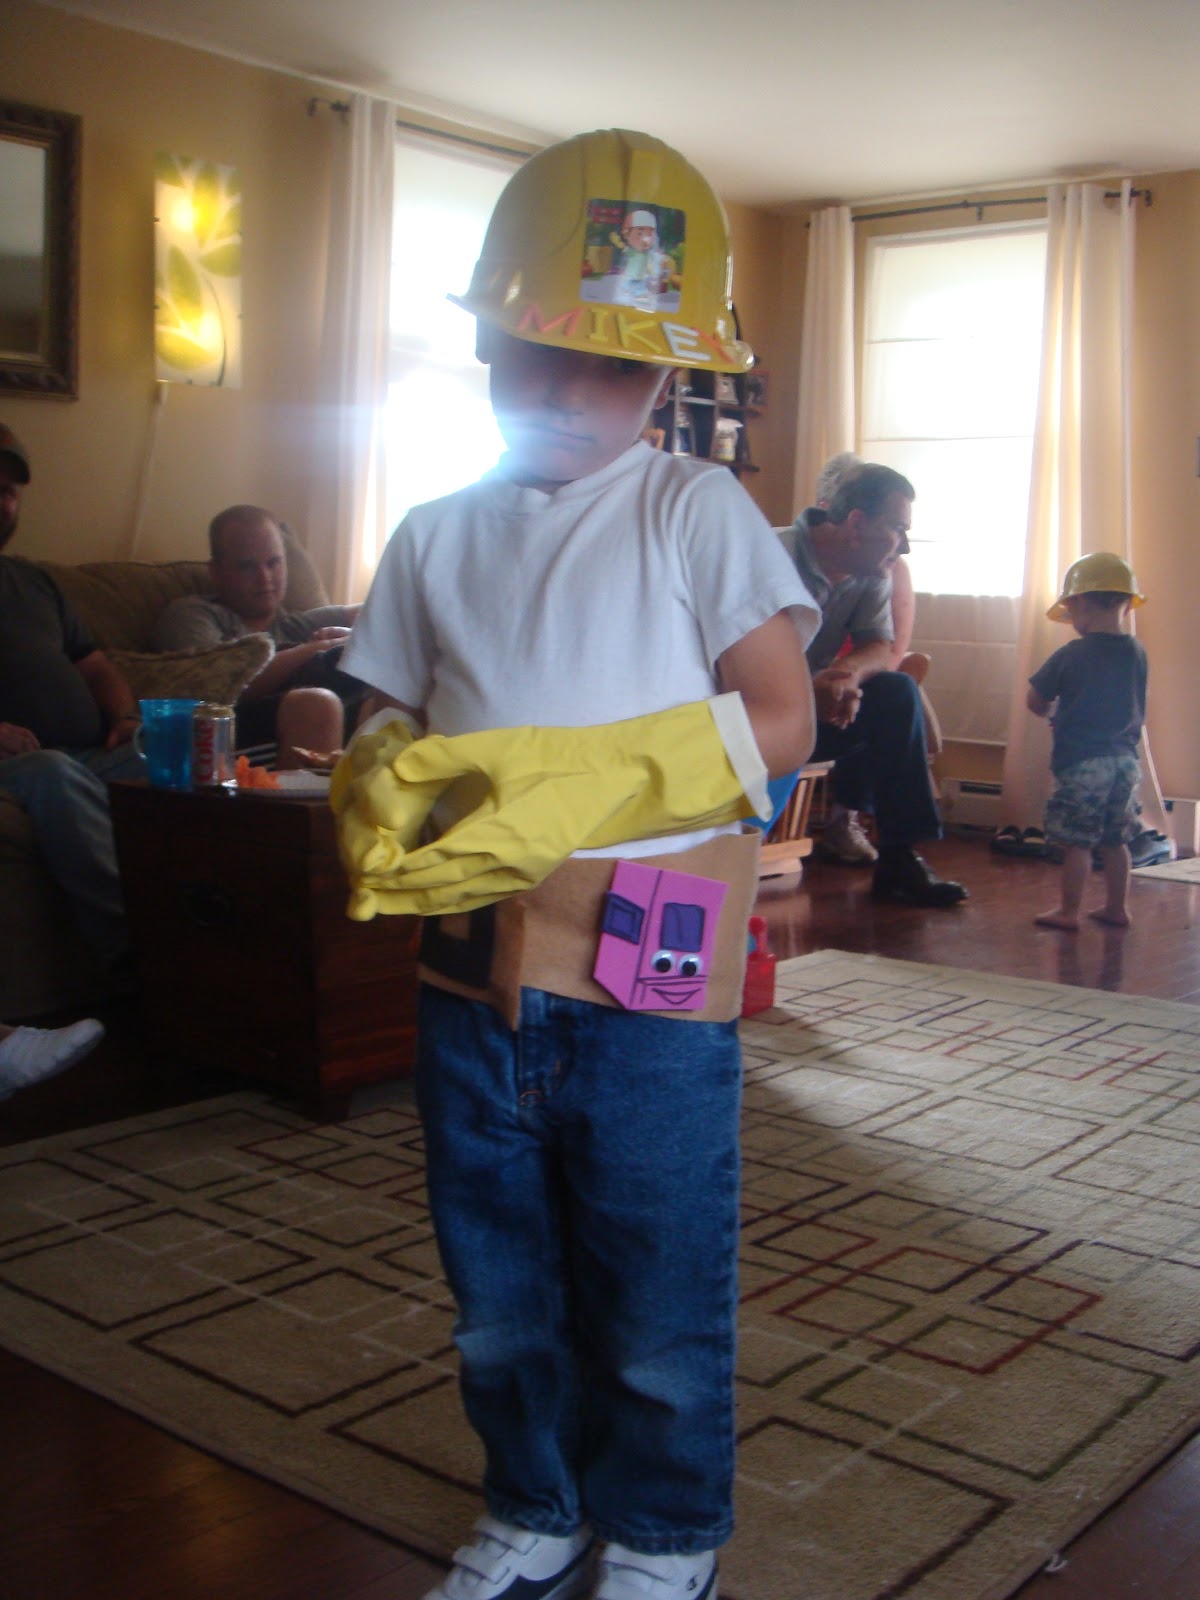
One happy customer!
  You can't see all of the tools, but after everything was assembled we had lots of little Handy Mannys running around.
It was very cute and kept the little ones busy for just the right amount of time.

Age: 2-6 to assemble the pieces.  An adult will be needed to draw and cut out the tools.
Time: 10-15 minutes for the kids.  2-3 hours for the adults.
Cleanup: None for the kids.  Lots of craft foam scraps for mom.
What You Need:
  • To Build the Tools -
    • Craft Foam - Blue (Pat); Orange (Rusty); Yellow/Green (Felipe); Blue/Purple (Turner); Pink/Purple (Stretch); Dusty (Red); Squeeze (Green); Silver (Felipe/Turner/Dusty/Squeeze)
    • Tan Felt (I also used some leftover felt for the toolbelts. Just measure your little one's waist to get a general idea of the length. They should be about 5-6" inches wide). 
    • Self Adhesive Velcro (Save some money and just buy the 'hard comb' side of the velcro if you can.  The velcro combs will stick to the felt.  You will need a small pieces (about an inch) for each tool, and a large piece (about 2 inches) to adhere the belt to itself.)
    • Hot Glue Gun & Hot Glue Sticks
    • Black Sharpie Marker
    • Glue Stick
  • In each goodie bag
    • Finished Tool Pieces (materials listed above)
    • Googly eyes (2 eyes per tool)
    • Yellow dish gloves (1 pair per child.  You gotta have gloves like Handy Manny!  The kids look so darn cute with this massive gloves on their tiny hands.)
    • Construction Hats (I bought mine from Oriental Trading)
    • Self-adhesive foam letters (like these.  I filled each kid's bag with the letters for his/her name.)
    • I also added gummy tool candy and Handy Manny stickers.
  • Amount of supplies will depend on home many sets you plan to make.  I made most tools about about 6-8" tall.  I used the gloves, construction hats, and toolbelts as party favors for each kid.
Why I Like This Craft:
My son and daughter both love Handy Manny.  My son loves playing dress-up, so I was trying to think of an age-appropriate activity for the kids that fell within the Handy Manny theme.  This seemed to work and doubled as the party goodie bag.

Making the Tools-
Step 1: 
You do not have to be an artist to make these tools.  Remember that these tools are for 3 year olds.  They will think you are awesome regardless of how the tools come out.  I'm not a fabulous drawer, but think I did an OK job winging it!  Just find a good pattern and trace what you can.

Find some patterns to use for each tool (you can use coloring books or print-outs from Disney's website) and print them out.  I didn't make all of the tools.  Pick the ones that are easiest for you to draw.

Step 2:
Cut-out the patterns and trace an outline on the craft foam.

Step 3:
Cut out the craft foam.  Some tools will only need one color - Rusty the Pipewrench and Pat the Hammer.  Stretch the Measuring Tape is mostly pink, with a purple square accent.  For the screwdrivers (Turner and Felipe), I made the top in their respective colors (blue and yellow).  I used silver craft foam to mimic the shaft of the screwdriver.  I glued the accent pieces together with hot glue.

Step 4:
Add detail with a black Sharpie marker so your tool has some definition.  Do not draw the eyes.  (See pictures below)

Step 5:
Glue a piece of velcro (hard comb part) to the back of the tool.

Step 6:
Cut out the felt pieces.  Each piece will be a long rectangle.  It should be sized to fit around your child's waist.  So the belt can stay when wrapped around, glue a piece of velcro (hard comb part) to the underside of the felt, near the end of the felt.  I used dark brown felt as an accent piece to look like a buckle.

Step 7:
Add all of the near finished pieces into the baggie.  Add in 2 eyes per tool and name letters.

Party Activity - Attaching the Eyes & Dressing Up Like Manny

Step 1:
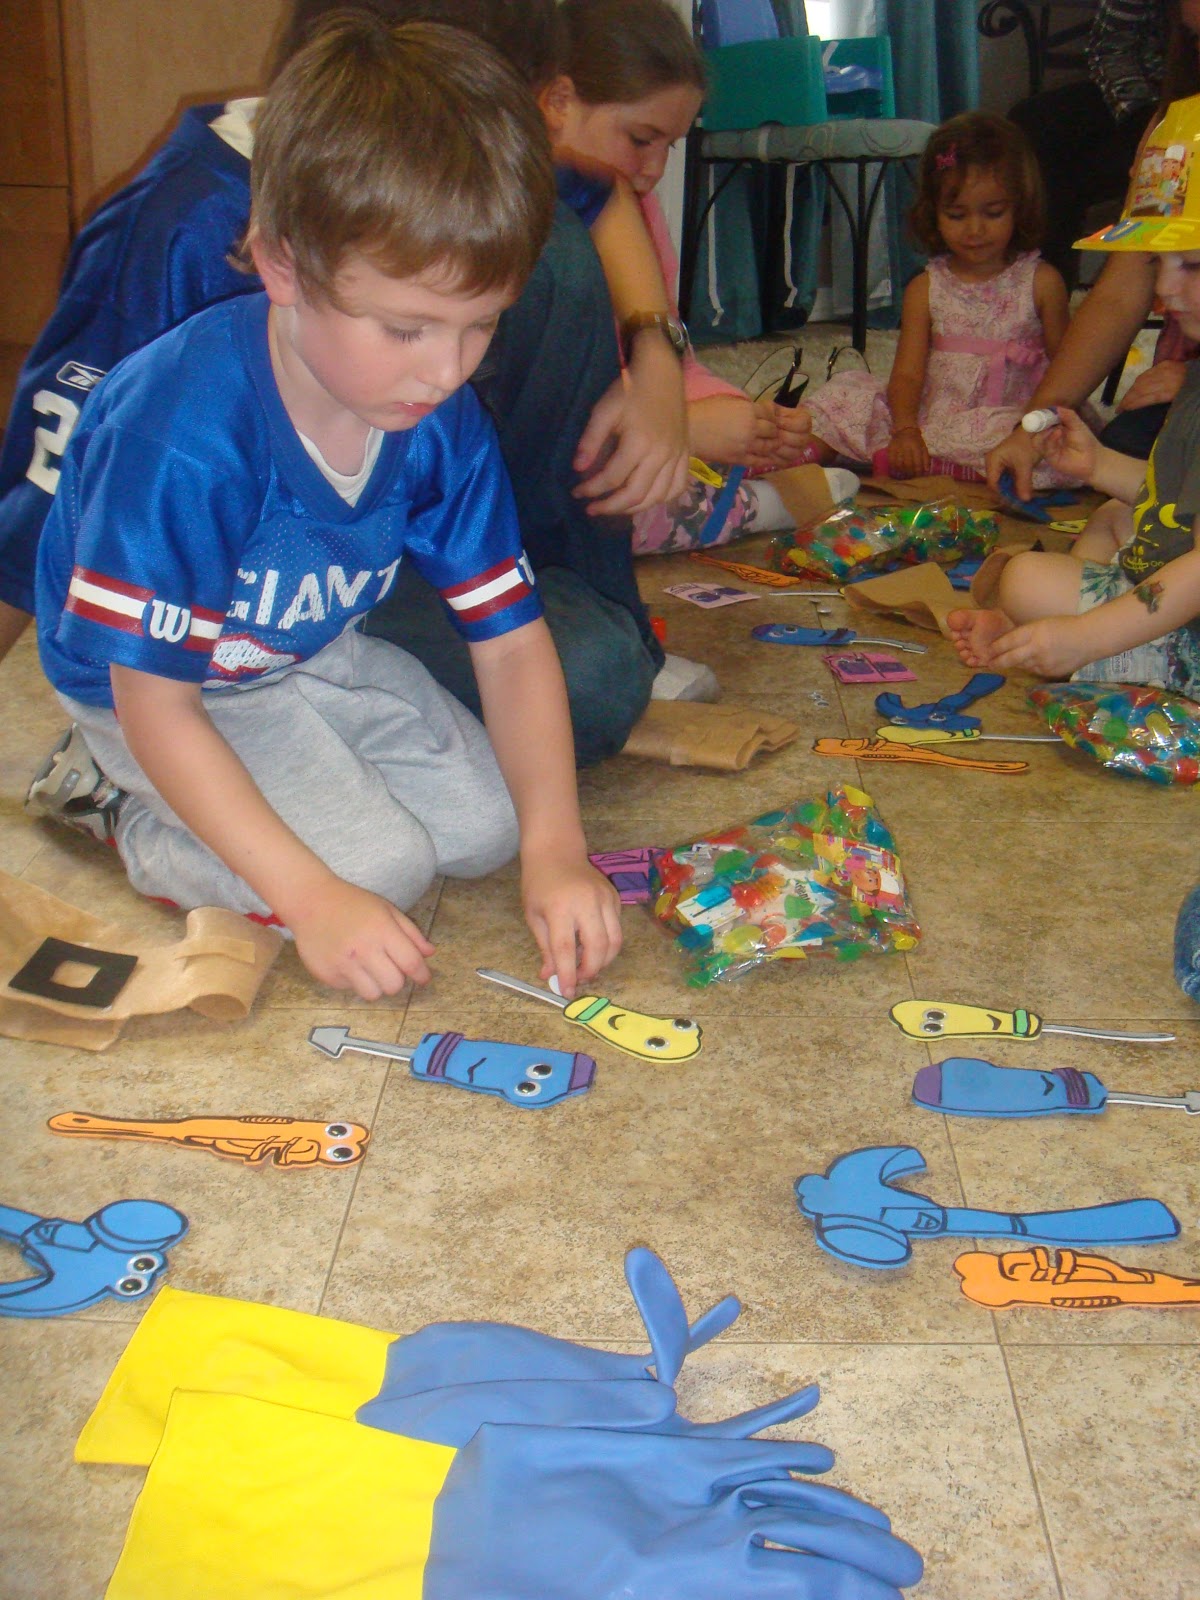
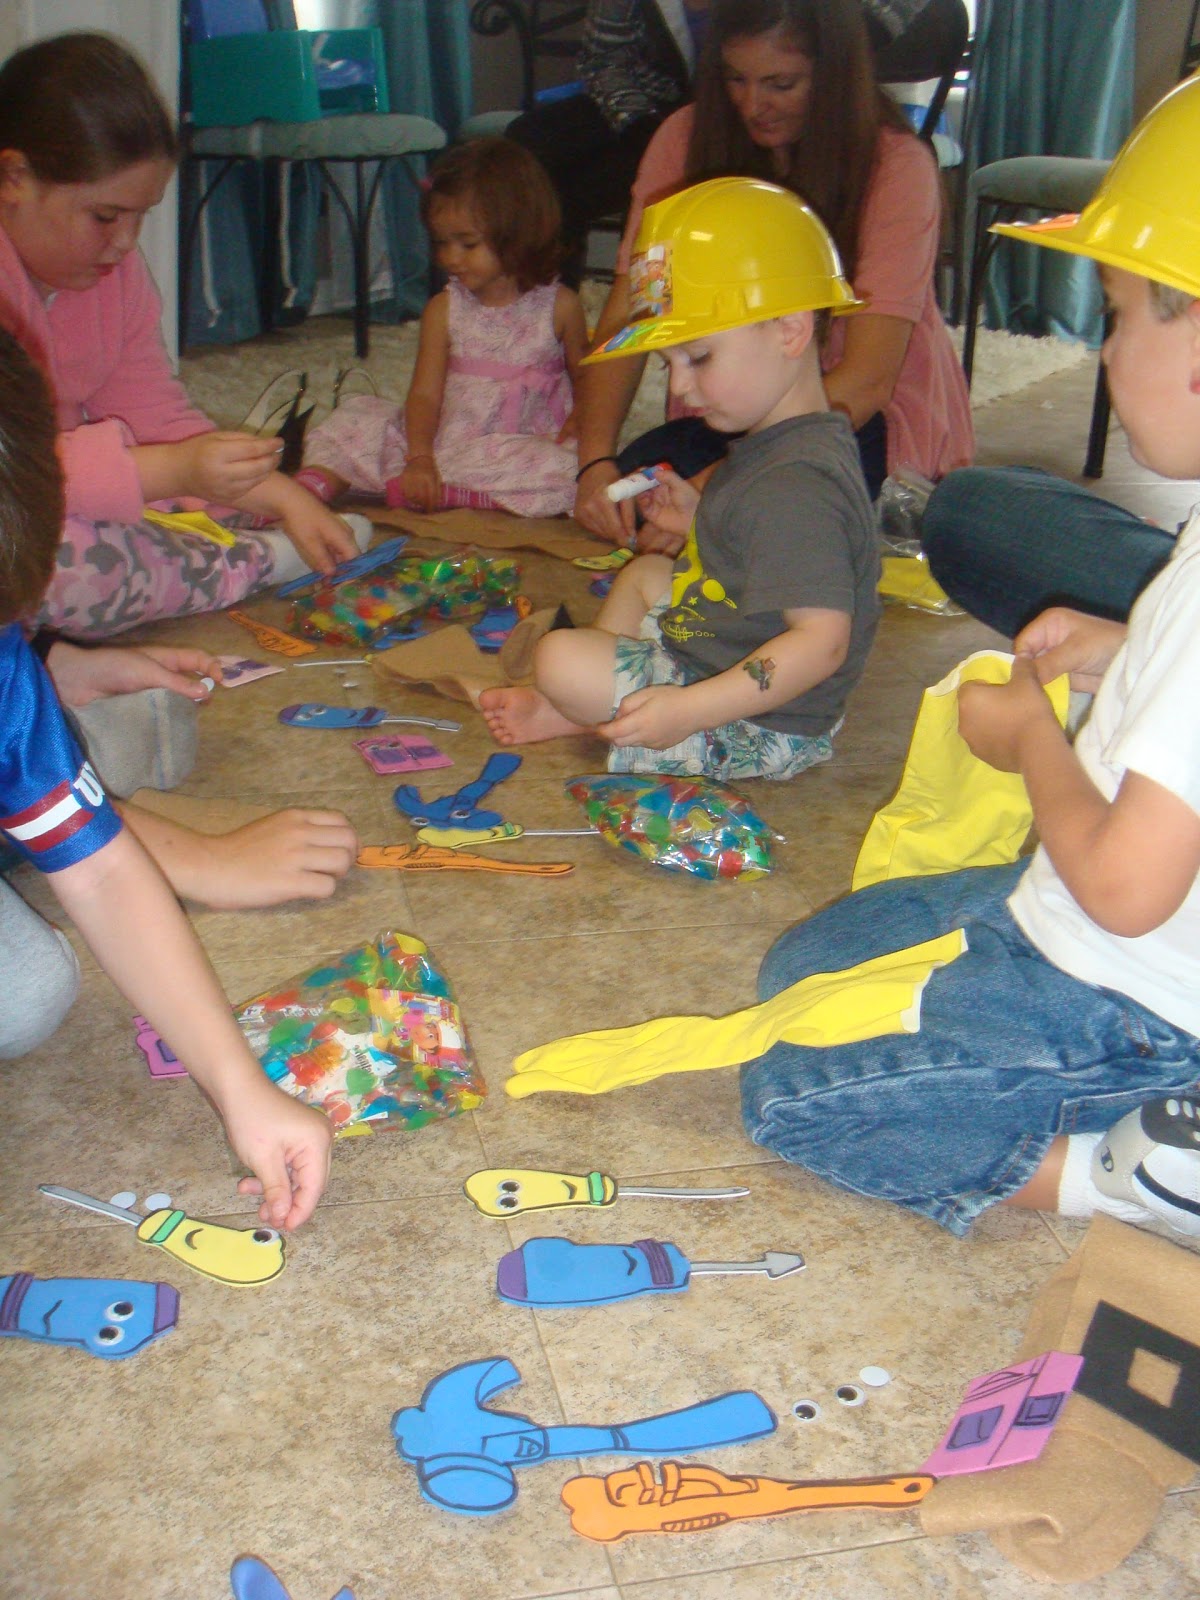
As soon as you hand out the baggies, the pieces are sure to hit the floor.  Be sure to have extra googly eyes, glue sticks (the kid-friendly kind), and a hot glue gun with hot glue ready to go.  We did this activity on my kitchen floor.
Notice the semi-finished tools in the lower right corner of this picture. 
Pat, Rusty, and and Turner are all assembled, minus the googly eyes.

Step 2:
Pass out a few glue sticks and instruct the kiddos to find 2 eyes and glue them on each tool.  If the glue isn't drying fast enough, go ahead and zap it with the glue gun.

Step 3:
Once each tool is complete, stick it on the belt. 

Step 4:
Once the toolbelt is complete, have each kiddo find the letters for their name and assemble that on the construction hat.

Step 5:
Complete the Handy Manny costume with the gloves, hat, and toolbelt.

I hope your kiddos have as much fun as we did.  My son is almost 5 and he still plays with his Handy Manny costume.

-Rose @-}---

Easy Candy Cups

It seems that all I post anymore are food related crafts.  With lots of parties and holiday we're always whipping up something in the kitchen.  This candy cups evolved when I had a bowl of melted chocolate candy coating and I didn't need to make another 24 lollipops.  My son desperately wanted to lick the bowl, but we did one better - he made his own candy!  And, I realize this not an original crafty-treat, but it's the first time we made them.  I was shocked how yummy they actually tasted.
Age: 2+
Time: 10 minutes +
Cleanup: Its best to clean this little food craft up right away before the chocolate hardens in the bowl. Should only take Mom 5 minutes to clean the bowl, spoon, and silicon cups.
What You Need:
  • 1 bag of Candy Melts/Wafers (I used a different brand this time.  A.C. Moore recently had the Make 'N Mold brand on sale, so we used the Milk Chocolate wafers for these candies.)
  • Silicon Cupcake Cups  (I have ones similar to these)
  • Mix-ins (We used mini marshmallows and raisins. Nuts and/or dried fruit would also work really well.  I was also thinking of maybe trying to put a little peanut butter or raspberry ganache in the middle.  Maybe next time...)
  • Microwave-safe bowl
  • Spoon
Why I Like This Craft:
I really enjoy making treats with my kids.  I know we could buy stuff, but it's so much more fun to make stuff.  And who doesn't love candy?

Step 1:
Melt the chocolate according to package instructions.  Remember to be patient and take your time.  If you chocolate gets too hot it will be lumpy and not look too pretty.  Lower heat and short cooking intervals.

Step 2:
Pour a little chocolate in cup.

Step 3:
Place the mix-ins in cup.  Squeeze sides of cup to get the goodies coated.


Step 4:
Pour a little more chocolate over the mix-ins.  Squeeze sides of cups to level out chocolate.  Use spoon if necessary.


Step 5. 
Let cool.  In about 20 minutes you'll be able to pop the candies out of the cup. 

Tip: Don't make the chocolate too thick. The chocolate does get very hard.  It's kind of hard to bite through a huge mass of chocolate.

-Rose  @-}---

Sunday, March 6, 2011

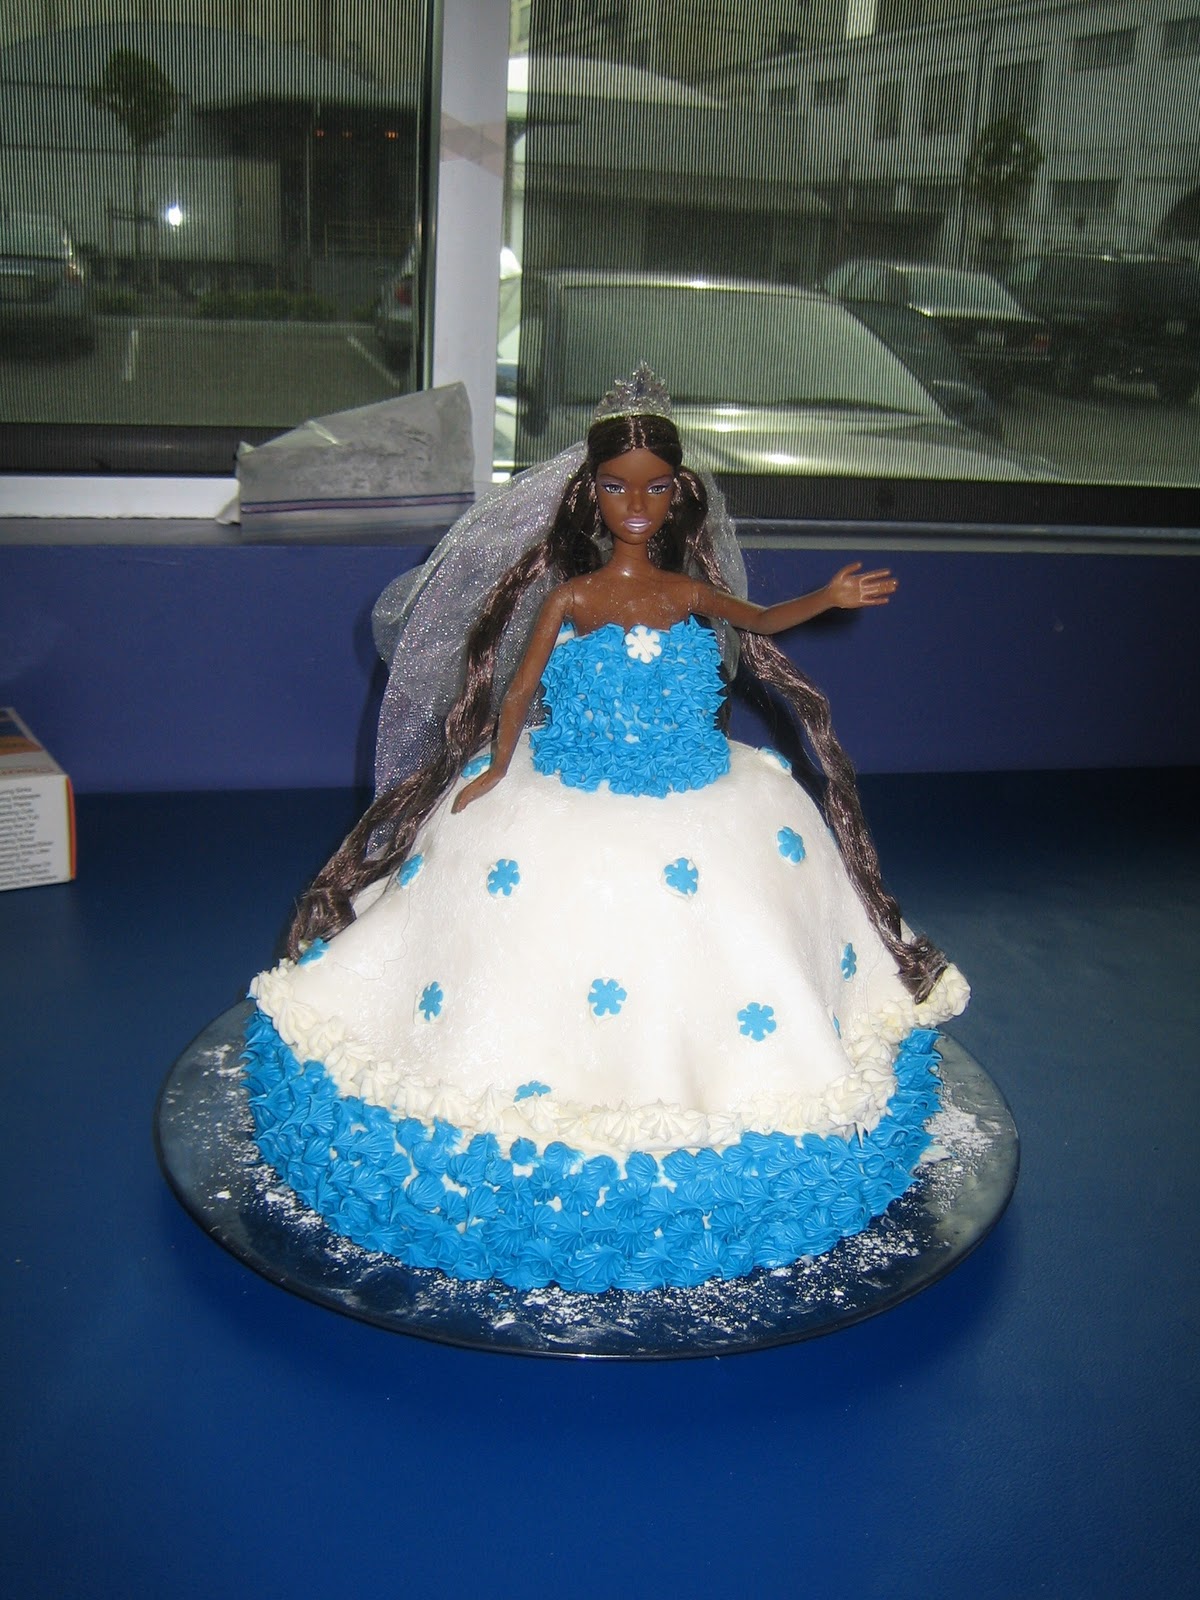
Barbie Cake and Cake Pops

Birthday party time at my house!
My almost-four-year-old repeatedly insisted upon a bicycle cake, helped review designs online, and chose a template for chocolate bike toppers on the cupcakes. 

Then she saw the Barbie-like cake topper in the cake decorating aisle.

All thoughts of that bike cake flew out the window.

Here are the resulting birthday sweets we made.  Sorry if the instructions are rambling.  You'll have to click on some links to get the full instructions. 

Age:  These are mommy crafts.  My almost-four-year-old helped with several steps but also got yelled at quite a bit for potentially destroying my hard work.  So, involve your kid for short periods of time in a controlled manner and have a distraction handy to keep them away while you do the hard work.  My husband took our kid to the playground for a while :)

Mess/Cleanup:  This is extremely messy, took two days of work and over an hour of cleanup after the birthday party.  Why didn't I buy a sheet cake from Safeway? 

What you need:  I used other people's instructions for all of these crafts but I'll share some shopping lists and tips here.  I made over 100 cake pops/balls and one doll cake for a party with 40 people and we had too much. 

Grocery shopping list
3 Cake mixes (and ingredients required for cake mix instructions-generally eggs and oil)
3 boxes of butter (12 sticks)
1 package mini marshmallows
1 small box and 2 2-lb bags of powdered sugar
1 bag of chocolate chips (if you want milk or dar chocolate pops instead of the white chocolate flavor of candy melts)
Vanilla extract
Parchment paper
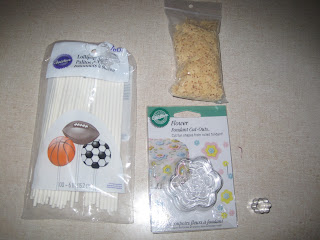
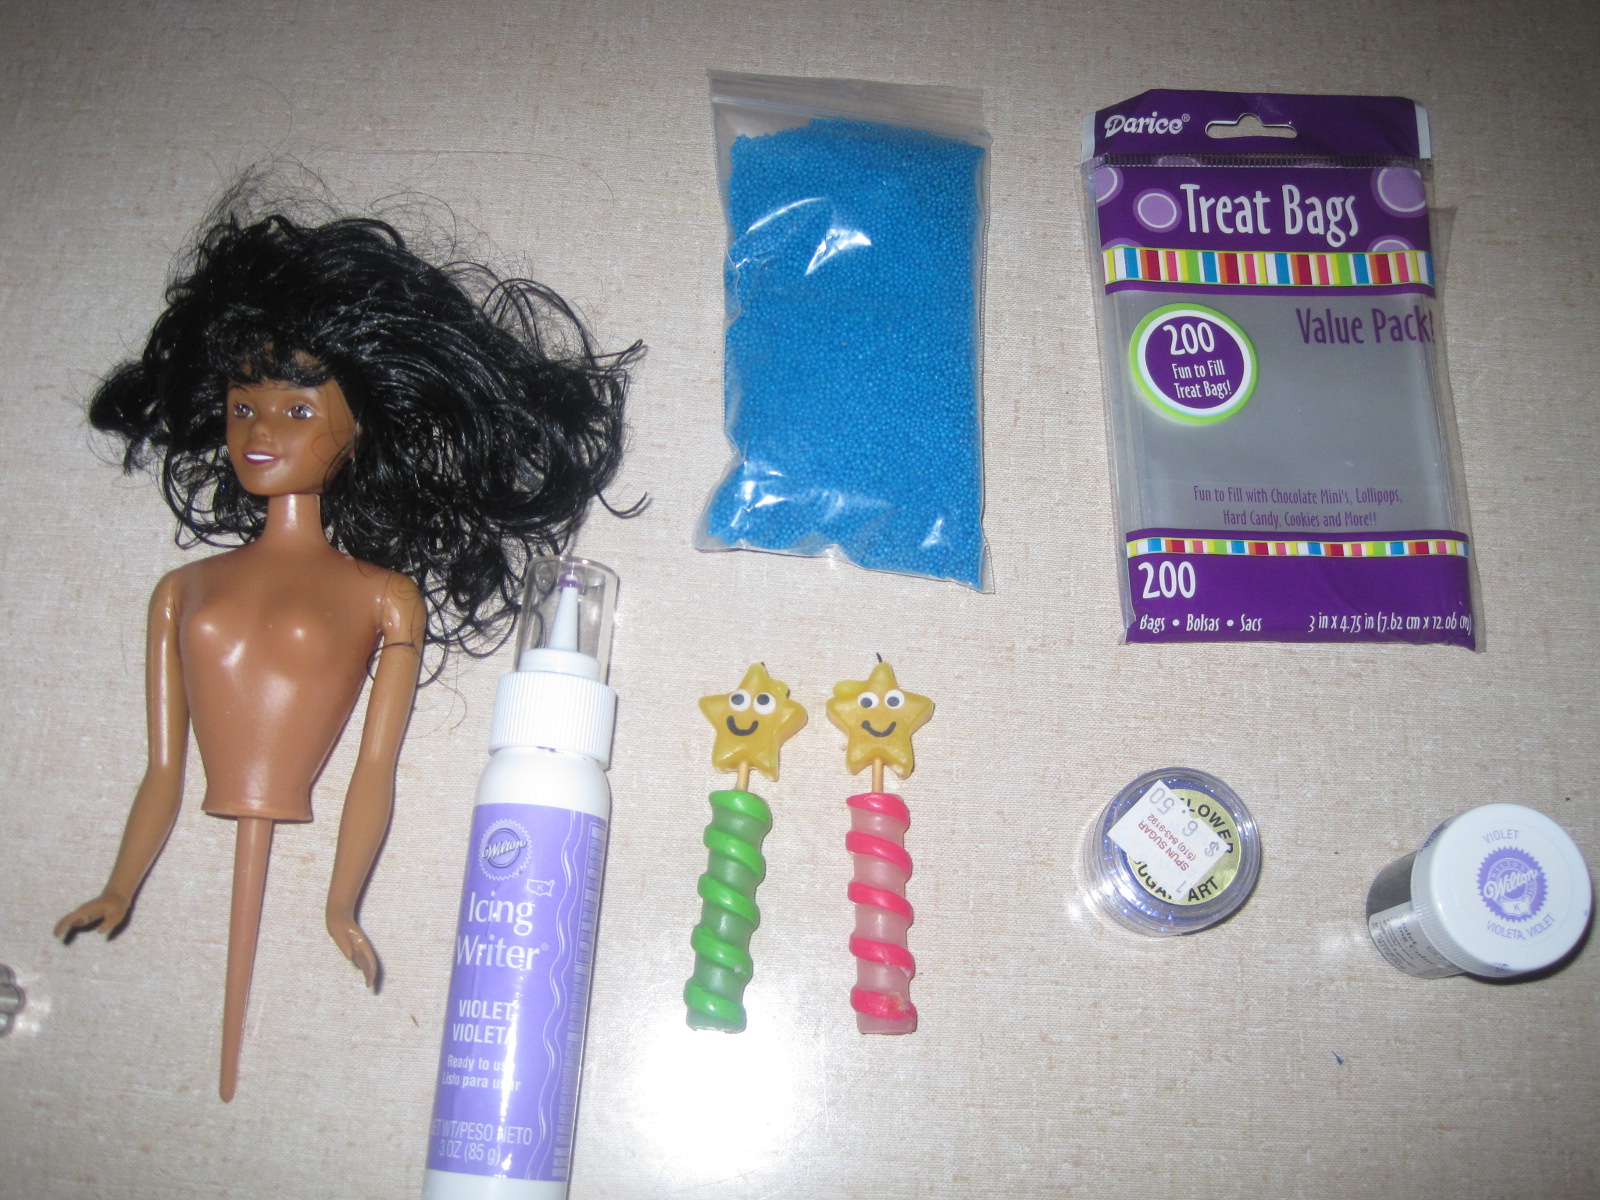
A few of the supplies
Craft store shopping list (I went to Michael's)
Doll cake topper (or substitute a Barbie doll)
Doll skirt cake pan if you don't have an oven-safe bowl
Fancy star-tipped Wilton birthday candles
Paste food coloring (I used purple)
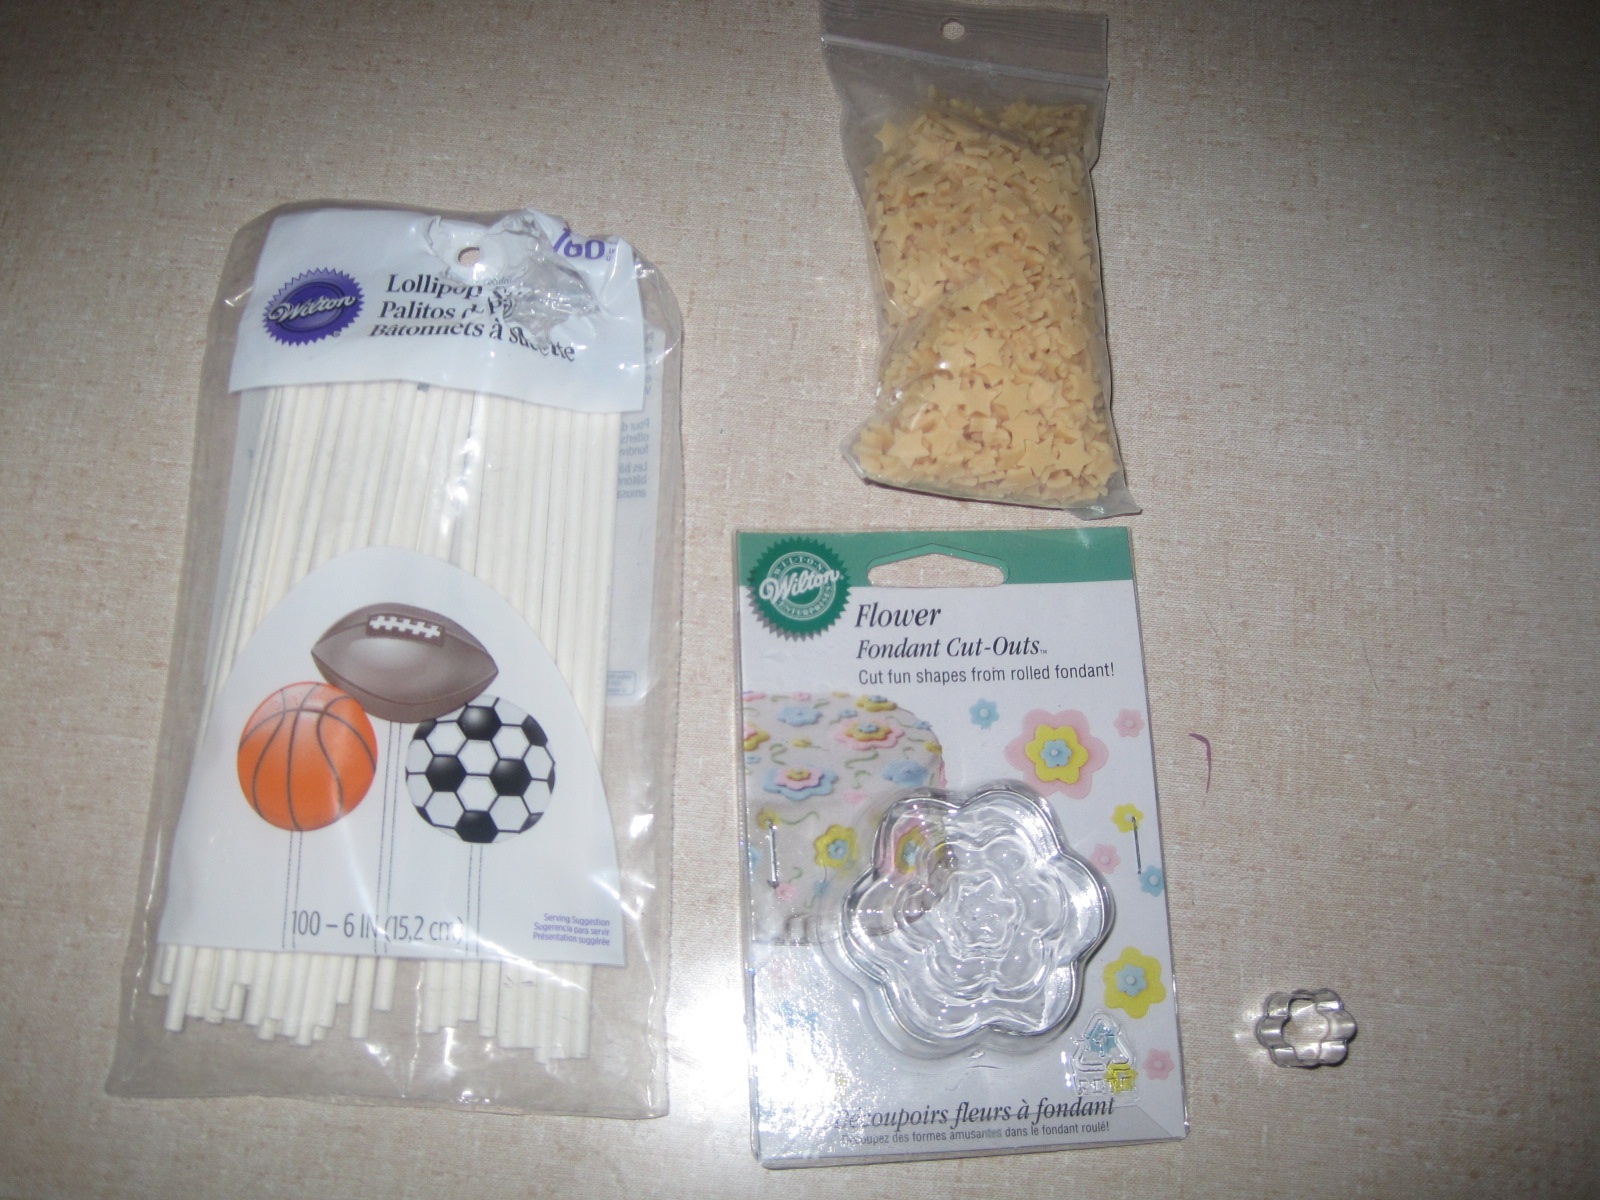
100 count 6" sticks for lollipops
100 count plastic bag lollipop covers
4 bags of candy melts
Colored icing writer
Small flower shaped Wilton fondant cookie cutter
Small nonpareils
Star shaped white chocolate (I used stars from Spun Sugar in Berkeley) or star shaped candy confetti
Luster dust (I used disco blue from Spun Sugar in Berkeley)
3 2" thick styrofoam sheets for the cake pop display (I got 3 shaped like a circle.  Bakerella shows a cupcake carrier that can hold a rectangular shaped one).
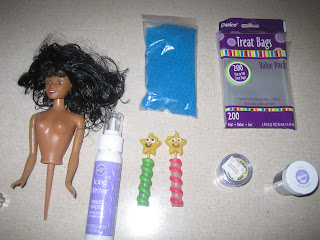
That doll topper is creepy, eh?

What else you need at home:
  • Paint brush for luster dust
  • Rolling pin
  • Large Pampered Chef batter bowl (or other oven-safe glass bowl)
  • Large microwave safe bowl for marshmallows (my kitchen is not well stocked with these)
  • Plate or pan for doll cake (I used a white ceramic Ikea quiche pan with fluted sides)
  • Box or pan to protect your doll cake (I used a roasting pan with handles)
  • Boxes or pans to transport your styrofoam cake pop displays (we used a combo of jelly roll pans and a really big cardboard box)
  • Platters for cake balls
  • Foil to protect your melts-like-sugar creations
  • An empty shelf in your freezer!!!!

Cake Pops and Cake Balls Instructions and Tips

Seems like half the people I know already knew about these cake pops before I did.  The book and the blog are a huge hit!  Cake pops are charming and adorable and mere photos of them will make you squeal with delight.  I plan to buy the book very soon. 
www.bakerella.com

Here are the cake ball/cake pop instructions.  I made my cake pops and cake balls with yellow cake mix and homemade buttercream with violet colored candy melts and a smaller batch with semi-sweet chocolate chips.  The ones made from chocolate chips were reportedly quite delicious but I didn't taste any. 

I thought it was tough getting a smooth coating on both the cake balls and cake pops.  It's ok if your first tries are lumpy (at least that is what I told myself). 

Cake balls:
http://www.bakerella.com/red-velvet-cake-balls/

Cake pops:
http://www.bakerella.com/hope-these-put-a-smile-on-your-face/

Cake Pop Tips: 
Plan ahead for an hour to cool your cake before crumbling, and three hours to make two batches of cake pops. 
Make room to freeze your balls (heh heh) ahead of time.  Room-temperature balls during assembly = disaster. 

Enlist your kid to put the sprinkles on the pops while you dip.  The candy melts harden pretty quickly and your fingers may get too sticky to sprinkle very well.

Crumble the cake into a really fine texture and eat the browned crusty corners.  It doesn't crumble well.

Homemade buttercream frosting tastes infinitely better than canned frosting.  Save a little extra to add decorations to your Barbie cake. 

Buttercream frosting:
http://www.foodnetwork.com/recipes/gale-gand/quick-vanilla-buttercream-frosting-recipe/index.html

Tip:  I omitted the heavy cream.  Make enough for your cake pops as well as another batch to frost the Barbie cake. 

Barbie Cake:
Grease your glass oven-safe bowl and fill with one box of cake mix.  I used a bit of cake mix to "flour" my bowl before baking so it wouldn't leave a white flour residue.  Bake it for 50 minutes at 350 degrees.  Use a knife to test for doneness and allow 2-3 hours for the cake to cool before frosting. 

After the cake cools cut the wide end of the cake so it will sit flat on the plate and give your kid the scraps to eat.  They will start asking for a bite of cake as soon as the oven starts emitting a nice cake aroma so you will be glad to have a scrap to spare to stop those pestering and relentless requests for cake! 

Once the cake is cool put it on the display plate you'll use for the finished cake.  Frost the cake with a crumb coat layer of buttercream.  Turn the TV up loud because you WILL curse the buttercream as it repeatedly picks up layers of brown crumbs to mar the beauty of your fantastic bowl shaped cake.  This is a terrible shape to frost!  Smooth it out really well to get better results with the fondant skirt.  Now give your kid the frosting beaters to lick. 

If you've never worked with fondant before you might want to do a quick internet search for tips on working with fondant frosting while the cake is cooling.  There are a ton of videos and instruction pages out there.  Basically, you need to use powdered sugar the same way you use flour on the surface and rolling pin when rolling out your fondant. 

Marshmallow fondant:
Use Rose's instructions for fondant and roll it out for the dress. 
http://happycraftykids.blogspot.com/2010/12/really-tasty-edible-play-doh.html

Tips:
I added a whopping amount of paste food coloring to get a rich purple color (maybe half a teaspoon?)  My fondant and my hands were a lovely shade of purple afterward.  Take a bath afterward to get your hands back to a normal color! Unfortunately I finished my cake minutes before it was time to go to the party, but it was a good conversation starter with the other parents. 

To make the skirt, lay down two sheets of parchment paper and sprinkle with powdered sugar.  Roll the fondant out in a big circle and reserve some dough for the bodice and flower decorations.  Lift it occasionally to keep it from sticking to the parchment paper.  Trust me, I learned this the hard way. 

Swipe at your circle lightly to get rid of the powdered sugar left over on your fondant before you put it on the cake.  Drape the fondant over your frosted cake.  Use a table knife to cut the bottom level with your cake.  You can frost over this if your cuts look messy.  Mine were ok today (the first one I made years ago looked too messy so I covered it up.  Here is an old photo of that one, which had much more frosting piping. 
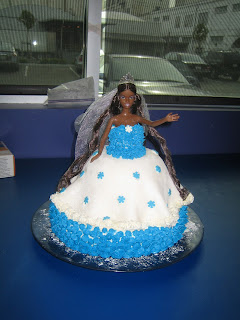
The bodice is huge to 1) cover the electrical wires coming out the back of this high-tech Barbie and 2) to intentionally promote a more normal body image shape.  Yes, I'm serious.  It wasn't just an accident!
Apply luster dust with a small dry paint brush to add some sparkle to your cake and to cover up the remaining powdered sugar. 

Use scraps to create a bodice for your Barbie's dress.  I made mine with a heart shaped neckline :)

Put some nonpareils onto some scraps of fondant and roll over them with a rolling pin.  These suckers fall off really easily.  My almost-four-year-old was observing and advised I use the smallest fondant flower cutter.  This was sage advice and reduced the number of candies that fell off.  Cut out some tiny flowers from your bumpy fondant and glue them onto the skirt with leftover buttercream frosting. 

GOOD LUCK packing up all these darned things if you have to transport them to a birthday party somewhere else!!!!  Map out the least bumpy route you can find and try not to strangle the driver if he makes a sudden stop. 

Now enjoy your party!  And try not to talk people's ears off about how proud you are of your cake pops and cake balls and Barbie cake or you'll upstage the birthday girl.  Unless, of course, you made these for your own birthday.  ;)

Nancy   
Wednesday, March 2, 2011

Super Easy Crayon or Ink Rubbing Card

Seeing as how I have been making my own greeting cards for at least the last 18 years, I figured it was high time for my kid to start making her own birthday cards for her friends.  This was not her first attempt, but it's the first one I've posted on the blog. 

Age:  2+
Time: 5-10 minutes
Mess/Cleanup: Minimal if you use crayons, potentially slightly messy if you use a stamp pad or marker
What you need:
  • Paper
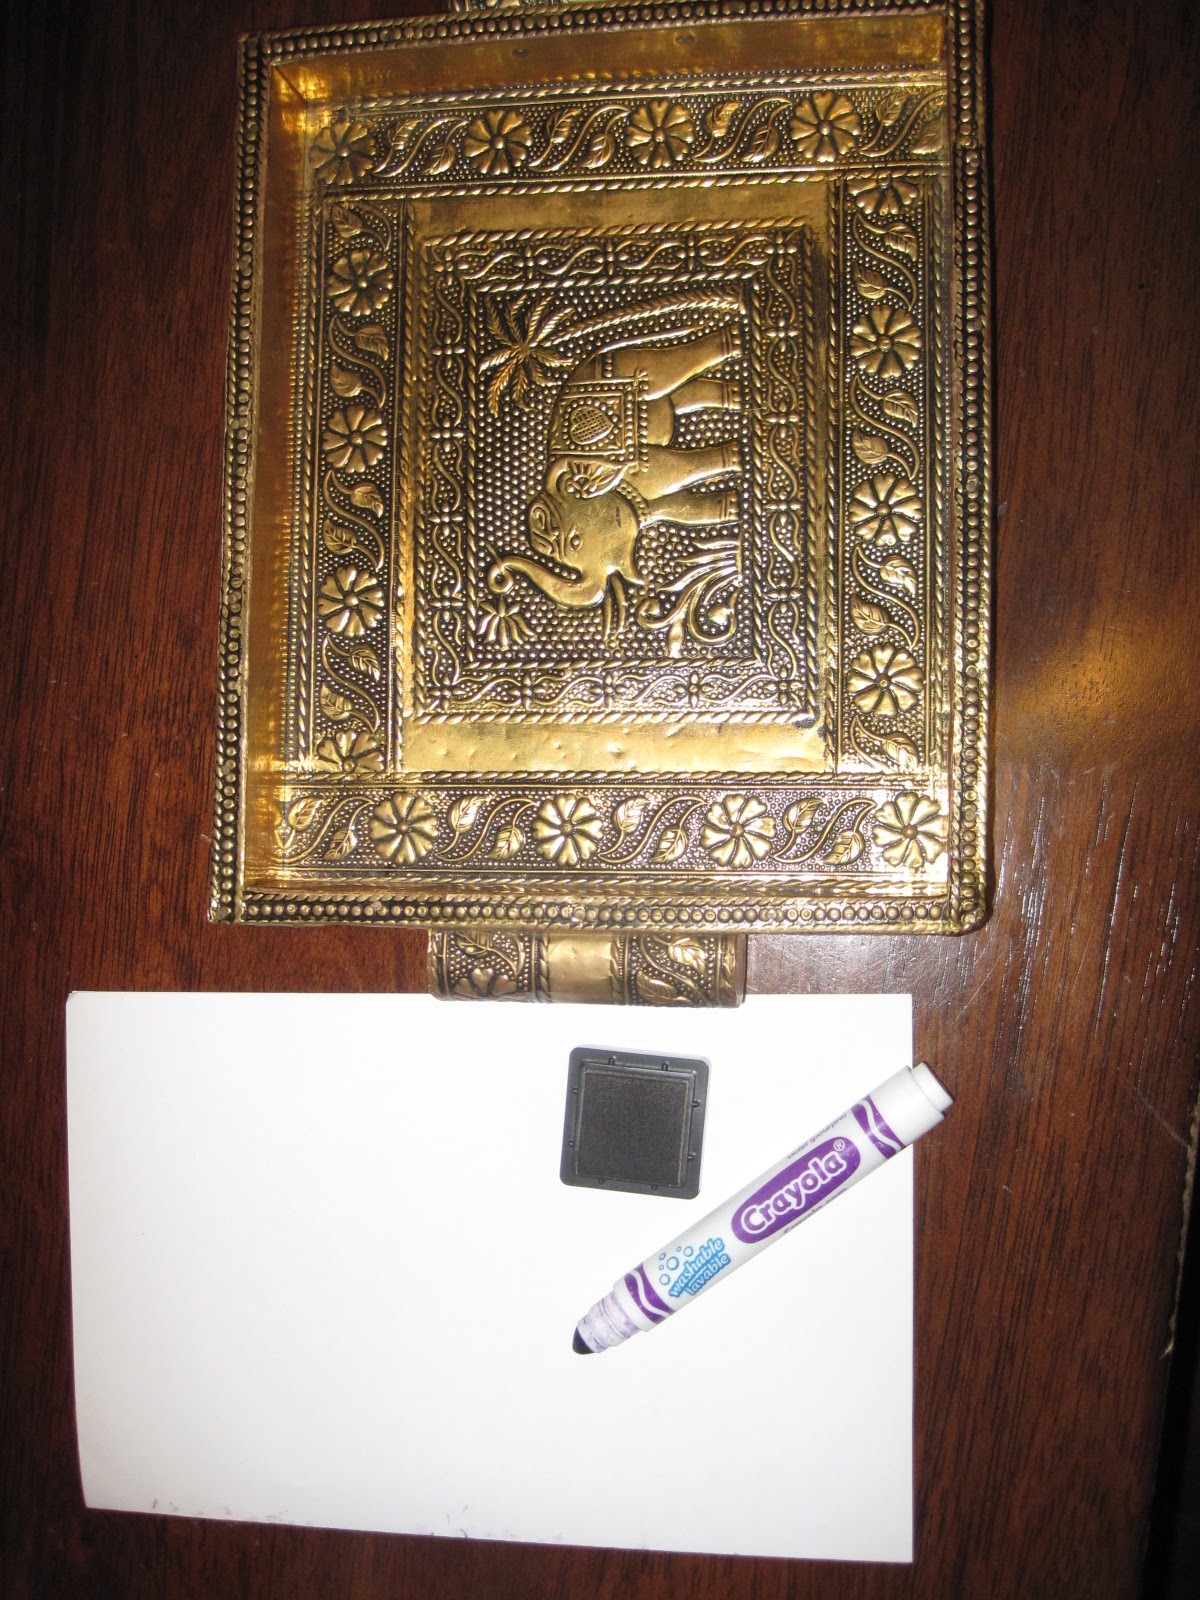
  • Crayons, markers, or stamp pad
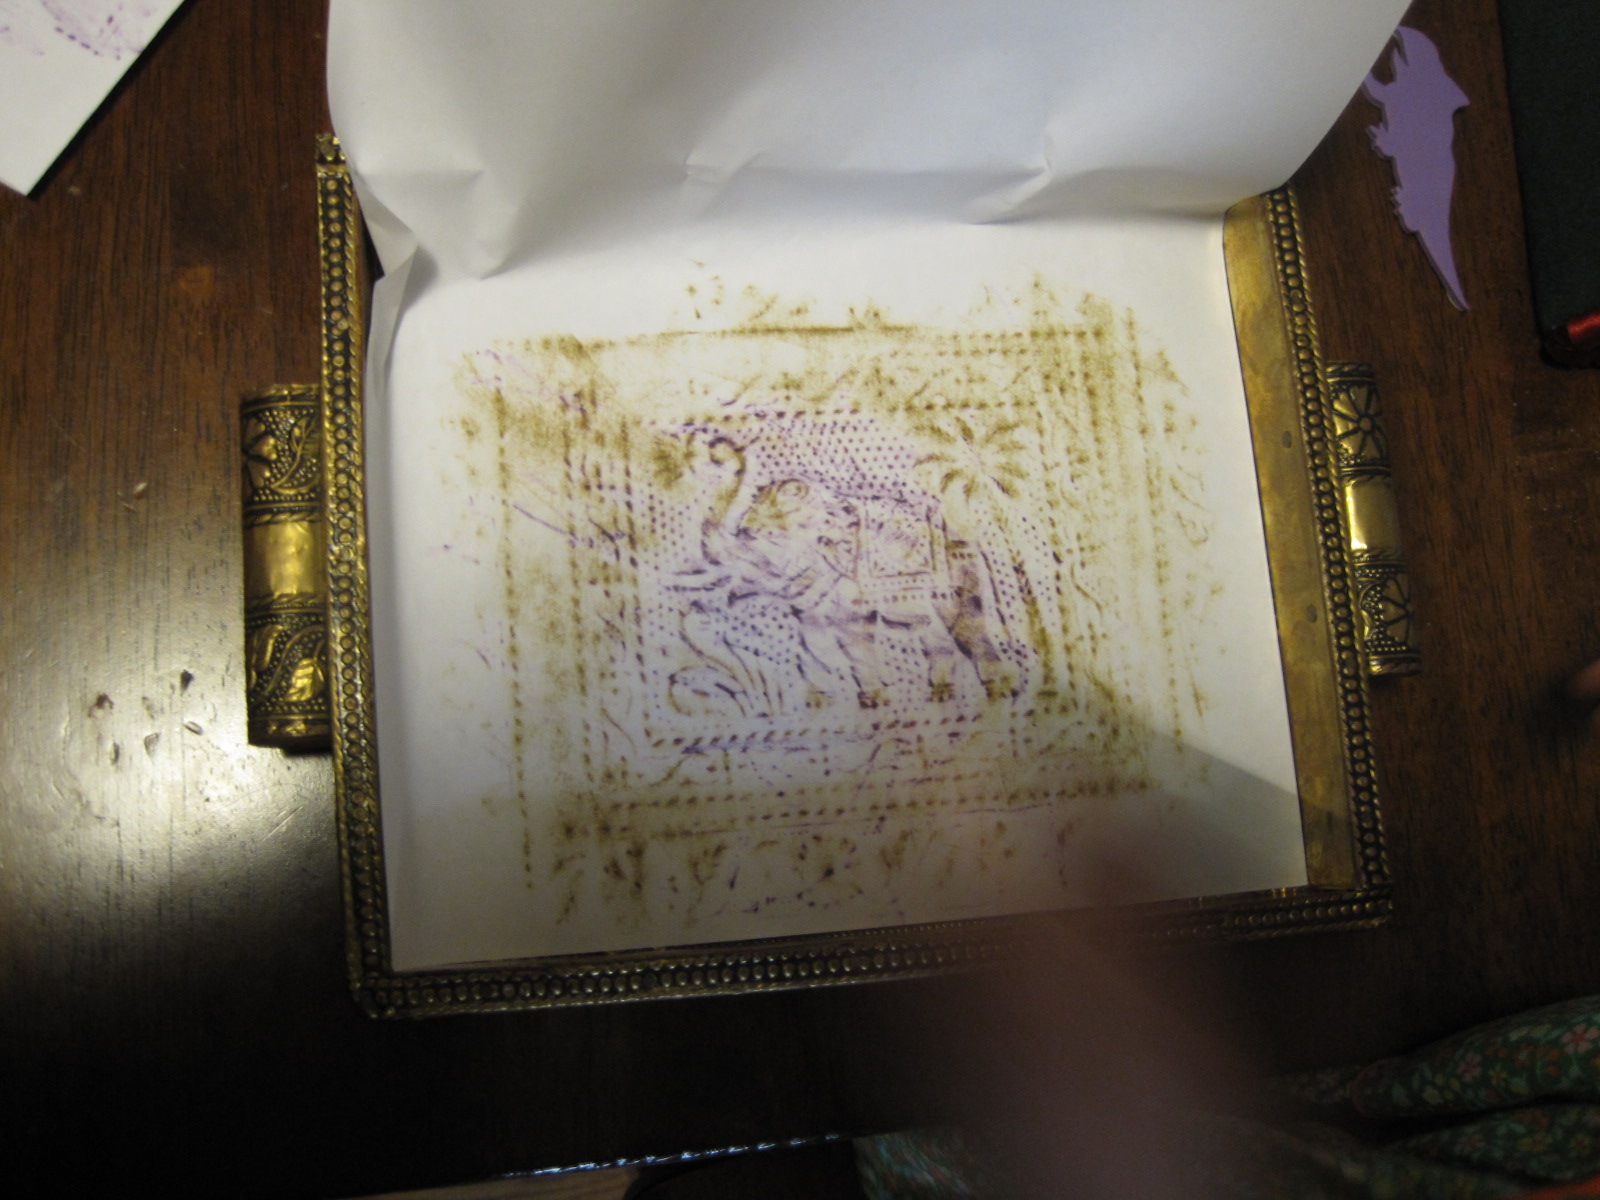
  • Something textured to rub-we used a metal tray from World Market.  You could also use a leaf, a brick or decorative iron grate, or even the clean textured sole of a shoe.  (One day Rose or I will post instructions for making your own textured picture to make rubbings of, but I haven't done it yet.  My bet is on Rose doing it first!) 
  • I like the cheap-o non-pigment ink stamp pads the best for this.  The color doesn't end up too over saturated.  Washable markers also help with cleanup
Why I like this craft:  My kid thought up the idea to use a stamp pad instead of a crayon.  I love it when they show their little minds in action!

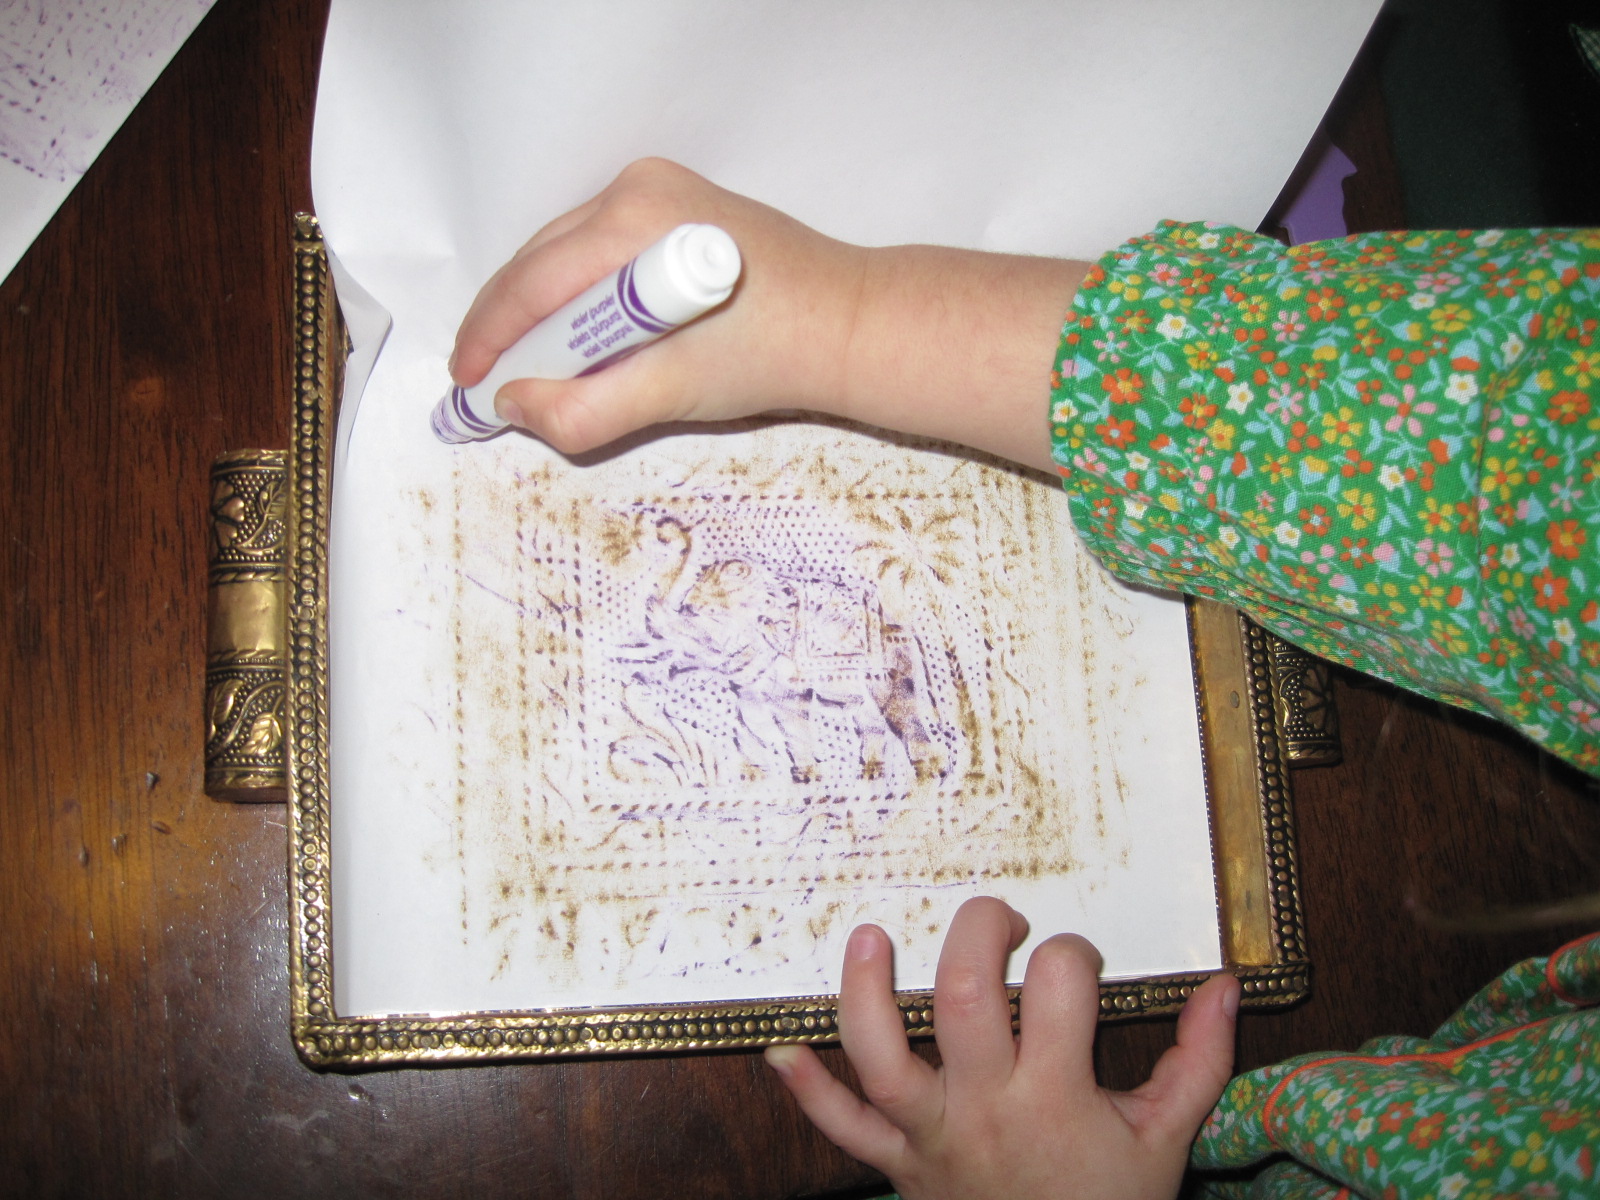
Step 1:  Put a piece of paper over your textured item.  If you use a leaf or other small, loose item you might want to tape it to a piece of paper with double stick tape first.


Marker in action!  (Notice the short fingernails.  Yeah.  She bites her fingernails now just like her mama.)
 Step 2:  Use a crayon, marker, or stamp pad to rub over the image. 

Younger kids will probably have the best results with the stamp pad.  Kids who can color pretty well will have great results with crayons or pens. 

Feel free to use several colors.

Stamp pad in action!
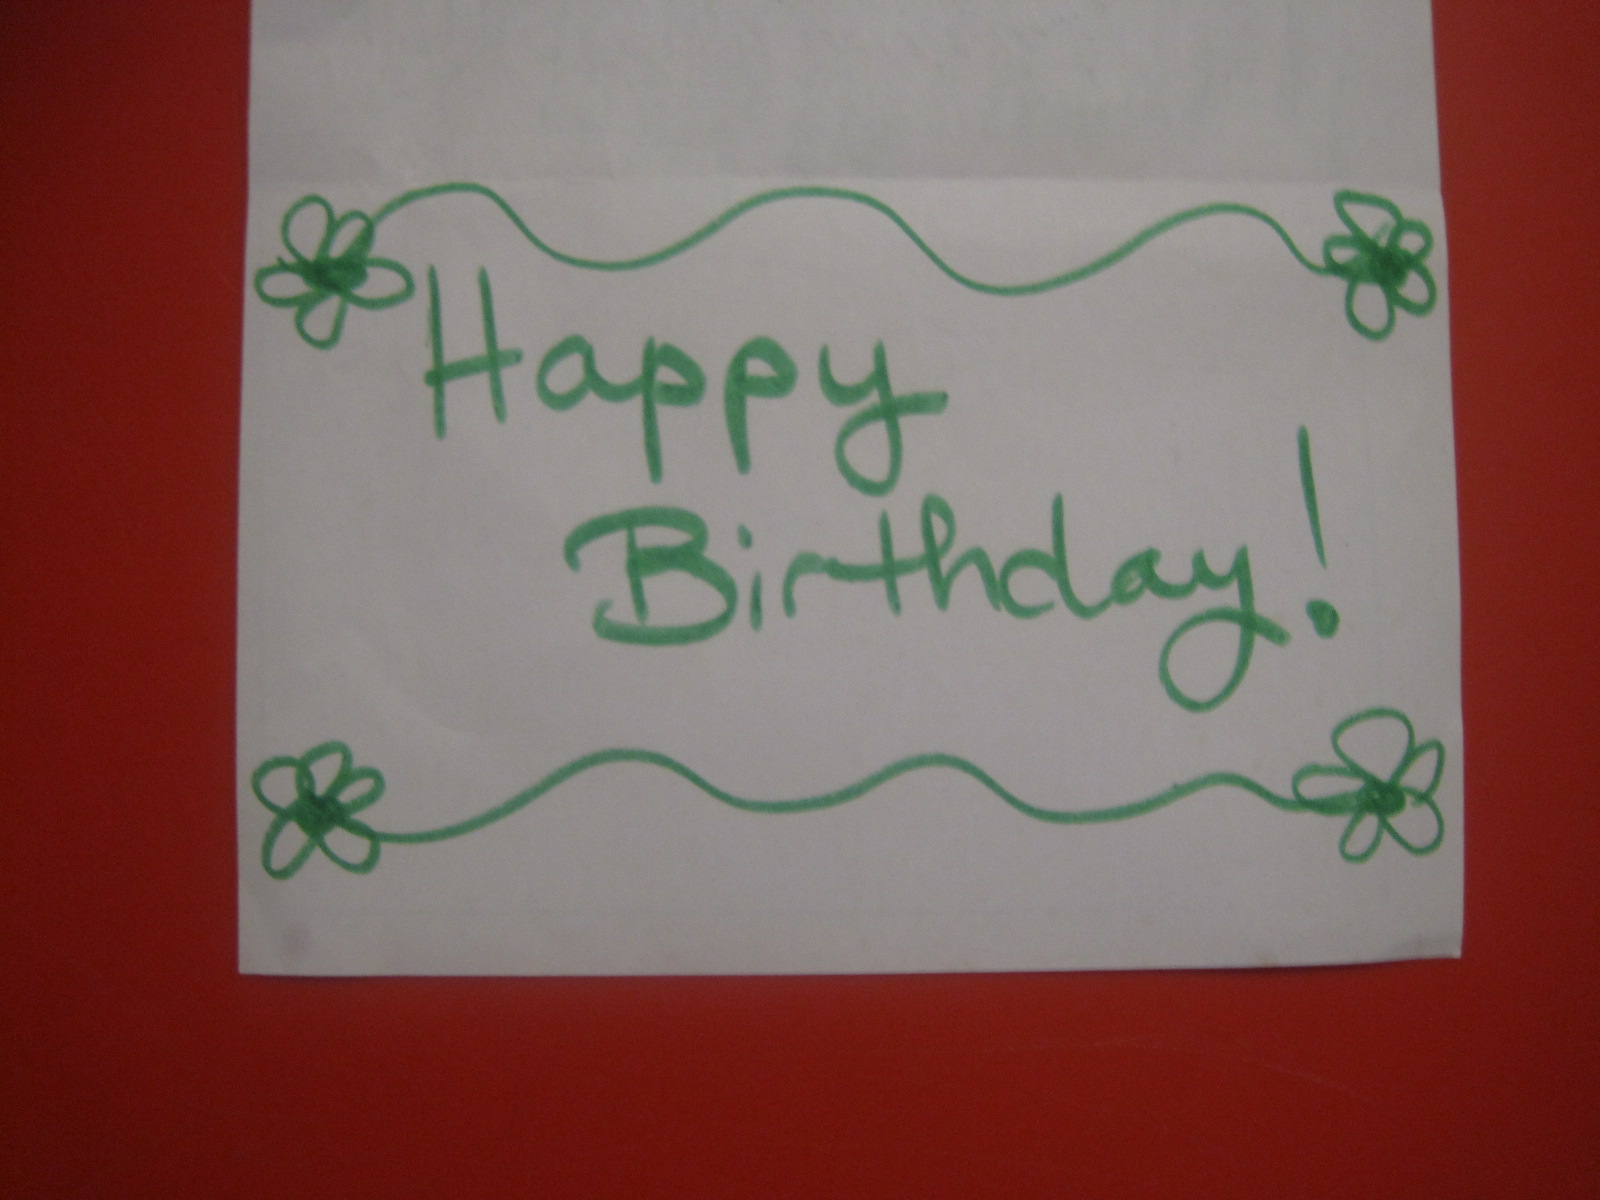
Step 3:  Fold your paper in half and write a message to that special someone!

Unfortunately I forgot to take a photo of the finished product made in January, and it is now March.  So I faked it and made a new card interior for YOU Mr. or Ms. Blog Reader!  Thanks for watching!

--Nancy

Wednesday, February 16, 2011
Marshmallow and Milk Painting

My friend Jill gave me the idea of using marshmallows for paint stampers.  Last night after dinner I decided to try this out.  The kids were already at the table and my little on was already wearing her smock.  This little craft only requires a few supplies and was perfect for my almost 2 year old to participate.  However, be forewarned - I don't know if I started a bad habit of drinking paint.  My little one fully enjoyed licking the marshmallow and drinking the colored milk!
Age: 18 months+
Time: 20 minutes+
Mess/Cleanup: We did not have any spills, so it was only a few minutes to clear the table and dump the leftover milk.  The kids ate their marshmallows.  And, the milk paint easily came off their hands and faces.
What You Need:
  • Large Marshmallows
  • Craft paper, construction paper, or brown paper bag
  • Milk (about a cup)
  • Food Coloring
  • Spoons
  • Shallow bowls or plates with a deeper rim (see green plate in picture above)
  • Smocks for the little ones
  • Paper towels on hand
What I Like This Craft:
Any craft that both of my kids can do at the same time and that doesn't require a lot of clean-up is always welcome.

Step 1:
Lay out paper and put the smocks on the little ones.

Step 2:
Pour a little milk in each of the bowls/plates.

Step 3:
Add a few drops of food coloring to each bowl and stir.


Step 4:
Distribute the marshmallows and begin stamping.

Step 5:
When my son was done painting, he also enjoying mixing all of the colors.  My daughter thoroughly enjoyed eating the marshmallows.

Good luck!  And hopefully no bad habits are set for future crafting projects with real paint!

-Rose @-}---