Showing posts with label Styrofoam. Show all posts

Tuesday, May 3, 2011

No Drama-Diorama: Swing Set & Swimming Pool

This week my son's pre-school class is making a 3D model of their neighborhood.  We haven't been doing as many crafts since the weather has been so nice, but last night after seeing the little neigborhood of houses made by my son's class I was inspired.
Patrick and Batman enjoying their new park.

Age: 4+
Time: 30 minutes+
Mess/Cleanup: 5-10 minutes for all of the paper scrapes
What You Need:
  • 1 flatboard box (I used a pasta box)
  • 1 piece of styrofoam
  • Glue Gun with sticks
  • Scissors
  • Pool Only
    • Plastic wrap (using blue cellophane would also save a step)
    • Blue marker
    • Stapler
    • 2 pieces of white paper.
    • Decorations (my son chose to use self-adhesive glitter stars and numbers)
  • Swing Set Only
    • 1 piece of green felt
    • Glue sticks
    • About 2 feet of yarn
    • 5 popcicle sticks.
    • We added Batman and Slinky Dog

Why I like this craft:
Every day is gets harder to pull my kids off the TV, iPhone, or iPad - and they're only 2 & 4!  And if the weather isn't great going outside isn't an option.  Any inspiration I find I try to bring home and turn it into a craft so we can have an activity before bedtime.  Both my son and daughter has little gumball-machine 'active figures' that are perfect size to 'play' on their new playground.  As soon as my son got up this morning he told me that, "Patrick (the Starfish) and Batman went swimming, and Batman broke the swing."  At least it's functional art!

Step 1:
Cut apart box.  We just need to 2 large rectangles (one for the bottom of the pool, and one for the swingset base), and the strip of flatboard (for the sides of the pool)
Pool:
Step 2a:
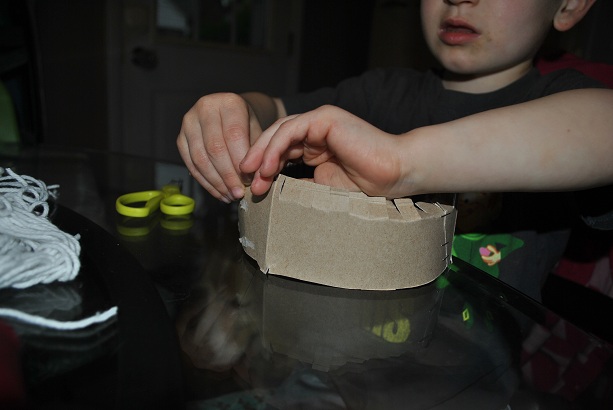
(Mom's part) Take strip of flatboard, arrange it in a circle and staple the ends together.  Using the scissors, snip little 1/4 inches flap all around the strip of flatboard.
Step 2b:
Have your little one fold the flaps inward.  We will use these flaps to attach the edge of the pool to the base.

Step 2b:
(Mom's part) Using the glue gun, apply glue to one of the large flatboard rectangles in the shape of the "pool".  Adhere the edge of the pool to the base.  Using scissors, trim the base to match the edge of the pool.
Step 2c:
Using the white paper, cut out oval for the bottom and strips for the side.  Adhere to the inside of pool.  This will make the water stand out.
Step 3: Making the water.  This was my son's favorite part.  Take a large section of plastic wrap.  Flatten it on the table.  Have your little one use the marker to color the plastic blue.  My son loves this because it looked like he was coloring directly on the table.Step 4: Invert the plastic wrap (so the marker doesn't not get on anyone's hands) and stuff in into the pool.  If needed, fluff it up with more plastic wrap under the blue.
Step 5:  We used a little piece of styrofoam to make the diving board.  I just used the glue gun to attach it.
Step 6:  Have your little decorate the outside of the pool.


Swing Set
Step 7: Using the last flatboard rectangle, using the glue stick, spread some glue and adhere the green piece of felt.  Trim if needed.

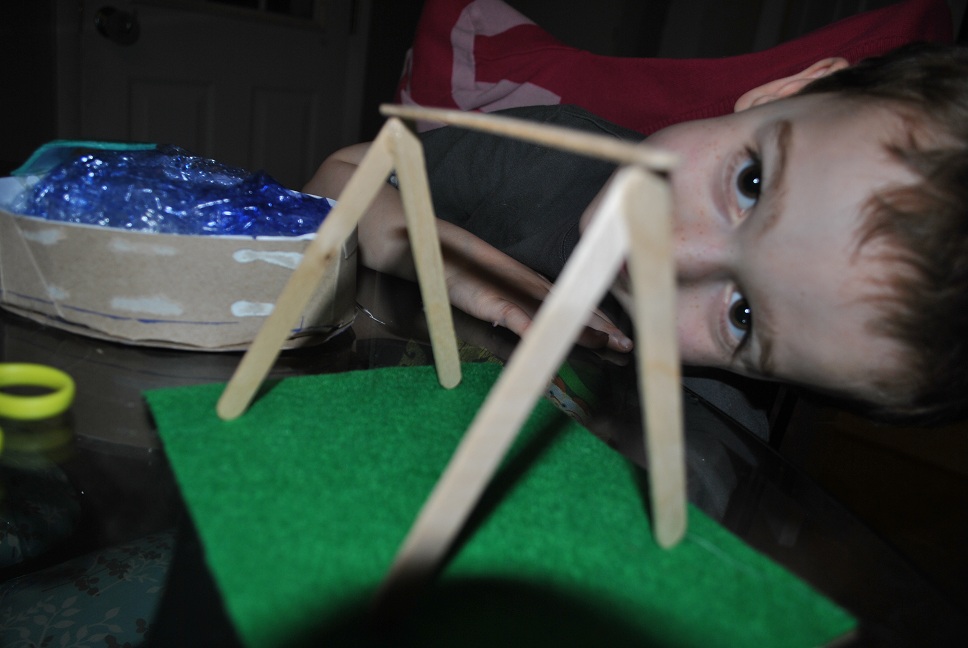
Step 8: Create 2 "V"s the same shape out of the popcicle sticks.  Using the glue gun, glue the top 2 sticks together for each "V".  Let cool for a few minutes.


Step 9:  Using the last popcicle stick, using the glue gun, attach the top piece.

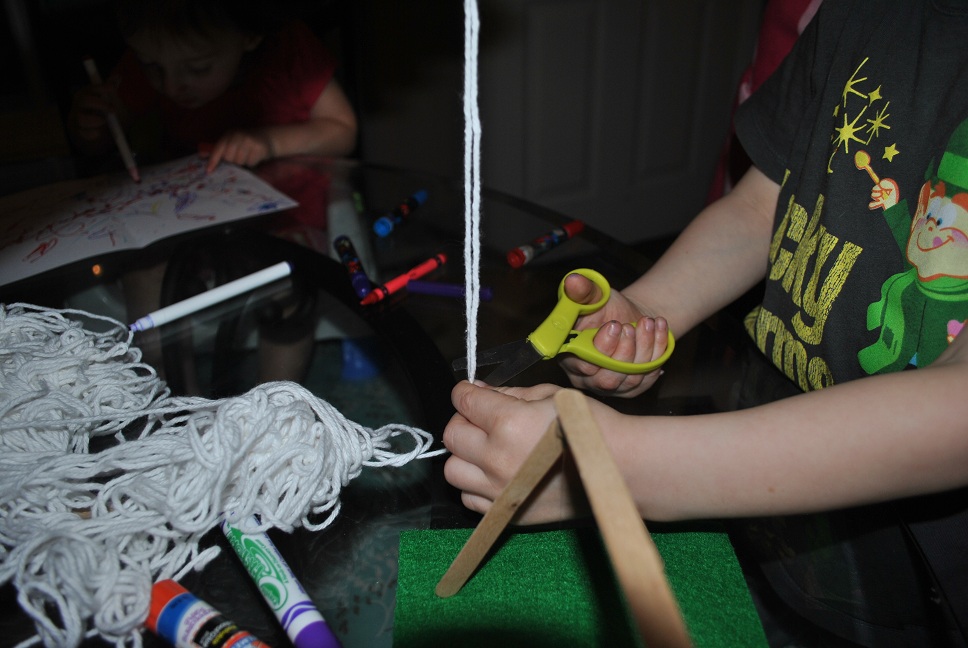
Step 10: Cut 2 pieces of yarn about 12" each.  This was a good exercise in measuring for my son.  Tie each into a "U", using the top stick as the base.  This will create your 2 swings.

Step 11: Cut 2 small rectangles out of the styrofoam.  Cut tiny slits into the short ends.  Insert the strings into the slits.  Voila - you have swing seats!
Step 12: Using the glue gun, glue the four posts to the felt.

Phew.  That's it.  Now bring on all of the mini action figures!


-Rose @-}---

Sunday, March 6, 2011

Barbie Cake and Cake Pops

Birthday party time at my house!
My almost-four-year-old repeatedly insisted upon a bicycle cake, helped review designs online, and chose a template for chocolate bike toppers on the cupcakes. 

Then she saw the Barbie-like cake topper in the cake decorating aisle.

All thoughts of that bike cake flew out the window.

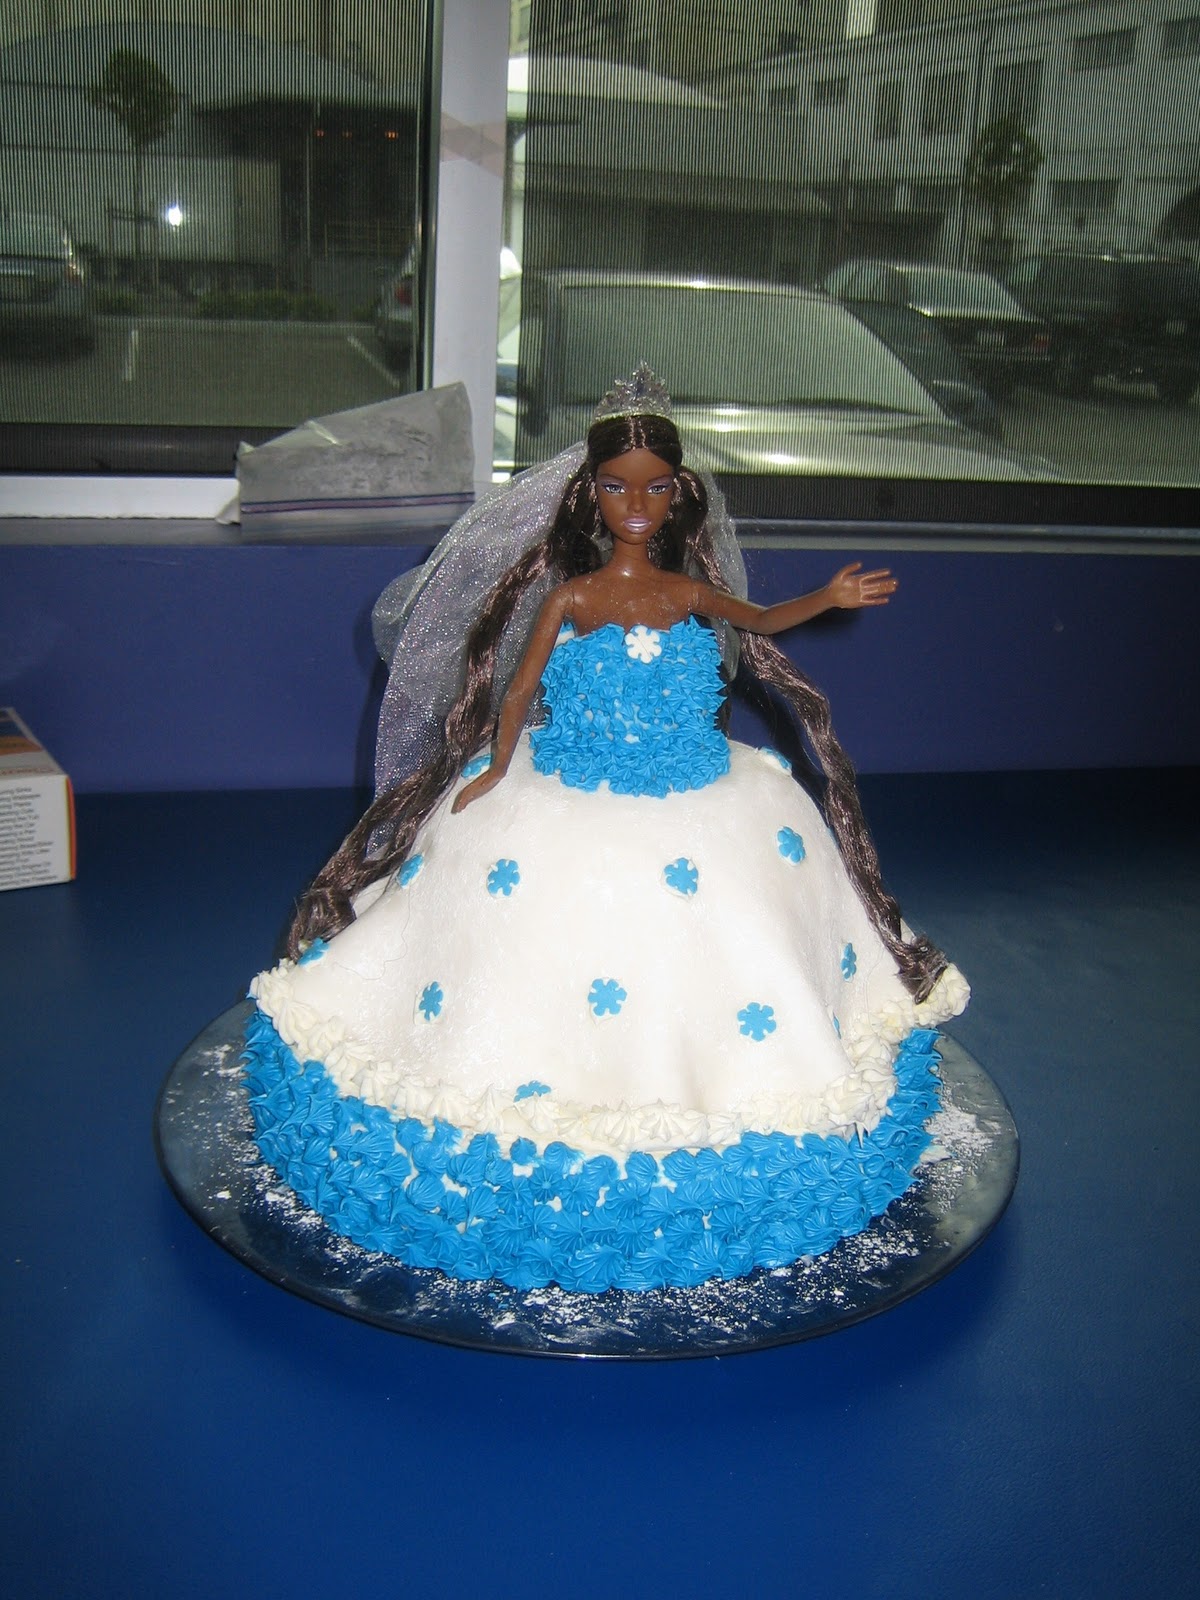
Here are the resulting birthday sweets we made.  Sorry if the instructions are rambling.  You'll have to click on some links to get the full instructions. 

Age:  These are mommy crafts.  My almost-four-year-old helped with several steps but also got yelled at quite a bit for potentially destroying my hard work.  So, involve your kid for short periods of time in a controlled manner and have a distraction handy to keep them away while you do the hard work.  My husband took our kid to the playground for a while :)

Mess/Cleanup:  This is extremely messy, took two days of work and over an hour of cleanup after the birthday party.  Why didn't I buy a sheet cake from Safeway? 

What you need:  I used other people's instructions for all of these crafts but I'll share some shopping lists and tips here.  I made over 100 cake pops/balls and one doll cake for a party with 40 people and we had too much. 

Grocery shopping list
3 Cake mixes (and ingredients required for cake mix instructions-generally eggs and oil)
3 boxes of butter (12 sticks)
1 package mini marshmallows
1 small box and 2 2-lb bags of powdered sugar
1 bag of chocolate chips (if you want milk or dar chocolate pops instead of the white chocolate flavor of candy melts)
Vanilla extract
Parchment paper
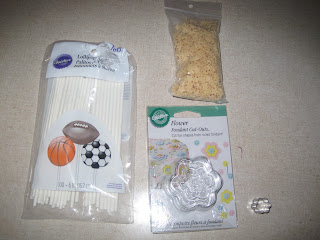
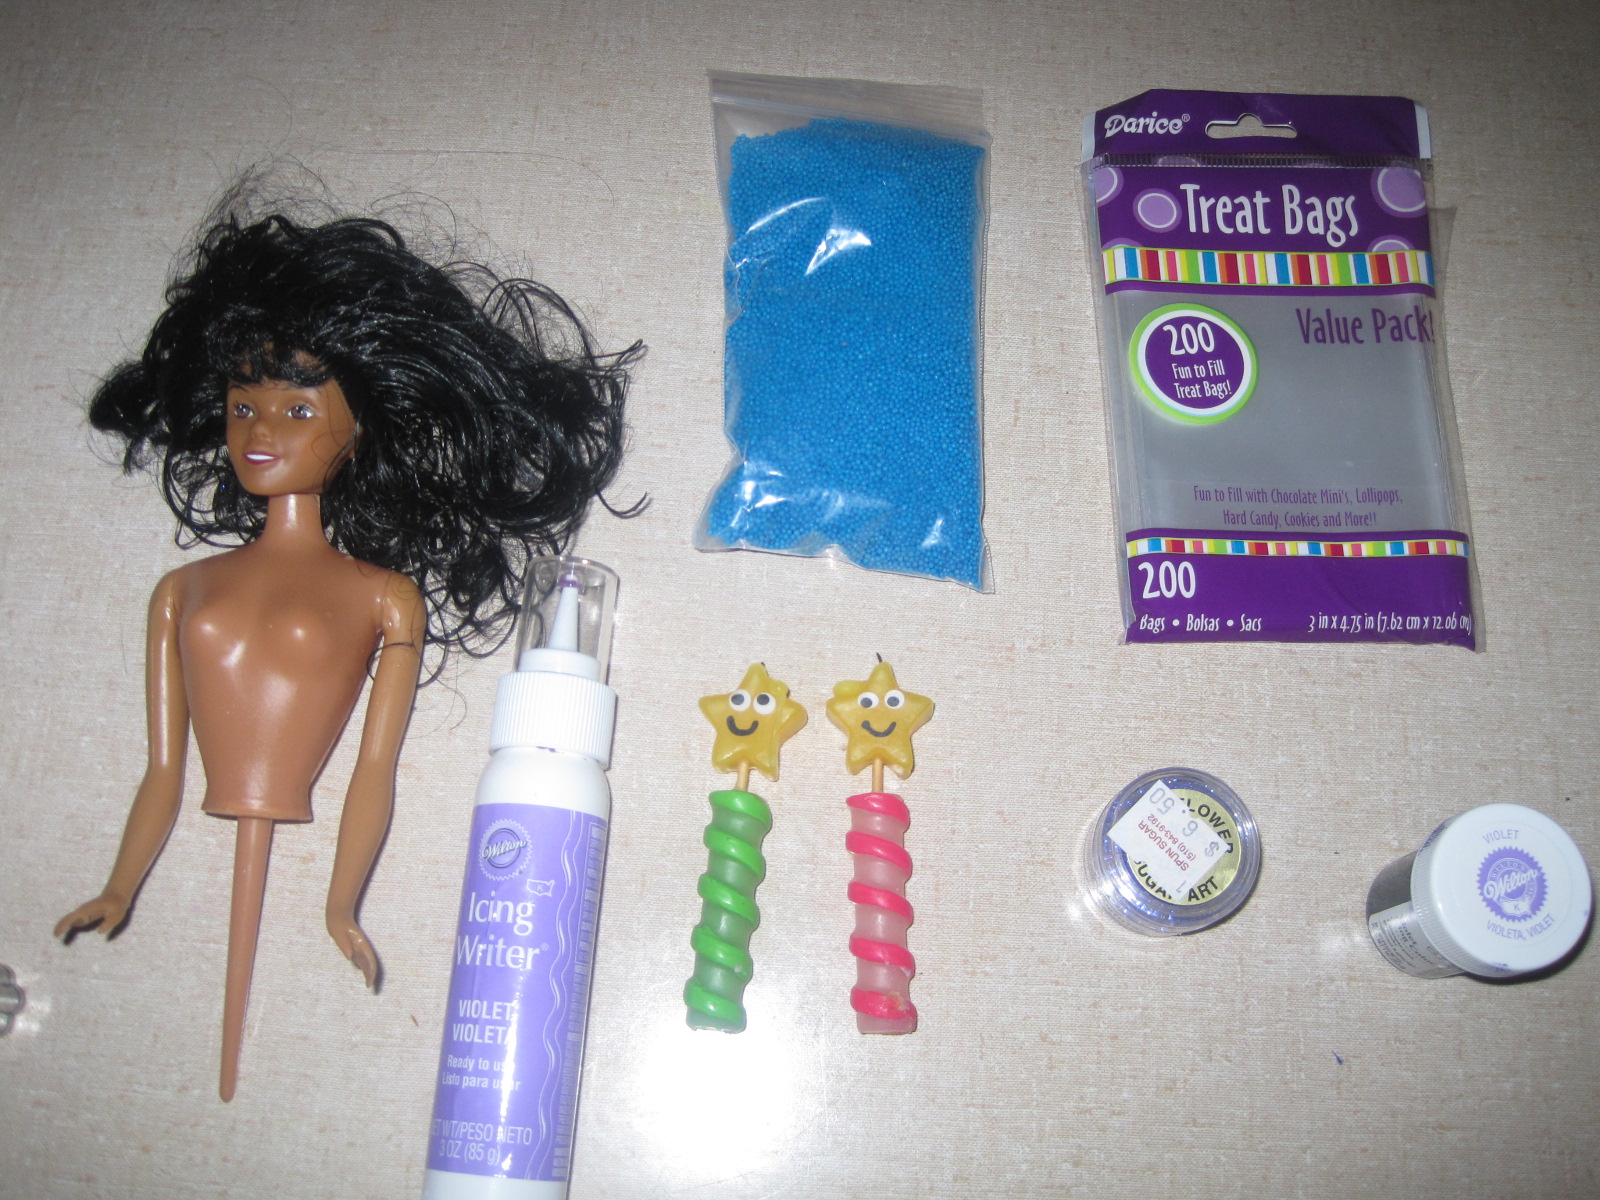
A few of the supplies
Craft store shopping list (I went to Michael's)
Doll cake topper (or substitute a Barbie doll)
Doll skirt cake pan if you don't have an oven-safe bowl
Fancy star-tipped Wilton birthday candles
Paste food coloring (I used purple)
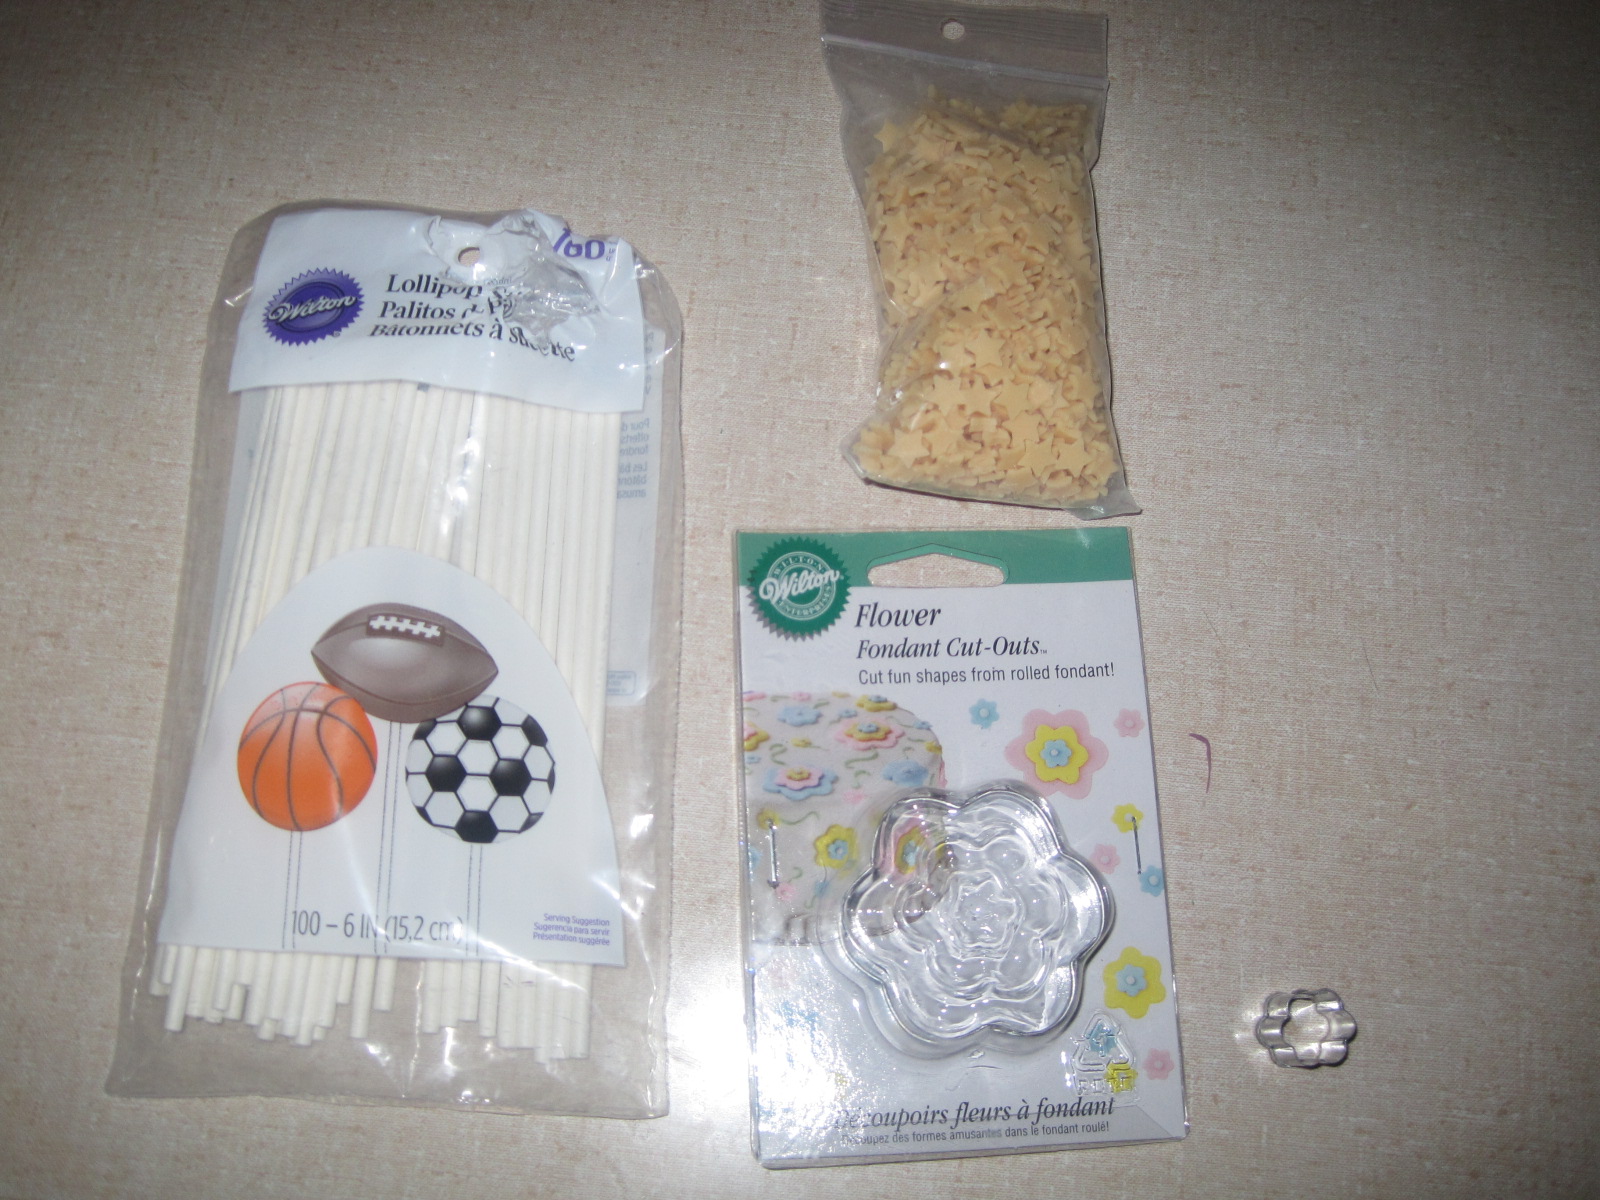
100 count 6" sticks for lollipops
100 count plastic bag lollipop covers
4 bags of candy melts
Colored icing writer
Small flower shaped Wilton fondant cookie cutter
Small nonpareils
Star shaped white chocolate (I used stars from Spun Sugar in Berkeley) or star shaped candy confetti
Luster dust (I used disco blue from Spun Sugar in Berkeley)
3 2" thick styrofoam sheets for the cake pop display (I got 3 shaped like a circle.  Bakerella shows a cupcake carrier that can hold a rectangular shaped one).
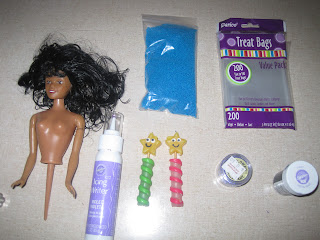
That doll topper is creepy, eh?

What else you need at home:
  • Paint brush for luster dust
  • Rolling pin
  • Large Pampered Chef batter bowl (or other oven-safe glass bowl)
  • Large microwave safe bowl for marshmallows (my kitchen is not well stocked with these)
  • Plate or pan for doll cake (I used a white ceramic Ikea quiche pan with fluted sides)
  • Box or pan to protect your doll cake (I used a roasting pan with handles)
  • Boxes or pans to transport your styrofoam cake pop displays (we used a combo of jelly roll pans and a really big cardboard box)
  • Platters for cake balls
  • Foil to protect your melts-like-sugar creations
  • An empty shelf in your freezer!!!!

Cake Pops and Cake Balls Instructions and Tips

Seems like half the people I know already knew about these cake pops before I did.  The book and the blog are a huge hit!  Cake pops are charming and adorable and mere photos of them will make you squeal with delight.  I plan to buy the book very soon. 
www.bakerella.com

Here are the cake ball/cake pop instructions.  I made my cake pops and cake balls with yellow cake mix and homemade buttercream with violet colored candy melts and a smaller batch with semi-sweet chocolate chips.  The ones made from chocolate chips were reportedly quite delicious but I didn't taste any. 

I thought it was tough getting a smooth coating on both the cake balls and cake pops.  It's ok if your first tries are lumpy (at least that is what I told myself). 

Cake balls:
http://www.bakerella.com/red-velvet-cake-balls/

Cake pops:
http://www.bakerella.com/hope-these-put-a-smile-on-your-face/

Cake Pop Tips: 
Plan ahead for an hour to cool your cake before crumbling, and three hours to make two batches of cake pops. 
Make room to freeze your balls (heh heh) ahead of time.  Room-temperature balls during assembly = disaster. 

Enlist your kid to put the sprinkles on the pops while you dip.  The candy melts harden pretty quickly and your fingers may get too sticky to sprinkle very well.

Crumble the cake into a really fine texture and eat the browned crusty corners.  It doesn't crumble well.

Homemade buttercream frosting tastes infinitely better than canned frosting.  Save a little extra to add decorations to your Barbie cake. 

Buttercream frosting:
http://www.foodnetwork.com/recipes/gale-gand/quick-vanilla-buttercream-frosting-recipe/index.html

Tip:  I omitted the heavy cream.  Make enough for your cake pops as well as another batch to frost the Barbie cake. 

Barbie Cake:
Grease your glass oven-safe bowl and fill with one box of cake mix.  I used a bit of cake mix to "flour" my bowl before baking so it wouldn't leave a white flour residue.  Bake it for 50 minutes at 350 degrees.  Use a knife to test for doneness and allow 2-3 hours for the cake to cool before frosting. 

After the cake cools cut the wide end of the cake so it will sit flat on the plate and give your kid the scraps to eat.  They will start asking for a bite of cake as soon as the oven starts emitting a nice cake aroma so you will be glad to have a scrap to spare to stop those pestering and relentless requests for cake! 

Once the cake is cool put it on the display plate you'll use for the finished cake.  Frost the cake with a crumb coat layer of buttercream.  Turn the TV up loud because you WILL curse the buttercream as it repeatedly picks up layers of brown crumbs to mar the beauty of your fantastic bowl shaped cake.  This is a terrible shape to frost!  Smooth it out really well to get better results with the fondant skirt.  Now give your kid the frosting beaters to lick. 

If you've never worked with fondant before you might want to do a quick internet search for tips on working with fondant frosting while the cake is cooling.  There are a ton of videos and instruction pages out there.  Basically, you need to use powdered sugar the same way you use flour on the surface and rolling pin when rolling out your fondant. 

Marshmallow fondant:
Use Rose's instructions for fondant and roll it out for the dress. 
http://happycraftykids.blogspot.com/2010/12/really-tasty-edible-play-doh.html

Tips:
I added a whopping amount of paste food coloring to get a rich purple color (maybe half a teaspoon?)  My fondant and my hands were a lovely shade of purple afterward.  Take a bath afterward to get your hands back to a normal color! Unfortunately I finished my cake minutes before it was time to go to the party, but it was a good conversation starter with the other parents. 

To make the skirt, lay down two sheets of parchment paper and sprinkle with powdered sugar.  Roll the fondant out in a big circle and reserve some dough for the bodice and flower decorations.  Lift it occasionally to keep it from sticking to the parchment paper.  Trust me, I learned this the hard way. 

Swipe at your circle lightly to get rid of the powdered sugar left over on your fondant before you put it on the cake.  Drape the fondant over your frosted cake.  Use a table knife to cut the bottom level with your cake.  You can frost over this if your cuts look messy.  Mine were ok today (the first one I made years ago looked too messy so I covered it up.  Here is an old photo of that one, which had much more frosting piping. 
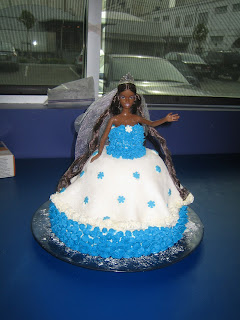
The bodice is huge to 1) cover the electrical wires coming out the back of this high-tech Barbie and 2) to intentionally promote a more normal body image shape.  Yes, I'm serious.  It wasn't just an accident!
Apply luster dust with a small dry paint brush to add some sparkle to your cake and to cover up the remaining powdered sugar. 

Use scraps to create a bodice for your Barbie's dress.  I made mine with a heart shaped neckline :)

Put some nonpareils onto some scraps of fondant and roll over them with a rolling pin.  These suckers fall off really easily.  My almost-four-year-old was observing and advised I use the smallest fondant flower cutter.  This was sage advice and reduced the number of candies that fell off.  Cut out some tiny flowers from your bumpy fondant and glue them onto the skirt with leftover buttercream frosting. 

GOOD LUCK packing up all these darned things if you have to transport them to a birthday party somewhere else!!!!  Map out the least bumpy route you can find and try not to strangle the driver if he makes a sudden stop. 

Now enjoy your party!  And try not to talk people's ears off about how proud you are of your cake pops and cake balls and Barbie cake or you'll upstage the birthday girl.  Unless, of course, you made these for your own birthday.  ;)

Nancy   

Thursday, December 9, 2010

Preschooler-Easy Glittery Ornaments

First off - I love making these ornaments!  I remember making these 30+ years ago with my mom and siblings.  My preschooler is now old enough to sit still for 30 minutes and has some fine motor skills to write some letters.
The camera doesn't do the glitter justice.  It's so pretty and my 4 year old did 90% of this himself.
Age: 2 & up.  For what it's worth, I did try this craft with my 19 month old -- but it ended in a glittery mess and her off to naptime.  However, can glitter ever be messy?  It just looks like Tinkerbell visited my kitchen.
Time: 30 minutes - 1 hour
Mess/Cleanup:  The glitter and glue can get a little messy.  But it really takes less than 5 minutes to clean up.  The kids stayed relatively clean.  I just needed some baby wipes to wipe down their hands.
What You Need: 
  • Styrofoam (my grocery store still uses styrofoam to package veggies)
  • Paper plates (2 plates per child, plus 1 for the glue plate)
  • Glue (I used Tacky Glue and it works really well)
  • Paint brushes
  • Glitter (I love Martha Stewart's tinsel glitter)
  • Scissors
  • Ribbon
  • Hole punch

Substitutions:
  • Craft foam for styrofoam.  I'm also thinking this will work really nicely with salt dough.
  • Scrap paper instead of paper plates
  • Any embellishment in lieu of glitter. But I do love glitter.
  • Dental floss, flishing line, or just a tree hook to attach ornament to the tree
  • Pencil to punch hole through stryfoam instread of a hole punch
Why I Like this Craft:
For me it all about the memories and I get some more glittery ornaments for my tree!

Step 1:
Trace and cut out shapes on styrofoam.  I just used the lid of a sippy cup for the circles.  When I was little, my mom used to trace cookie cutters.

Step 2:
Punch a hole about .25 inch from the edge.  This will be used to string the ribbon hanger later.

Step 3:
Squirt some glue on a paper plate and arm your smock-covered little ones with paint brushes. Notice my toddler is smockless.  It just wasn't worth the battle.  Let them cover one side of the styrofoam with glue. The paint brush will help with a nice even coat.  After this glue step is over, switch paper plates.  Have a "gluing" plate and a "glitter" plate.  This will make it easier to sift the excess glitter back into the bottles.

Step 4:
Have your little ones choose their favorite color glitter and sprinkle the ornament to cover.  Shake off excess glitter.
I would recommend removing the glue and brushes from the table before this step.  I would also recommend having a well-rested toddler if you have a very little one participating.  Our glitterstorm was triggered when I attempted to take away the glitter shaker.


Our meltdown occurred shortly after this picture was taken.

Step 5:
Have mom (or dad) transfer the remaining glitter back into the glitter tubes. Let dry for a minute or two.

Step 6:
Paint a stripe or letter (my son painted his initial) with glue over the glitter. Stencils could also be used.


Step 7:
Sprinkle a high contrasting color over the glue.  Shake off excess glitter and transfer the remaining glitter back into the tubes.

Step 8:
Same steps, other side.

Step 9:
Thread ribbon through hole.  Hang to display.

Variations:
I think you can really do a lot with this craft.  You can really make this a craft for adults, as you can get pretty intricate in your design. 
  • Edging: You could punch holes around the edge of your shape. After all of the glitter detail is complete, whipstitch the edges with a little ribbon.  You could also roll the edges in glue and cover with a contrasting glitter or a little ribbon.
  • Garland: You can cut out a bunch a little circles or stars and punch a hole in the center or on top.  Once all of the individual pieces are covered in glitter, thread the pieces with ribbon (I think I might try this next).
  • Accents:  If you have any plastic stencils, like these, after you do the base layer of glitter place the stencil on top of the shape and paint the glue over the stencil.  Lift stencil and sprinkle the contrasting glitter over the glue.  (This is also on my to-do list). 
have fun!
-Rose @-}---

Wednesday, November 24, 2010

Make-Your-Own Connector Set Toy

Background:
When I was little my mom used to save everything if you she thought it could potentially be useful in a craft or as a substitute for a toy.  For example, those little tins on the ends of biscuit containers served as my Barbie's dinnerware for years.  She also saved the styrofoam packaging from groceries for us to make a variety of glittery Christmas ornaments.  That styrofoam  is pretty durable, since 30+ years after I made those ornaments they still make their yearly appearance on her Christmas Tree.  My local grocery store packages all of their fruits and vegetables styrofoam trays and I started to feel really guilty just throwing them away.  So, here's my idea for reusing stryofoam .... Make-Your-Own Connector Toys, something similar to K'nex.

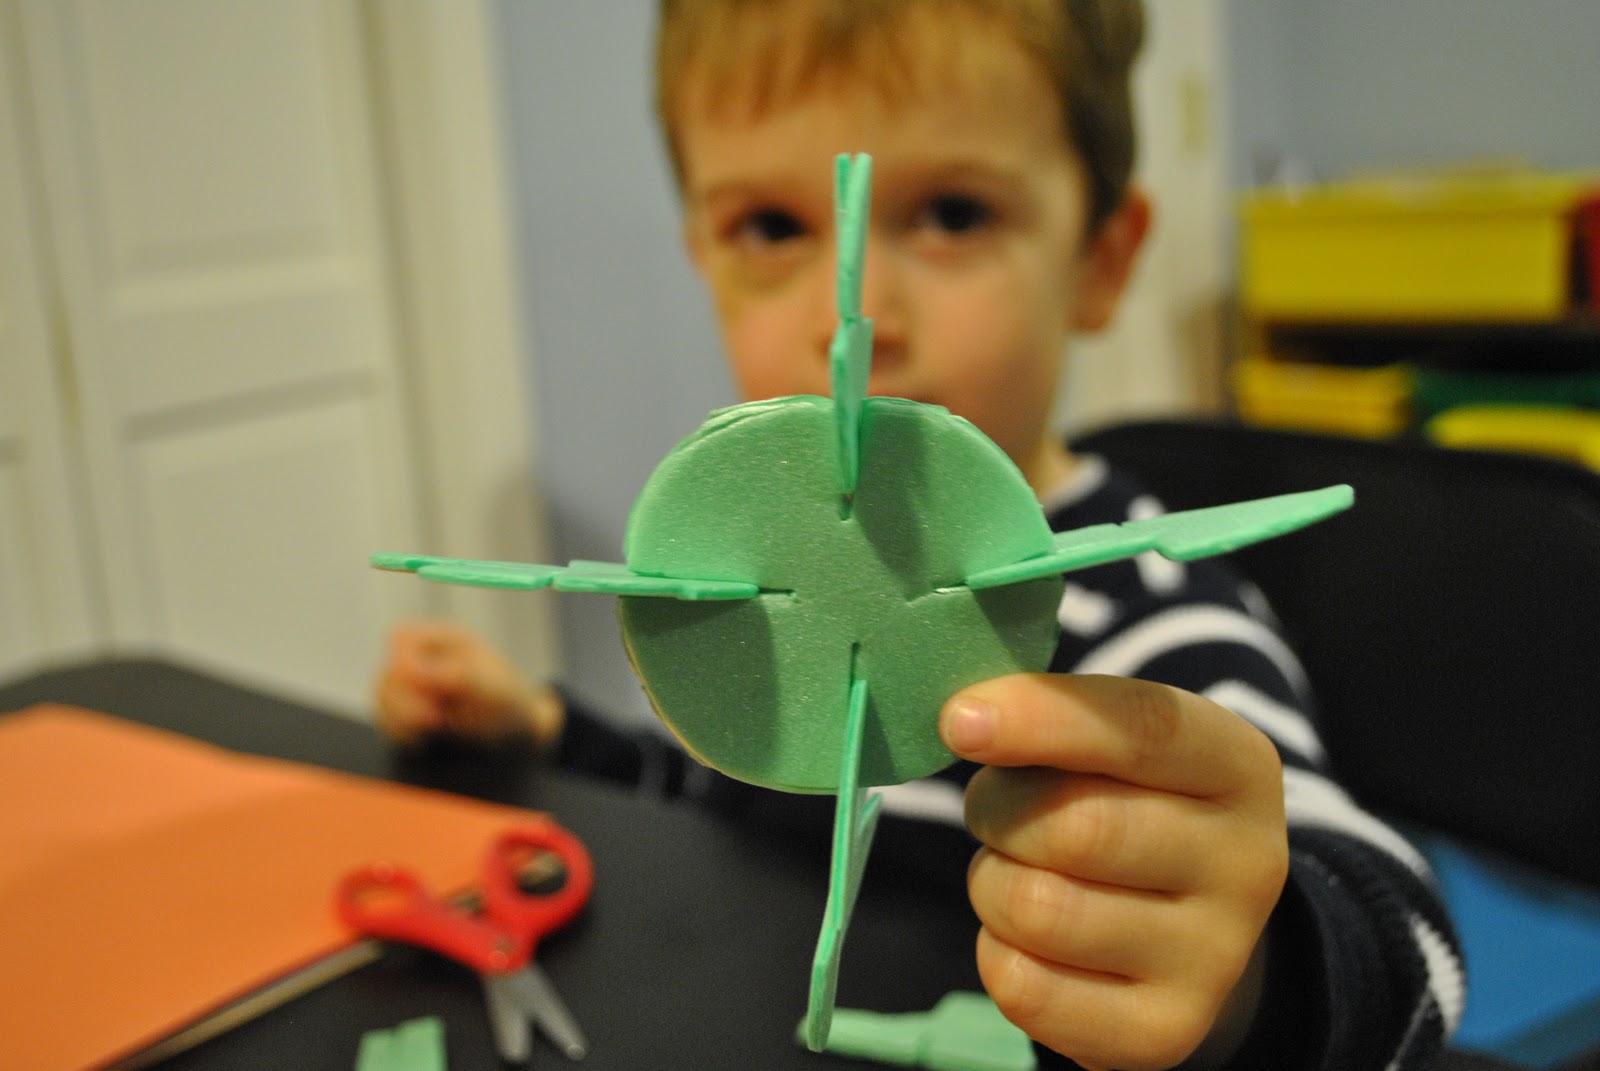
It's a bird, a plane?  Who knows... but it was fun!
Age: 3-10 years
Time:  15-30 minutes + play time
Mess/Cleanup:  Really easy clean-up.  Just brush the leftovers and broken pieces in the trash.
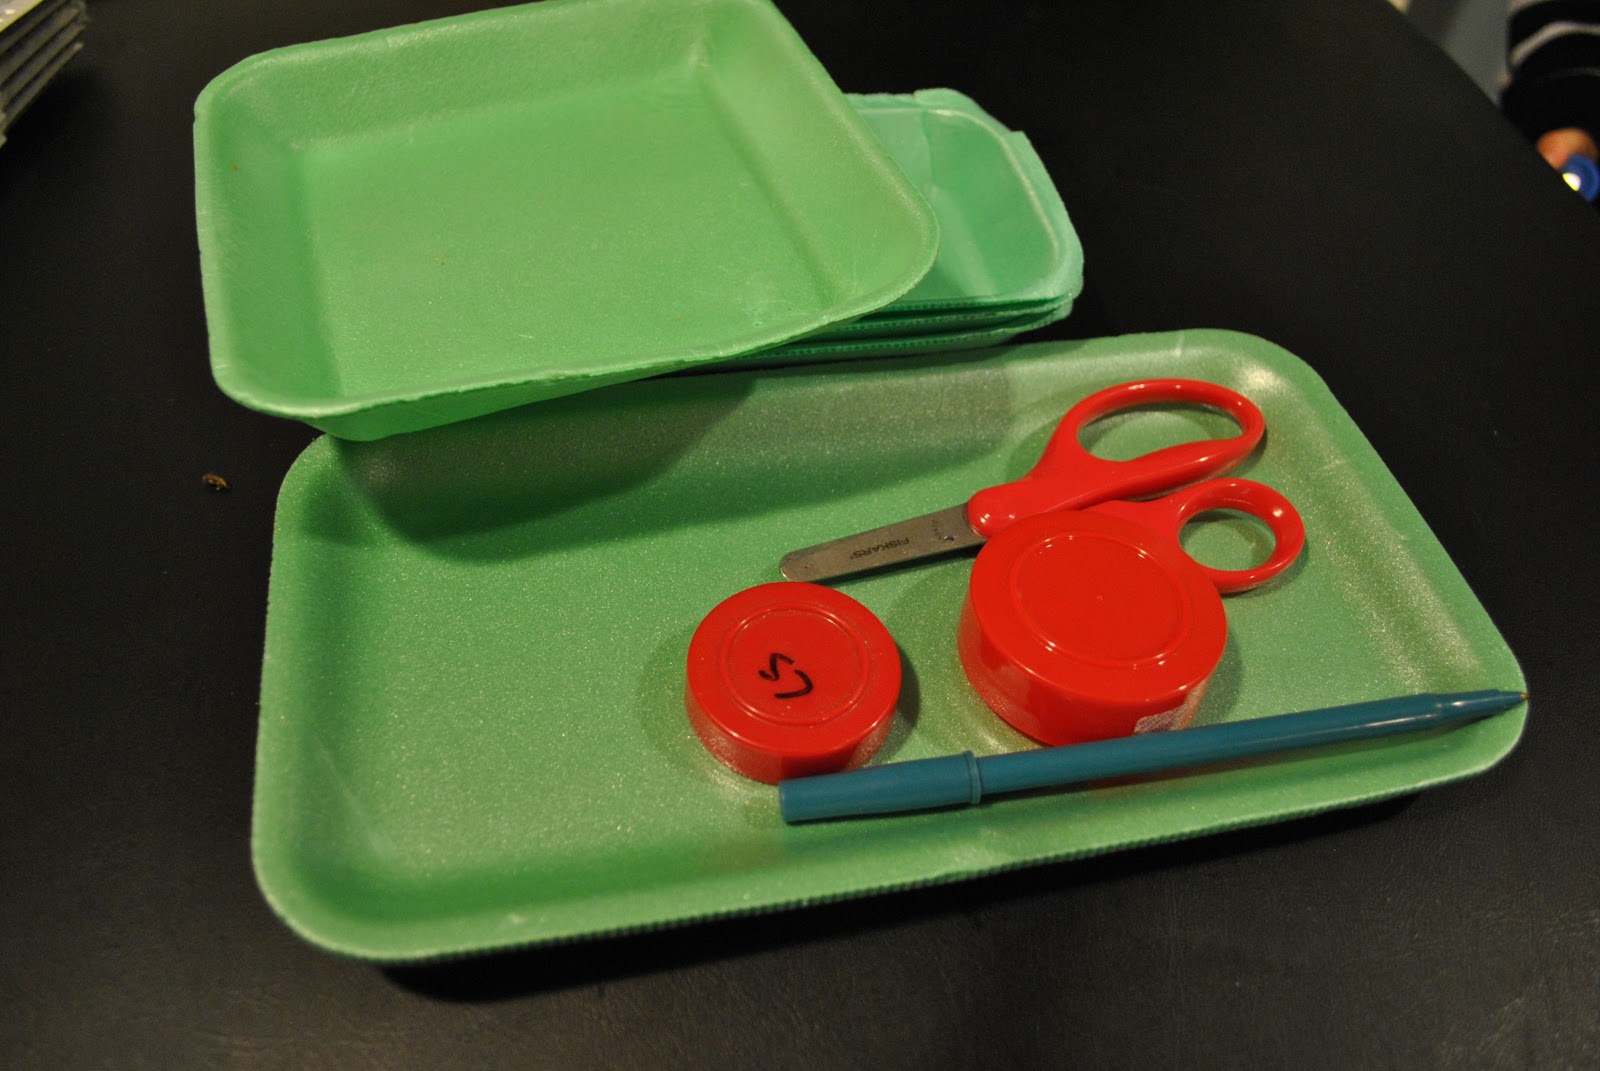
What You Need: Scissors, Marker/Pen, Styrofoam Packaging, Something to trace circles (I used lids from my spice containers)
Why I Like This Craft: My son loves to build stuff; however most of our building toys have a million pieces and it's inevitable that 1/2 the pieces are missing.  When I find these missing pieces in my shoe or in the bottom of my purse I'm always tempted to throw it away.  With this craft, it's an activity and a toy.  And if one of the pieces end up where it's not supposed to be I can thow it away without the guilt.  It was destined for trash anyway!

The Stuff: Scissors, Pen, Spice Lid, Styrofoam
How To Make This:
  1. Trace/Draw shapes onto styrofoam
  2. Cut out shapes.  My 4-year loves his safety scissors and they work perfectly on stryfoam.  He was able to easily cut of circles, squares, and various "freeform" shapes.
  3. Cut out little notches around the shape.  These notches will allow you to connect the pieces together.  Depending on the age of your child, you may want to do this part.  My son got a little scissor-happy and a number of the circles transformed into half-moons, so I took over this step and used my super-sharp mom scissors to cut the notches.
  4. That's it!  You're ready to create!

Enjoy!
-Rose
 @-}---