Showing posts with label Christmas. Show all posts

Friday, December 23, 2011

Hole Punch Wreath Cards

As usual, we're always scrambling around last minute. This time it was the night before the last day of daycare before the little Christmas break. The cards I ordered haven't arrive (the just arrived this morning, Dec 23rd, ergh!) and we had to whip up some festive gift card holders for the kids' teachers .  I got some minimal supplies and this is what we came up with.
  •  Age: 2+
  • Time: 15 minutes for 4 cards
  • Mess/Cleanup: easy breezy @ < 5 minutes
  • What You Need:
  • Why I Like this Craft: I love using my new scalloped hole punch/paper shapers.  I think it may be one of my favorite tools in my crafting closet.  Kids can easily punch the cutouts and glue them on.  The finished product looks like a wreath and with minimal meltdowns (from me or the kids).
Step 1:
Using the punch, punch out the pieces in the green paper.  Once the edges of the paper were used my son cut straight lines around the voids so he can move the tools towards the inside of the paper.


Step 2:
Using the red paper, trace a circle (using a cup as a guideline).

Step 3:
Using either a glue sticks or regular craft glue, encircle your traced line with glue.  I don't have a picture of this step, because my 2-year old started eating the glue sticks and gluing various items to my table. I brought out the craft glue, had my 5 year old draw the glue circle, then locked the glue up in the cabinet to avoid another meltdown.

Step 4:
Have you little ones place the green circles on the glue line. 

Step 5:
Decorate your wreath with pom-poms and stickers.


Again, this isn't rocket science, but it is a nice little activity.  Enjoy! 
-Rose @-}--

Friday, December 17, 2010

Graham cracker gingerbread house

This little edible house is a super fast activity.  We made this right before bedtime because the graham cracker house my daughter made at pre-school that day got squished on the way home and the poor little dear was sobbing over the crushed mess in her backpack. 


Time:  10-15 minutes
Age:  2-3+
Mess/Cleanup:  5 minutes for a simple house like this one
  • What you need: 
  • Graham crackers
  • White can of frosting
  • Candy for decorating
  • Optional:  Santa hats for Halloween pumpkin and your kid
Substitutions/suggestions: 
Use whatever food you have on hand.  We had half a bag of peanut M&Ms left over from Halloween and some rainbow sprinkles.  I planned to use some candy canes but didn't need them.  Pre-school used raisins and banana chips. 
You could also just buy one of those gingerbread house kits.  I got the mini village this year and it is terribly cute!!!! (See photos at the end)

The holidays all blend together these days
Step 1:  Crack your graham cracker into pieces for the walls. 


Next time I might make the house square for added stability but this worked fine.  You could add an empty milk carton or juice box to the middle to make it stronger, too.
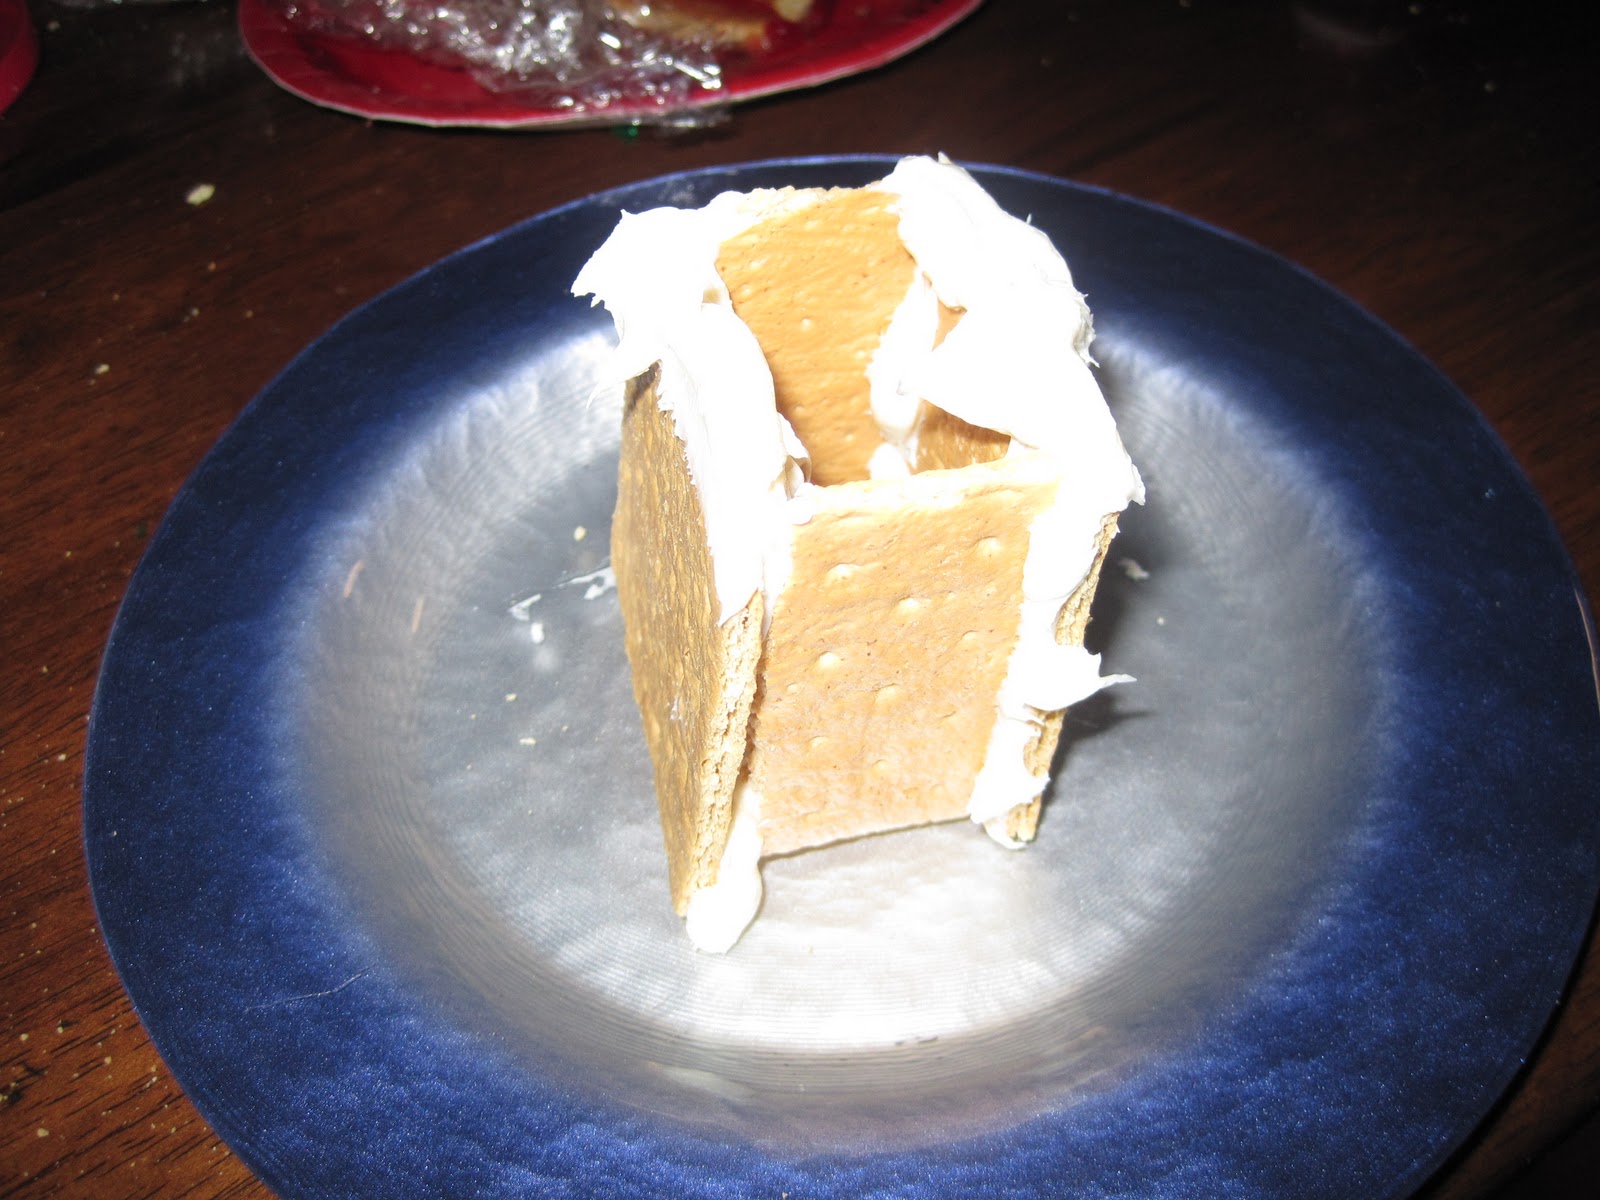
 Step 2:  Put frosting on the edges of the biggest graham cracker pieces and stick 'em all together to make four walls

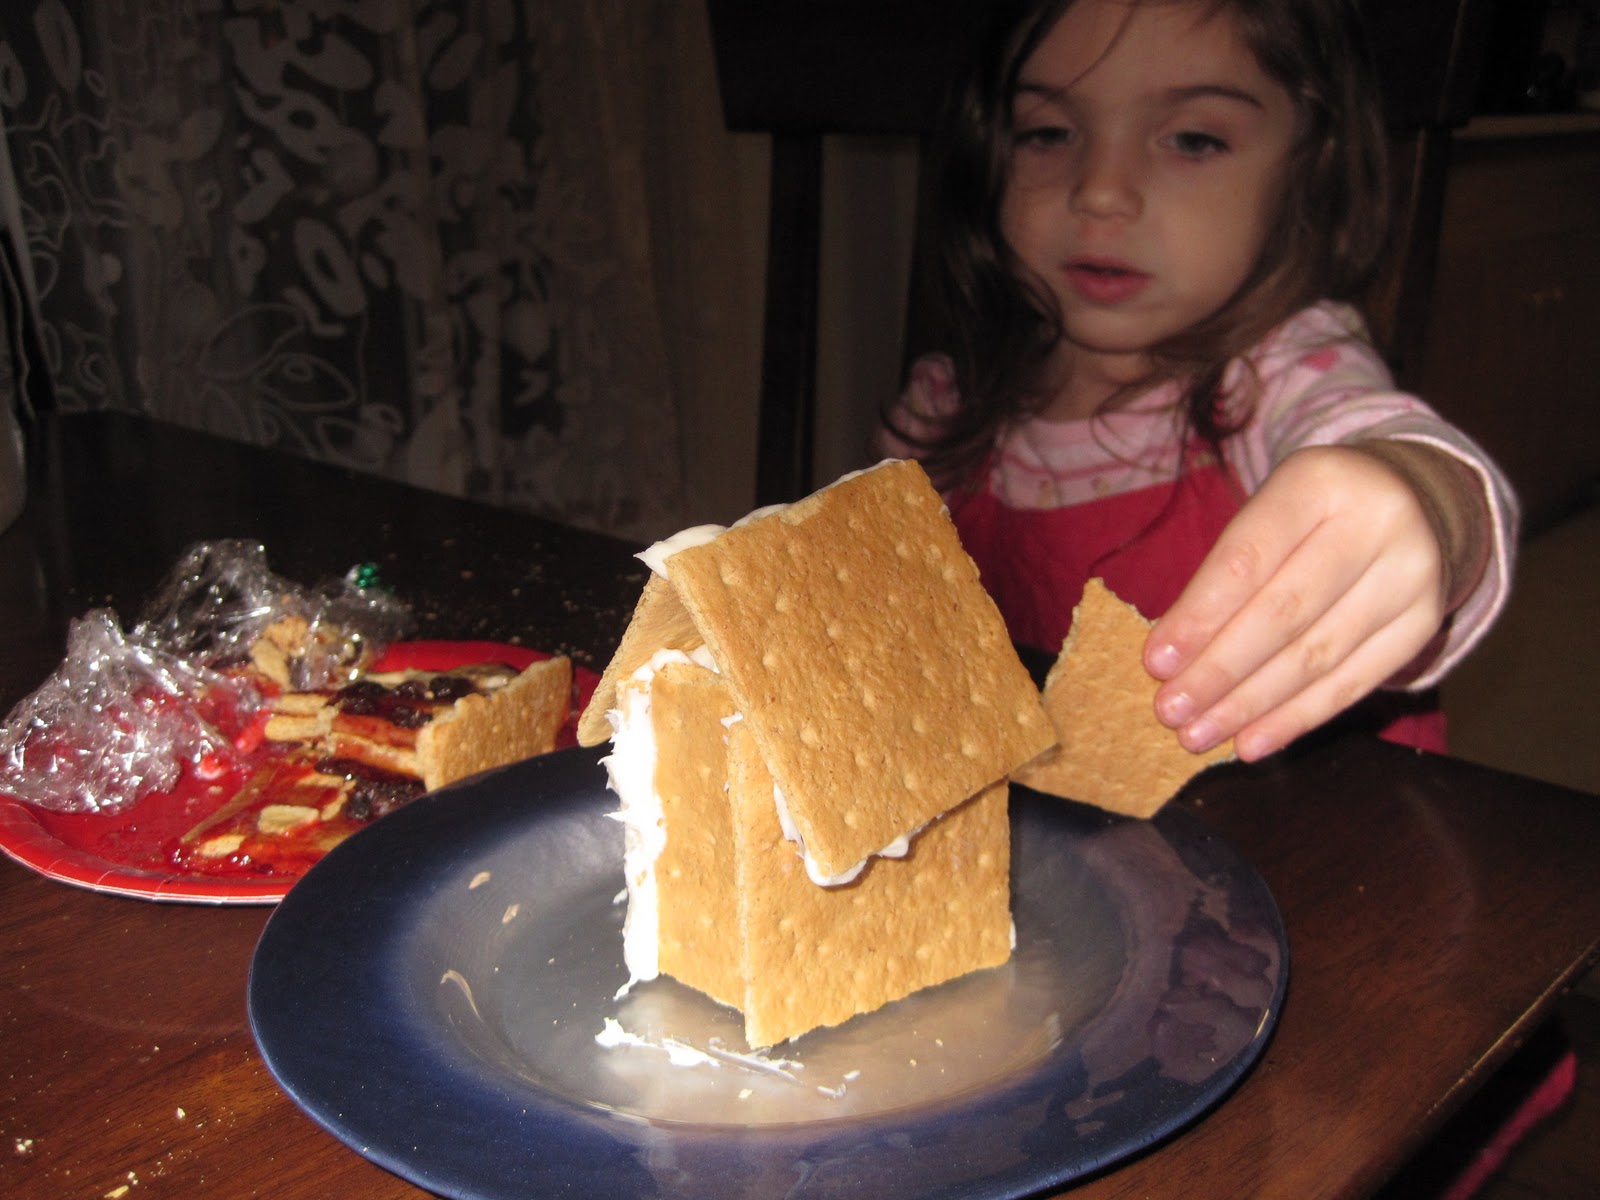
Step 3:  Snap another big graham cracker in half, dab some frosting on the edges, and make a pointed roof.  Note:  My roof slipped several times because I had too much frosting, but it stayed put after a minute.


This odd little scrap of broken graham cracker became a tree on the side of the house
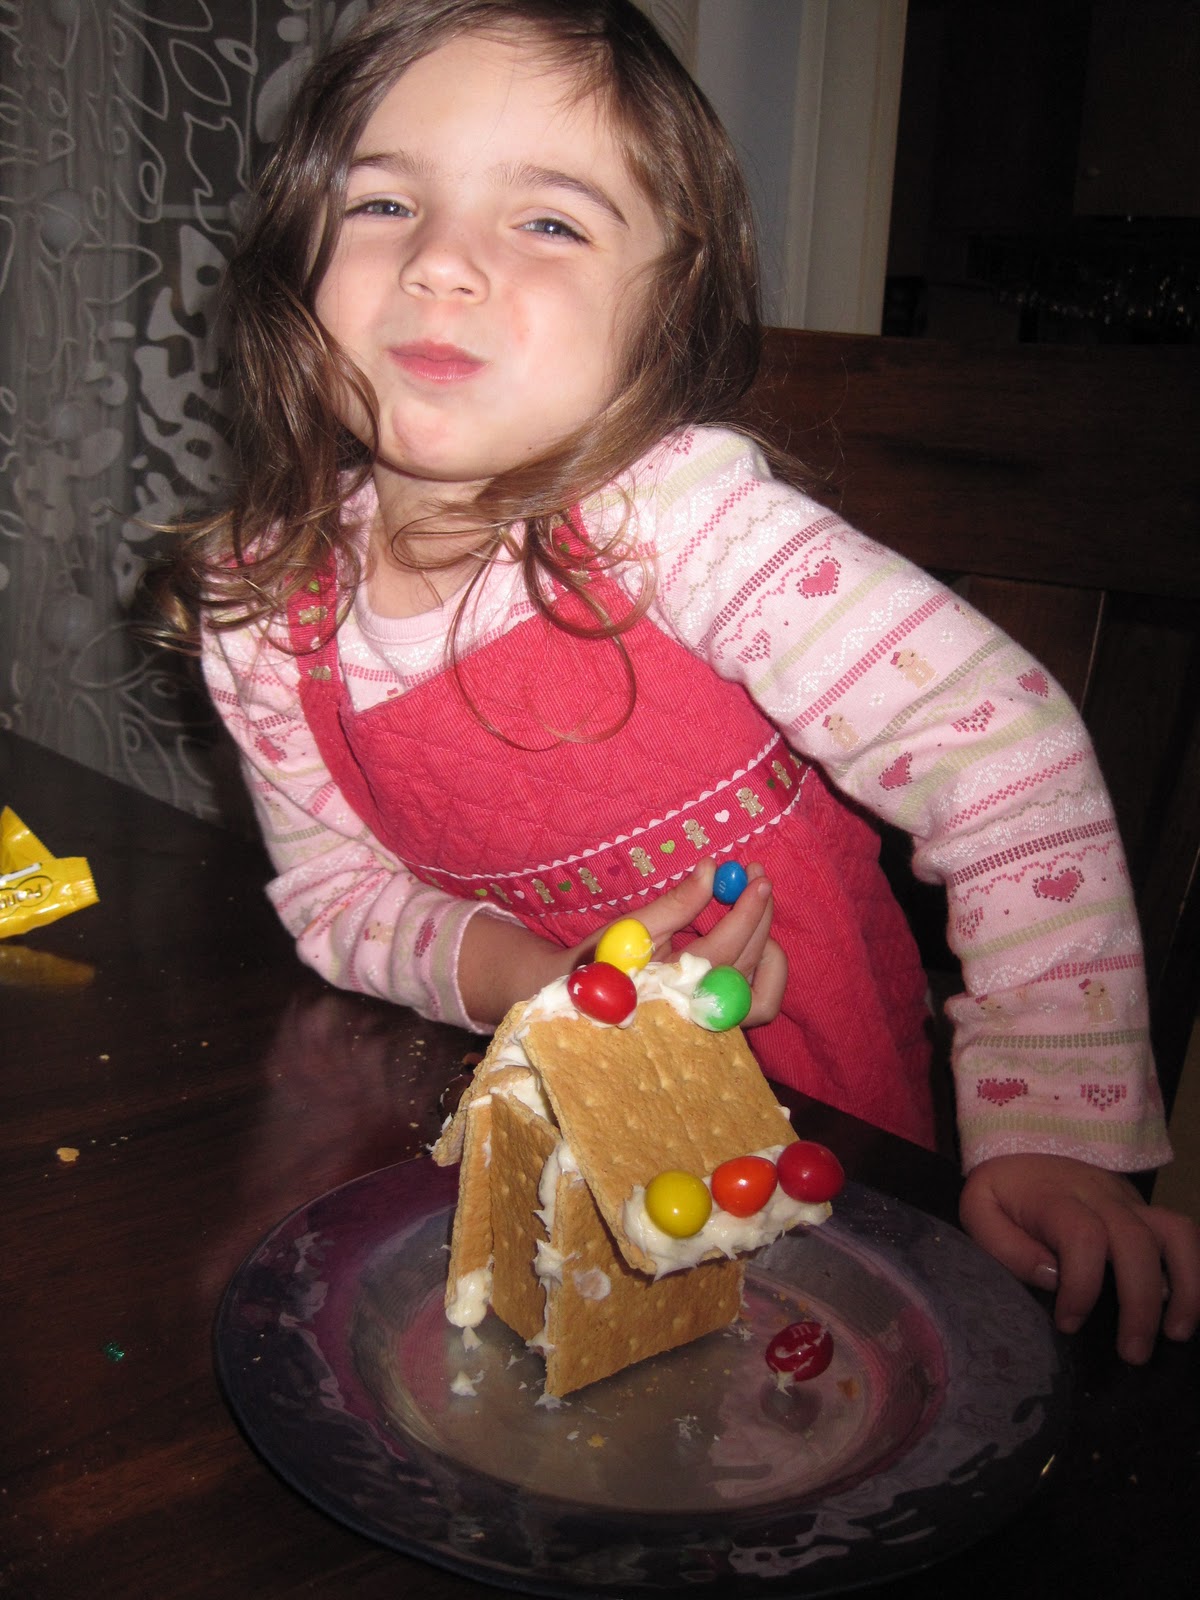
 Step 4:  Add candy!  Still-sniffling daughter wanted "lights" on her house so I improvised with the forlorn, forgotten Halloween M&Ms.  Silver non-pareils would also make fantastic lights.  The squished graham house was soon forgotten. 


You might need to eat some of the M&Ms that don't fit the color scheme ;)
 Warning:  The roof on the finished house became quite lopsided overnight, so if you want this to last use a milk carton or something else inside the house to keep it up.

And here is the sad little house that prompted this whole activity.


The annihilated graham cracker house from pre-school. It was entirely too healthy, anyway. Building materials should be bad for you! This is jelly and raisins and bananas!  Pshaw!

This is the Wilton gingerbread village kit with extra Nerd rope, candy canes, Andes candies, Red Vines and peppermint swirl kisses
-Nancy

Thursday, December 16, 2010

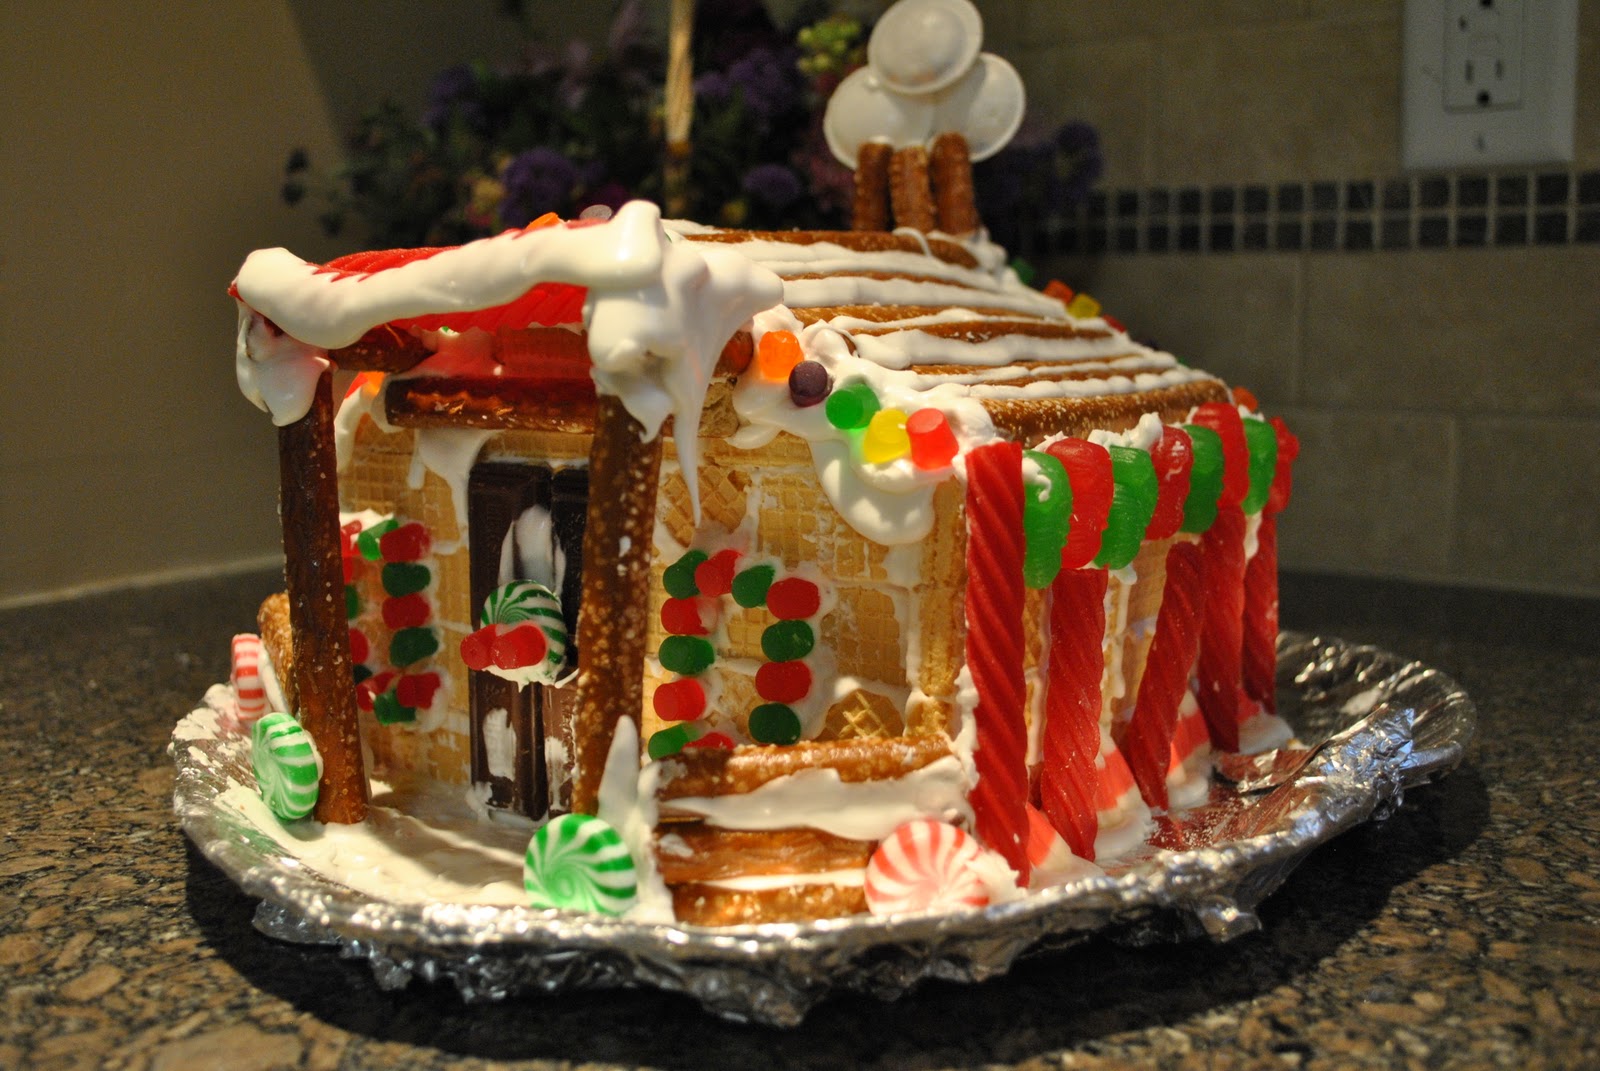
Sugar Wafer Candy Cottage

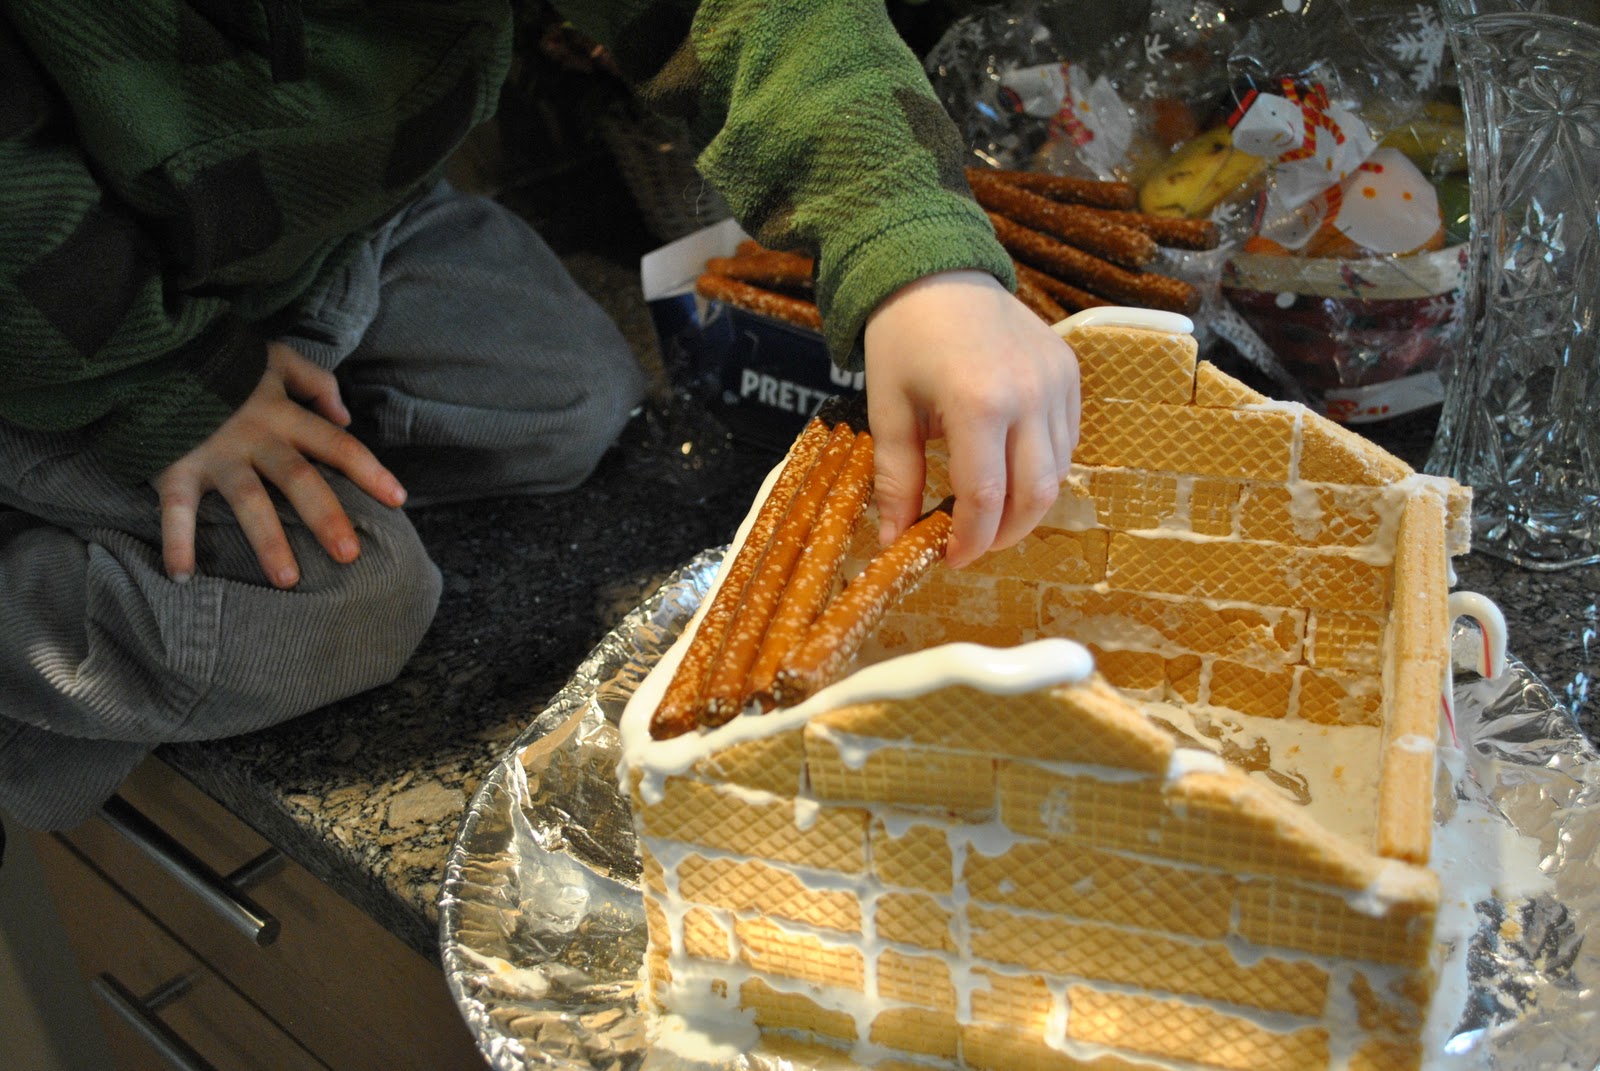
This is really just a variation of a gingerbread house.  I usually make our houses out of graham crackers, but thought I would do something a little different this year.  This little cottage looks like a mess of icing of candy.  But that's ok, it tastes good and my son and I had lots of quality time building it together. I had to resist my obsessive tendencies and remember this is his project too :)  He thinks it looks like Candy Land.  I couldn't agree more.
Time: 1 hour +.  We ran out of ingredients so did this over the course of 2 days.
Age: 3+
Mess/Cleanup:  Ugh.  This is so messy with royal icing.  Cleanup is not fun.
What You Need: (House Structure Only)
  • Sugar Wafers (1 large pack)
  • Empty Cereal Box (we'll use the flatboard to build a template)
  • Serrated Knife
  • Baggie (I like the 1 gallon baggies with no zipper)
  • Pretzel rods
  • Candy assortment
  • Royal Icing
    • With mixer, whip 2 egg whites with 2 teaspoons of lemon juice
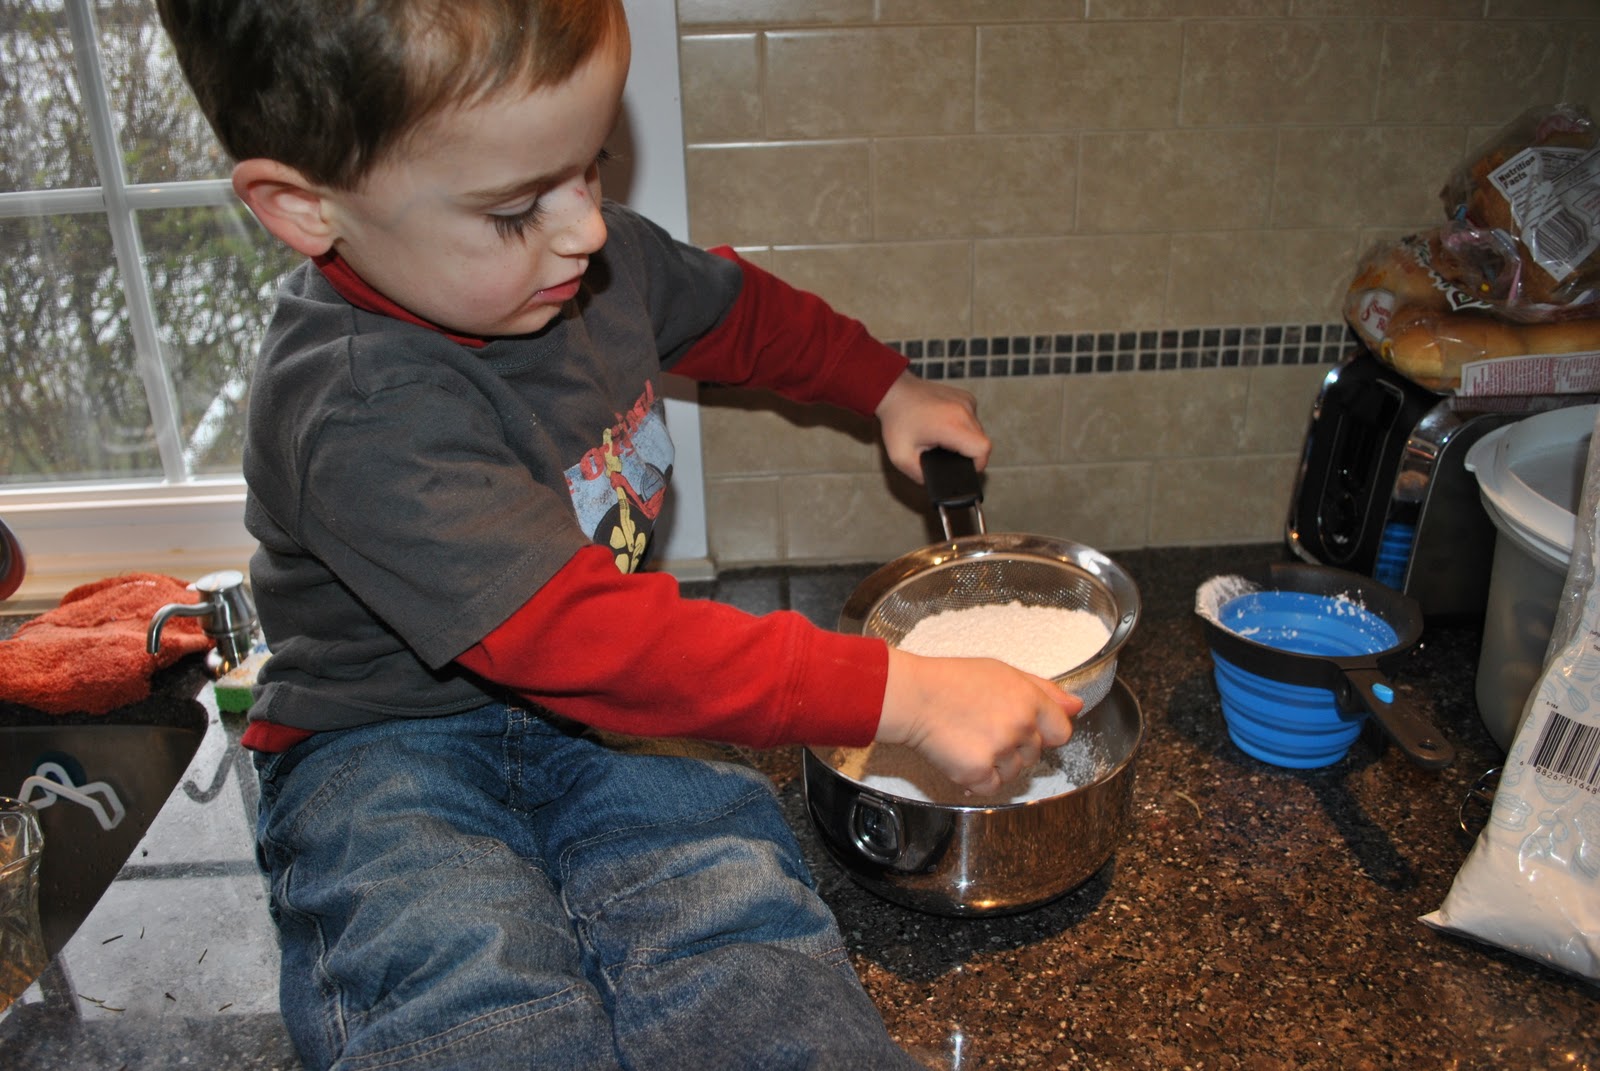
    • Add 3 cups of sifted powdered sugar
    • Blend until smooth
    • Transfer icing to baggie and snip off corner to use as piping bag. I originally used a baggie to pipe the icing - however, I later found out that filling a reusable (empty and clean) ketchup container was MUCH easier and cleaner. 
      My son loves the sifting part!
      

Why I Like This Craft: 
Candy. Tradition. Candy.  Lots of time with my preschooler.  What's not to love?

Step 1:
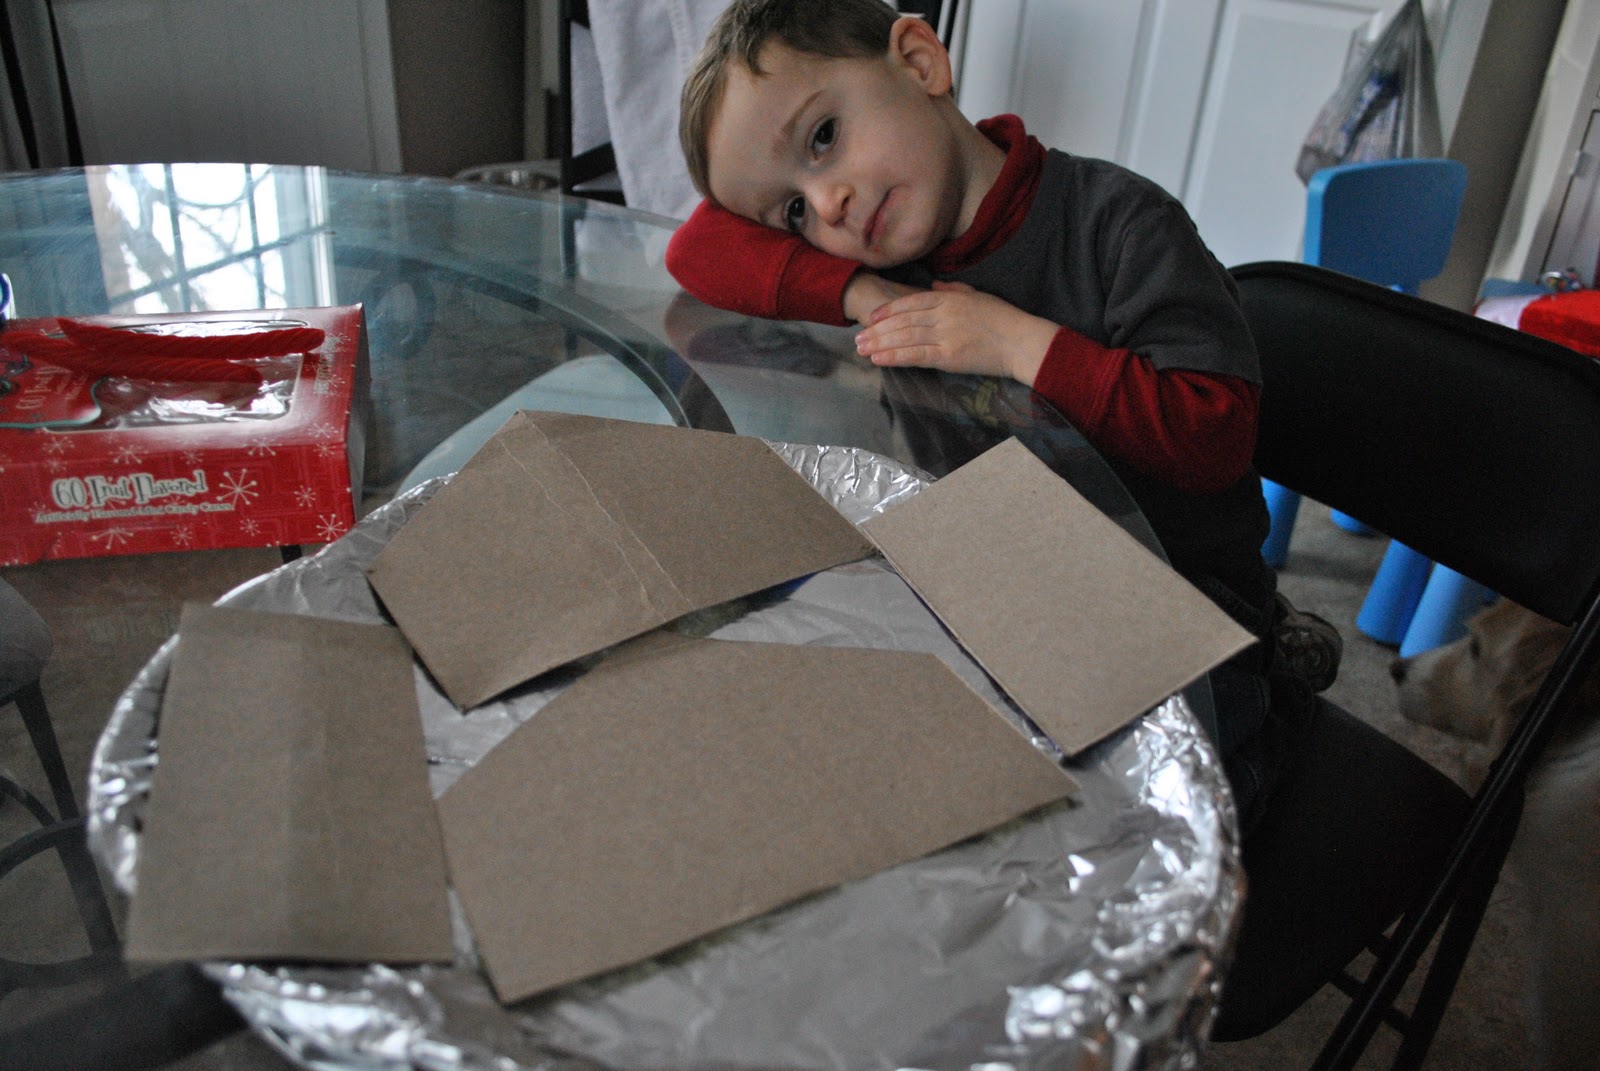
Flatten out the cereal box.  Find your inner architect, and sketch 2 sides to include the pitch of the roof and 2 rectangle sides.  You may want to measure some of your ingredients (e.g., we made a roof from pretzel rods, so in the design I had to make sure the rods were the length of the rectangle) to ensure everything will fit together properly. 

I'm typically not much of a planner, but this little step made things a whole lot easier and saved us  a lot of mess.  If your flatboard pieces can fit together, so will your finished house.
Not a very exciting part of building.  Darn prep.
Step 2:
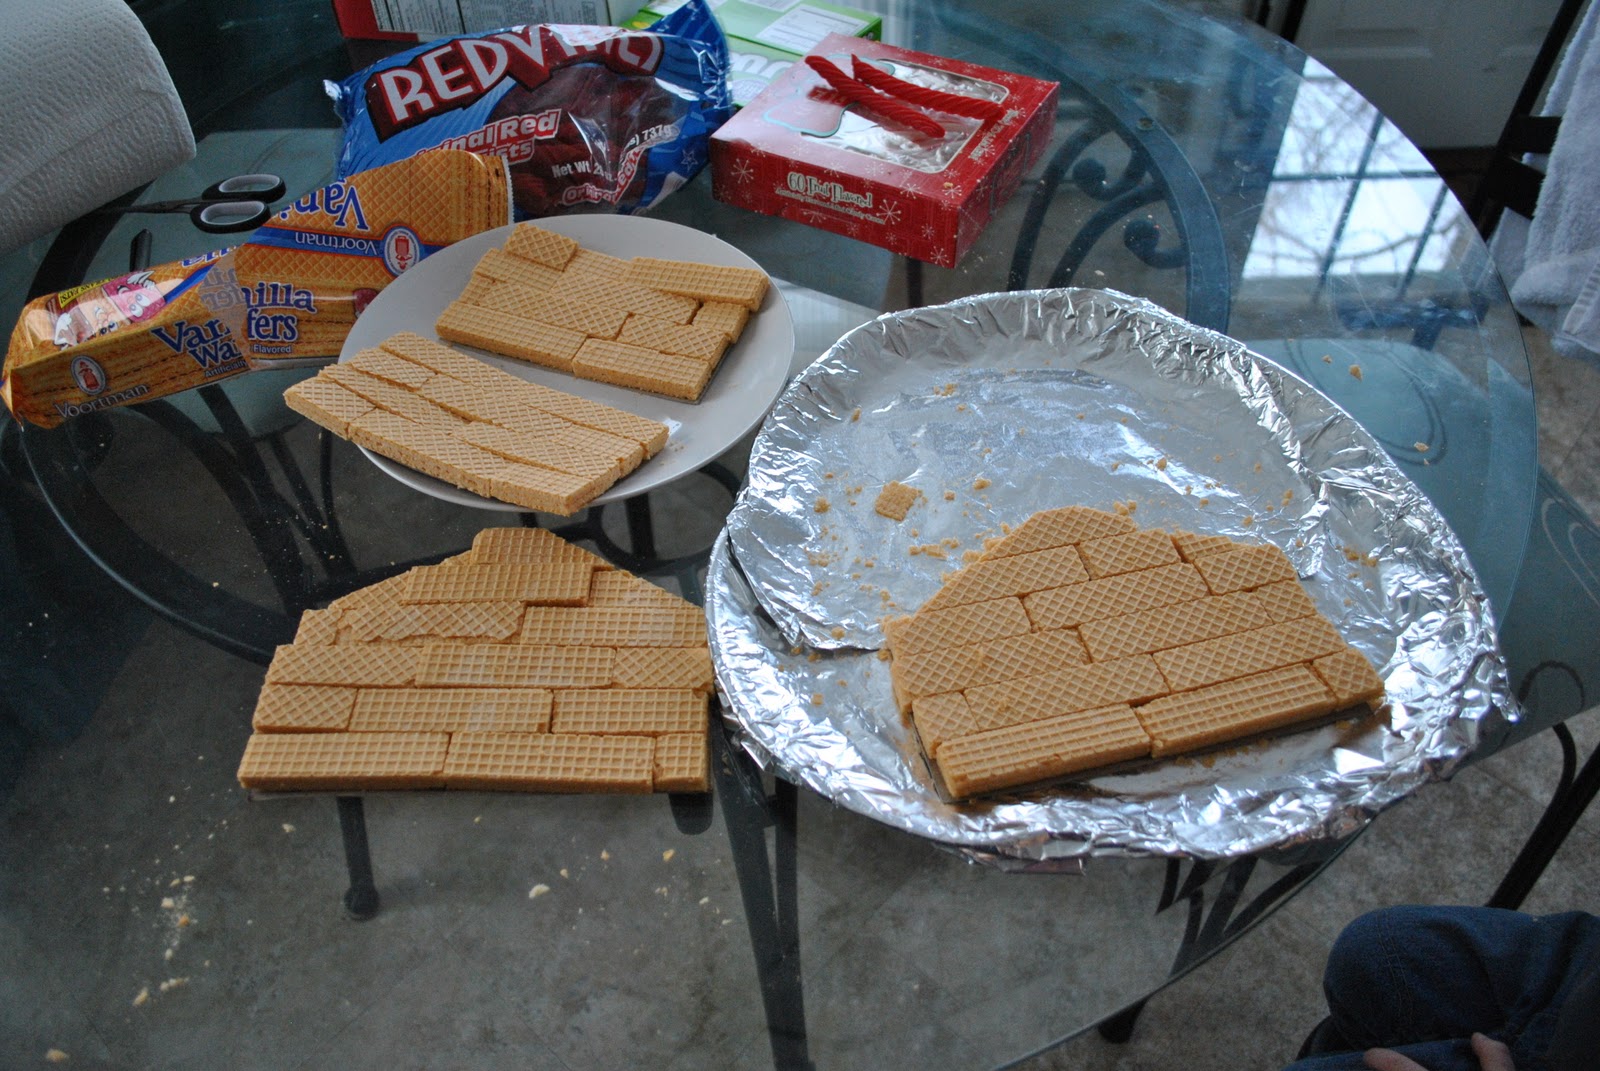
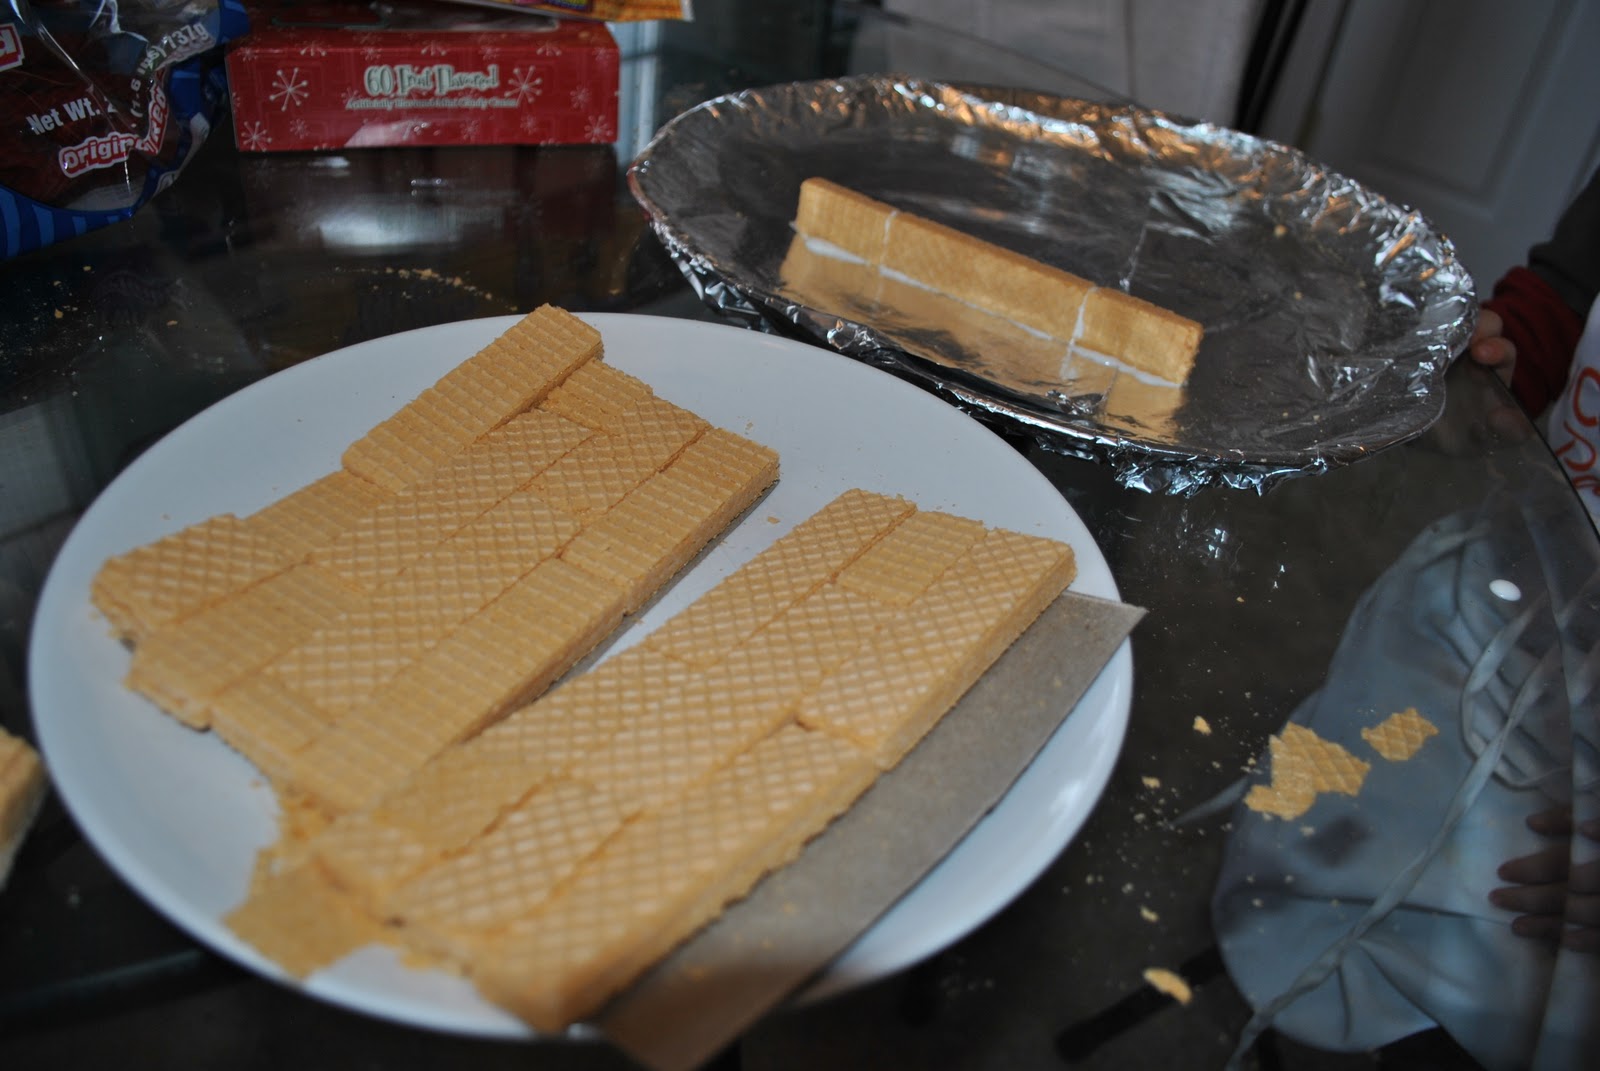
Resist eating the sugar wafers.  We only had 1 left after this step!Lay out your wafers in a subway tile pattern on each of your templates.  Using the knife, trim the wafer so it fits to the template.  This is to dry fit all of the pieces so assembly will be quick.

Step 3:
Bring out your icing.  Using it as "glue" for the "bricks", squirt some icing on 3 sides of the wafer.  Pick up your wafers in order of your template.  We started with the bottom left on each side.  Adhere wafer to your base.  The royal icing is pretty strong.  It will harden when dry. 

Step 4:
Once the sides are fairly dry (we waited overnight) you can attach the roof.  We used pretzel rods.  I ran a bead of royal icing (I had to make another batch) on all sides.  My son loved building the roof.  He said he was just like Handy Manny.

Step 5:
Decorate with your candy assortment and enjoy nibbling on your house!

-Rose  @-}---

Sunday, December 12, 2010

Alien Spaceship Ornaments

Thanks to Nancy for suggesting making alien spaceships with all of my left over Jello cups.  I think these came out pretty cute and it's a great way to reuse what would otherwise be trash.  This can either be a toy or an ornament.  I'm sure this spaceship can hold up to a few rounds Buzz Lightyear saving the universe from the creepy aliens.
Age: 3+
Time: 20 minutes
Mess/Cleanup: Little mess and very easy cleanup.  Only a few stryrofoam scraps.
What You Need:
  • 1 large pom-pom
  • 2 small pom-poms
  • 3 googly eyes
  • 1 toothpick
  • 1 Jello cup
  • 6 inches of string
  • Foil tape (you can buy this in the HVAC/Duct Tape section at Lowes or Home Depot) or tin foil
  • Styrofoam or cardboard
  • Scissors
  • Glue
  • Self-adhesive gemstones.  I have these from Oriental Trading
Substitutions:
  • Old CD or DVD instead of styrofoam and foil tape.  I think this would make a pretty cool flying saucer.
  • Instead of pom-pom alien, used a little action figure (that you're little one no longer plays with)
  • Use mini pom-poms or self-adhesive stickers instead of gems
  • Paperclip instead of ribbon, string, or yarn for the hanger
Why I Like This Craft:
My son is facinated with rocketships and Buzz Lightyear, so this craft was right up his ally!  I imagine we could make an entire army of alien spaceships.

 
Step 1:
Place Jello cup upside down on styrofoam.  Cut larger circle (about 2 inches larger than the pudding cup) out of the styrofoam.
Step 2:
Cut strips of foil tape about the diameter of the styrofoam circle.  If you do not have foil tape, you can cover the styrofoam with tin foil.  Have your little one peel the backing (great for perfecting fine motor skills) off the tape and adhere to the styrofoam.  Cover both sides of styrofoam.

 
Step 3:
Place gems around the perimeter of the foil-covered circle.

 
Step 4: Build-An-Alien
Using large pom-pom, glue on eyes.  We first used a glue stick, but found that Tacky glue works much better.
Step 5:
Snip toothpick in half.  Put a dab of glue on each end.  On each stick, place a small pom-pom on one end and adhere the other end to the alien head (see Step 4).  Place alien body in center of foil circle.

 
Step 6:
Poke hole in bottom of cup.  Thread and tie off string.  This will be the hanger if you are creating an ornament.  Place a bead of glue around the top of cup.  Invert cup and place over the alien.  Let dry.


That's it!  And, if you are using this as a tree ornament it might be cool to poke hole in the bottom of the spaceship under the alien.  Then insert a tree light to make the alien's spaceship glow.

 
-Rose @-}---

Edited to Add:
This morning while I was checking my Facebook, my son runs into the living room with his new alien spaceship - well, he made his alien and plopped him in a cup.  He must really like this craft!  He made most of it himself.  His variation:
  • Instead of gems, he used self-adhesive glittery stars
  • Instead of the styrofoam we used a CD.
  • Instead of a a yarn hanger, we used a paperclip.

Mini Ice Cream Sundae Ornaments

Ever since a recent trip to Hobby Lobby, my son has been wanting to make something with the pom-poms I bought.  I originally bought them for my daughter's Halloween costume (she was going to be a cupcake with sprinkles), but sadly the craft supplies sat in my boxes since I ended up buying costume instead.  And now since I have far more free time, I brought out the pom-poms.  Seeing the pom-poms on the craft table, my toddler was immediately facinated.  After repeated attempts to eat them and realizing they weren't food, she decided to stick them in her nose.  So, we quickly had to come up with something to use the pom-poms before they all became booger-covered.  This is what we made (with the clean ones).


Age: 3+
Time: 10 minutes
Mess/Cleanup: The paint did get a little messy.  But at least it was only one color and it was for only about 2 minutes.  Cleanup was a breeze.
What You Need:
  • Jello or Pudding cups
  • Pillow Stuffing (could also use cotton balls)
  • Glitter
  • Glue
  • Pom-Poms
  • Brown paint
  • Hole Punch
  • 6 inches of String/Yarn (if making an ornament)
  • Scrap paper/paper plate

Why I Like This Craft:
This was SO EASY!  Even non-crafters can successfully pull this one off.  We turned our cup into an ornament, so we have yet another trinket to add to the tree.

Step 1:
Squirt some glue in the bottom of the cup.  You can also add a little brown paint (aka Chocolate Sauce).
Step 2:
If you would like to make this sundae into an ornament, punch to holes in either side of the cup and thread the string or yarn.  Press stuffing, "Ice Cream", into the cup.  We did this in layers and added a few drops of glue between the layers to hold it all together.


Step 3:
Mix some brown paint with water.  Pour "Chocolate Sauce" over the "Ice Cream".  We used an extra Jello cup to mix the paint.

Yes, his nails ARE digusting.  Bath night is tonight.

Step 4:
Squirt some glue on the scrap paper.  Have your little one dip the pom-poms in the glue, then place on "Ice Cream".  We reserved a larger red pom-pom for the cherry.

Step 5:
My son really wanted to use some glitter.  So he sprinkled the Martha Stewart glitter (which is very fine) over the "Ice Cream". I think it now looks like Cotton Candy -- which gives me a whole new idea for a craft.  Maybe Cotton Candy Ornaments?  Since the glitter is so fine, we didn't even use glue.

That's it!  I was trying not to be obsessive crafting mom.  This one definitely looks like a 4 year old made it.  But it's cute and it's going on our tree.

-Rose @-}---


Saturday, December 11, 2010

Little Drum Ornaments

This are another ornament that my mom crafted together many moons ago that still hangs on her tree today.  My older brother and sister made these after my mom saw them hanging on her neighbor's tree.  These are pretty cute and not too difficult to make.  This is my adaptation based on what I had available in my craft supplies.
Age: 4+
Time: 20 - 40 minutes.  This will depend on how intricant you design you drum and what materials you use.
Mess/Cleanup:  Not that bad. Since minimal glue is used, only foam, felt and paper scraps need to be thrown away.
What You Need:
  • Cardboard Paper Tube
  • Foil Tape
  • 1 sheet of Self-Adhesive Glitter Craft Foam
  • 1 sheet of Self-Adhesive Felt (I bought the foam and felt at Hobby Lobby)
  • 2 Mini Pom-Poms
  • 2 Toothpicks
  • Foil Tape (I bought this at Lowes for a Home Improvement project)
  • Couple inches of yarn or ribbon
  • Glue
  • Pen
  • Scissors
  • Hole Punch
Substitutions:
  • If you can't find Self-Adhesive Foam or Felt, just use a glue stick to adhere the pieces.  Self-adhesive products help reduce the mess.
  • Instead of Foil Tape, you can just use some shiny wrapping paper, tin foil, craft foam, or felt to cover the tube.
Why I Like This Craft:
These cute little drums look great on your Christmas Tree.  And I've said it before, my mom has had these on her tree for 30+ years.  They'll last for years to come!

Step 1:  Drumsticks
Clip off one pointy end from each of the toothpicks.  Put a dab of glue on the pointy end and press on the pom-pom.  Let dry.

Step 2: Building the Drum.  I find it easier to have all of the pieces pre-cut and depending on the age of your child, then let them assemble the drum. My preschooler was getting a little bored while watching me make some of the more intricate cuts.  These are the pieces you will need:
  • 2 circles (Glitter foam) - same diameter of tube.  Trace the end of the tube onto the glitter foam.  Cut out 2 circles
  • 2 strips (Glitter foam), about 1/2 inch x 5 1/2 inches
  • 6 strips (Felt), about 1/8 inch x 2 inches
  • 1 piece of yarn, about 6 inches
  • 1 piece of Foil tape, about 5 1/2 inches
Step 3: Cut the length of the cardboard tube to equal the width of the foil tape.

Step 4: Adhere the Foil tape to cover the cardboard tube.
Step 5: Punch 2 holes on either side of the tube, about 1/4" from the edge.
Step 6: Thread the yarn through the hole.  Tape to affix yarn to tube.

Step 7: Adhere the circles to the top and bottom of tube.
Step 8: Adhere the 5 1/2" glitter strips to the top and bottom of tube.  Connect the circle to the tube with the strip.
Step 9: Use the felt pieces to create 3 Xs around the drum. 
Step 10: Criss-cross the drumsticks around the drum.  Use glue on the pom-poms to adhere the drumsticks to the top of the drum.  Hang to display.

Have fun!
-Rose @-}---

Thursday, December 9, 2010

Preschooler-Easy Glittery Ornaments

First off - I love making these ornaments!  I remember making these 30+ years ago with my mom and siblings.  My preschooler is now old enough to sit still for 30 minutes and has some fine motor skills to write some letters.
The camera doesn't do the glitter justice.  It's so pretty and my 4 year old did 90% of this himself.
Age: 2 & up.  For what it's worth, I did try this craft with my 19 month old -- but it ended in a glittery mess and her off to naptime.  However, can glitter ever be messy?  It just looks like Tinkerbell visited my kitchen.
Time: 30 minutes - 1 hour
Mess/Cleanup:  The glitter and glue can get a little messy.  But it really takes less than 5 minutes to clean up.  The kids stayed relatively clean.  I just needed some baby wipes to wipe down their hands.
What You Need: 
  • Styrofoam (my grocery store still uses styrofoam to package veggies)
  • Paper plates (2 plates per child, plus 1 for the glue plate)
  • Glue (I used Tacky Glue and it works really well)
  • Paint brushes
  • Glitter (I love Martha Stewart's tinsel glitter)
  • Scissors
  • Ribbon
  • Hole punch

Substitutions:
  • Craft foam for styrofoam.  I'm also thinking this will work really nicely with salt dough.
  • Scrap paper instead of paper plates
  • Any embellishment in lieu of glitter. But I do love glitter.
  • Dental floss, flishing line, or just a tree hook to attach ornament to the tree
  • Pencil to punch hole through stryfoam instread of a hole punch
Why I Like this Craft:
For me it all about the memories and I get some more glittery ornaments for my tree!

Step 1:
Trace and cut out shapes on styrofoam.  I just used the lid of a sippy cup for the circles.  When I was little, my mom used to trace cookie cutters.

Step 2:
Punch a hole about .25 inch from the edge.  This will be used to string the ribbon hanger later.

Step 3:
Squirt some glue on a paper plate and arm your smock-covered little ones with paint brushes. Notice my toddler is smockless.  It just wasn't worth the battle.  Let them cover one side of the styrofoam with glue. The paint brush will help with a nice even coat.  After this glue step is over, switch paper plates.  Have a "gluing" plate and a "glitter" plate.  This will make it easier to sift the excess glitter back into the bottles.

Step 4:
Have your little ones choose their favorite color glitter and sprinkle the ornament to cover.  Shake off excess glitter.
I would recommend removing the glue and brushes from the table before this step.  I would also recommend having a well-rested toddler if you have a very little one participating.  Our glitterstorm was triggered when I attempted to take away the glitter shaker.


Our meltdown occurred shortly after this picture was taken.

Step 5:
Have mom (or dad) transfer the remaining glitter back into the glitter tubes. Let dry for a minute or two.

Step 6:
Paint a stripe or letter (my son painted his initial) with glue over the glitter. Stencils could also be used.


Step 7:
Sprinkle a high contrasting color over the glue.  Shake off excess glitter and transfer the remaining glitter back into the tubes.

Step 8:
Same steps, other side.

Step 9:
Thread ribbon through hole.  Hang to display.

Variations:
I think you can really do a lot with this craft.  You can really make this a craft for adults, as you can get pretty intricate in your design. 
  • Edging: You could punch holes around the edge of your shape. After all of the glitter detail is complete, whipstitch the edges with a little ribbon.  You could also roll the edges in glue and cover with a contrasting glitter or a little ribbon.
  • Garland: You can cut out a bunch a little circles or stars and punch a hole in the center or on top.  Once all of the individual pieces are covered in glitter, thread the pieces with ribbon (I think I might try this next).
  • Accents:  If you have any plastic stencils, like these, after you do the base layer of glitter place the stencil on top of the shape and paint the glue over the stencil.  Lift stencil and sprinkle the contrasting glitter over the glue.  (This is also on my to-do list). 
have fun!
-Rose @-}---

Update to the Classic Paper Chain

I had some unexpected surgery last week. This has given me the gift of 4-8 weeks off of work and that much more time to spend with my kids at Christmastime.  Keeping a toddler and preschooler busy with the same project can be challenging - but I think I have found one that works!  Classic paper chains.  Who doesn't have great memories of creating these chains in elementary school?  I found that my kids love them and my 4 year old is very proud of his ability to create such a massive craft.
Here's our final product.  We did this craft 2 times yesterday, resulting in about 20 feet of chain. 

Age: 1 - 100
Time: 20 minutes +, depending on decoration and length of chain
Mess/Cleanup:  Not that bad.  We used all of the paper we cut up.  The paint was washable.
What You Need:
  • Any type of paper (We just used a mix of office paper).  About 6 pieces.
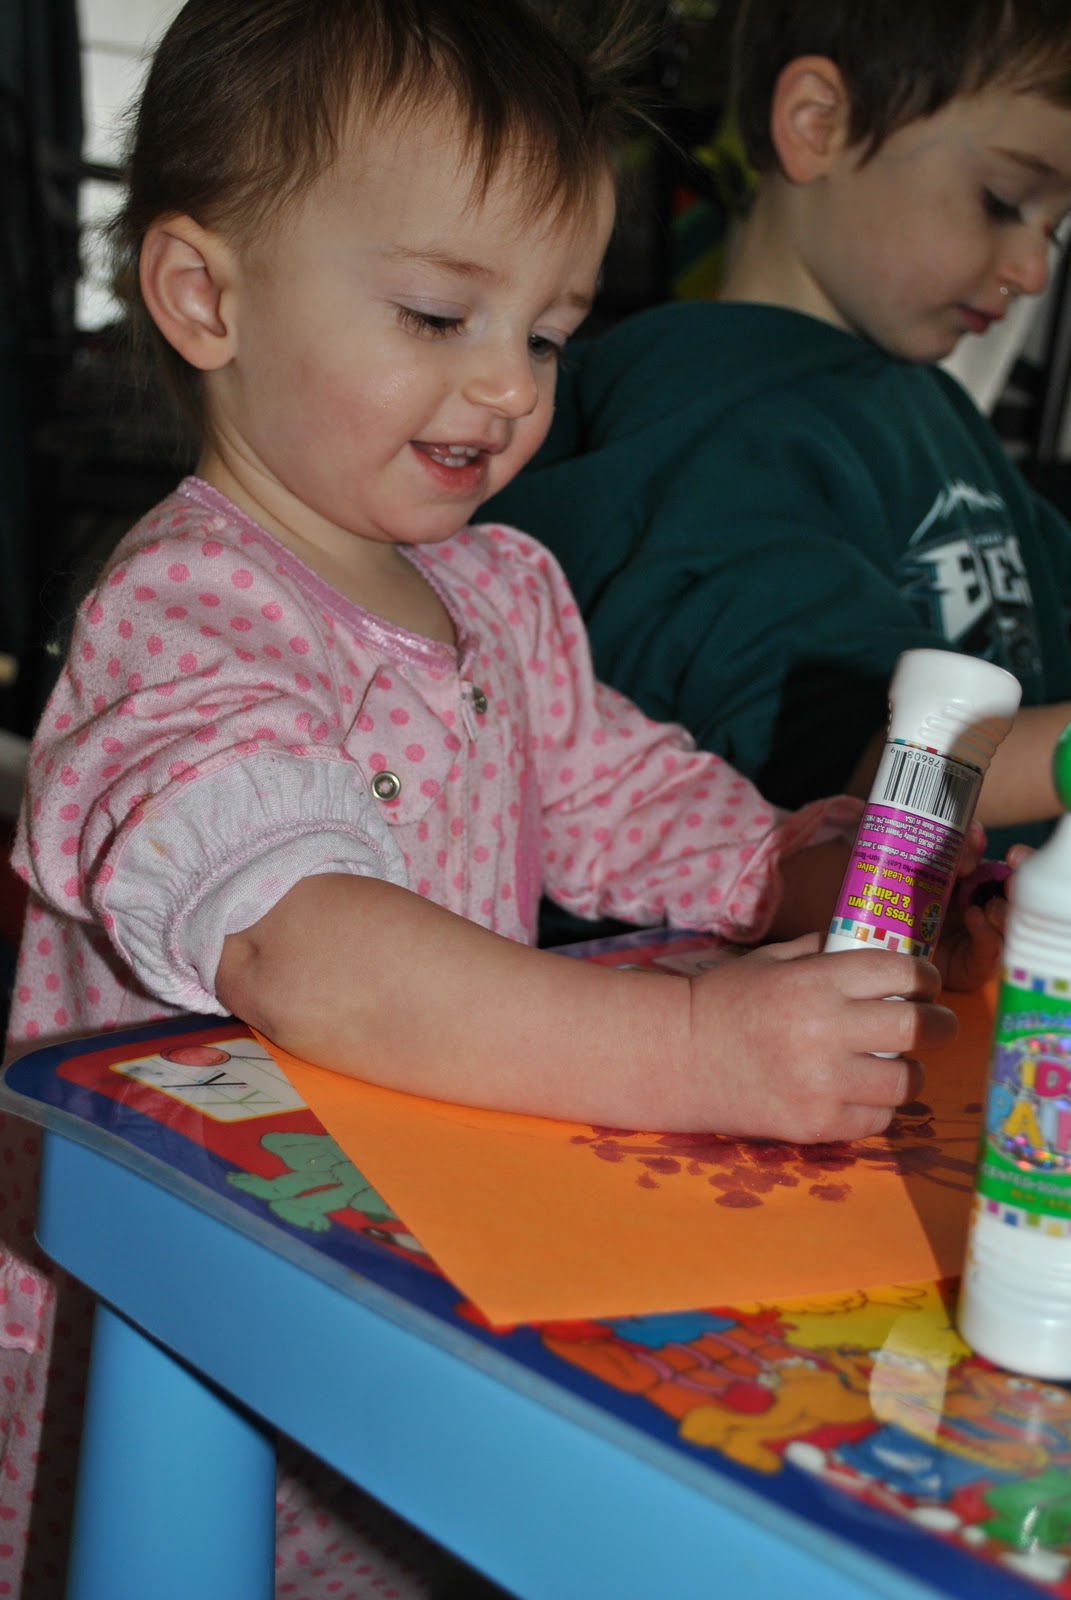
  • Dot Paint (I have ones similar to these.  Except my paint is also glittery).  Who can't resist glittery, fruit scented paint?  Not my toddler.  She applied it as lip stick.  Good thing it's washable!  And this paint is really easy to get off: teeth, lips, eyes, etc. It even gets out of clothes easily.
  • Stapler
  • Scissors
  • Substitutions
    • Any other decoration - glitter, stickers, paint, glitter-glue, pom-poms
    • Tape instead of a stapler
    • If you're looking to do something with old "art-work", use that as paper for the chain.  I think we'll probably do this again with colored-coloring book pages.
Why I like this Craft:
Both of my kids can do the craft at the same time.  I found out that my toddler LOVES dot paint.  I think she painted for a full 40 minutes.  This can also give me another craft to make out of the millions of pieces of "artwork" I have floating around my house.

Step 1:  Suit up the kids in smocks.  It just makes clean up easier. I have these cover all bibs from Ikea and this apron from Constructive Playthings.

Step 2: Cover a table with lots of paper.  We used 3 colors - orange, pink, and blue.  Bring out the dot paint or whatever you would like to do to decorate the chain paper to-be.  I think glueing some small pom-poms on the paper could make a cool chain. 

Even with a double ear infection, dot paint makes her smile!

I learned my lesson.  Anytime paint is introduced, a smock is really needed.
Step 3:  Let your little ones go wild on all of the paper.  6 pieces of paper will make a pretty decent length (maybe 6 feet) of chain.  This is the part where my toddler excelled.  She loved this!  She was also very upset when it was time to clean up.  This step makes this craft adaptable to the little ones.


The scented paint smelled so good!  And this paint dries rather quickly.
Step 4: Cut the paper into about 1-inch strips, using the short side of the paper.

Even a 4 year old can do this step!
Step 5: Make a loop out of the paper strip and staple to close the circle.  Continue interlocking strips to create a chain.  I think we all remember how to do this part.

Grandmom and Mom helped with this step.  But my preschooler loved using the stapler!

Enjoy!
-Rose @-}--