Wednesday, September 12, 2012

Glitterfying with Mod Podge

Summer has come and gone and I have yet to post any of the activites and crafts we've done the past few months.  But I knew I had to get this little sparkly activity out there to share how easy this craft is with great results .... and these great results can be achieved by your 3 year old!  Anything on Pinterest that includes a little glitter catches my eye, and lately all of my "pinnings" have something to do with Mod Podge.  This past weekend my kids and I hit up Michael's with one goal in mind -- buy Mod Podge!  And here's what we made, super sparkly little sneakers!

The camera of my iPhone does not give the glitter justice. 
Very cute way to repurpose shoes!

 
Age:  3+

Time:  20 minutes + drying time.

Cleanup:  We did this outside, but it's pretty easy to keep the mess contained.  Just have some paper towels handy.  I also score 5 cent foam brushes at Michael's, so I didn't even bother to clean them. 

What you need:


  • Mod Podge (We used the Glossy kind.)
  • Glitter (We used Martha Stewart's ultra fine glitter.)
  • Masking tape
  • Paint or foam brushes
  • Workspace "mat" (we used a piece of brown paper)
  • Something to glitterfy (We used some hand-me-down sneakers.  My daughter previously thought these were 'boy' shoes and refused to wear them.  Now, it's a completely different story.)

Directions
1. Clean off your object to Mod Podge.  I also glittered the top of my keys (thanks to Pinterest for the ideas), and cleaned the metal with rubbing alcohol.  For the shoes, I just brushed away any loose dirt.

2. Using the masking tape, tape off any areas your don't want covered.  My 3 year old did the majority of this craft by herself.  With the help of masking tap, she really only painted the canvas of the shoe.

 
3. On the workspace mat (or in a cup), mix together Mod Podge and glitter.  When mixed together, I had about 80% glitter.  I made a number of batches.  I didn't want to waste my expensive glitter.

4.  Brush on the glitter mixture.  We did about 3 coats with only 5 minutes between each layer.


6.  Peel off the tape and clean up any edges.
A little messy, but the coating will dry clear.  I used a paper towel to touch up the edges.

7. Let dry and enjoy!
My son decided to jump in and help us paint.


FYI ... this isn't water proof.  My daughter also decided to make Hello Kitty a little more sparkly.  Later on the Hello Kitties joined her in the bath and the Mod Podge coating dissolved.
If it didn't start raining, I'm sure we would have spent all afternoon finding more things to glitterfy.

-Rose
@-}---

Wednesday, March 14, 2012

Ooey Gooey Goobleck

Is it a liquid?  Is it a solid?  No, it's ooey gooey!

This is one of the strangest things I have ever made with my kid. 
Weird things happen when you mix cornstarch and water.

Squeeze it to make it solid

If you press your finger tips down on it or try to grab a handful it feels like a solid.  As soon as you let go it drips from your fingers like a liquid (especially when you are trying to take a picture of the solid phase)!


Age:  2+

Time:  5 minute tops to assemble.

Cleanup:  Very easy.  Even easier if you let it dry so you can sweep it up.  Start with a dry towel on countertops, then follow with a wet one.

What you need:
  • 1 cup of cornstarch + more to make it more solid in a hurry
  • 1 cup of water
  • large flat bowl or pan
  • spoon

Directions:
1) Mix equal parts of water and cornstarch in a bowl.  Add more cornstarch until it feels kind of thick when you stir it.  You can add more if you want it to be more solid (or only add half the water at first).

2) Now stick your hands in it and play!  Try to scoop up a handful and squeeze it or roll it to make a ball.  I like to let it drip from my fingers.  It kind of vibrates in a strange way.

Definitely liquid


Special thanks to Science World British Columbia for the inspiration!

Saturday, February 11, 2012

Egg Shell Sidewalk Chalk

In the past few months I've discovered Pinterest and now completely addicted and inspired to try lots of different crafts, but I only have a handful of free hours during the week -- so I've picked out some easy ones.  This is one of them.  I like to make crafts that I don't have to throw away.  I always feel guilty throwing a masterpiece in the trash, because I just don't have the room to keeps lots of stuff.  You probably have all of the materials in your house to make this craft.  You don't even need a trip to the craft store!

Age: 3+
Time: 30 minutes + 2 days to dry before you can use the chalk.
Cleanup: Manageable.  My kitchen was back to normal in a few minutes.  My son just had to wash his hands.
What I Like This Craft:  It's always to fun to use the stuff you make.  Especially when you're 5 years old!  Plus we already had everything in the kitchen.
What You Need:
  • Eggshells from about 6 large eggs (clean, dried, and without the inner shell lining)
  • 1 tsp flour
  • 1 tsp very hot water (water from my Keurig was perfect!)
  • Something to crush the shells (we used my kitchen mallet)
  • Bowl
  • Spoon
  • Ziplock bag
  • Paper Towel
  • Optional:
    • Petroleum Jelly
    • Cookie Cutter
    • Food coloring, tempura paint, or glitter

Step 1:
Put the egg shells in the bag and smash them until they become a fine powder.  It took us a good 5-10 minutes to get the shells pretty fine.  We also had lots of the egg lining to sift through.  I ended up using a small strainer to push the shells through.  This separated the egg from the lining and crushed up the shell a little more.

Step 2:
Take one heaping spoonful (we used a large spoon/tablespoon) of the egg shells and mix it with one teaspoon of hot water and teaspoon of flour.  Using this ratio, mix in all of your eggshells.  Mix until well blended. In the end, we used 3 spoonfuls of shells, 3 tsp of flour, and 3 tsp of hot water.
Step 3: (optional)
Mix in a coloring.  We used a drop of poster paint.  We also decided to add in lots of glitter.

Step 4:
Spread the petroleum jelly on the cookie cutter.  On a paper towl, fill the cookie cutter with the mixture.  All of our egg mixture fit into this single cookie cutter.  If you are not using a shape, you can simply roll the mixture into a log.

Step 5:
Let dry for about 2-3 days on the paper towel.

That's it!  Note:  the eggshell chalk it a little scratchy.  I wouldn't use it on a chalkboard.  Save this for the sidewalk!

-Rose
@-}---

    Friday, December 23, 2011

    Hole Punch Wreath Cards

    As usual, we're always scrambling around last minute. This time it was the night before the last day of daycare before the little Christmas break. The cards I ordered haven't arrive (the just arrived this morning, Dec 23rd, ergh!) and we had to whip up some festive gift card holders for the kids' teachers .  I got some minimal supplies and this is what we came up with.
    •  Age: 2+
    • Time: 15 minutes for 4 cards
    • Mess/Cleanup: easy breezy @ < 5 minutes
    • What You Need:
    • Why I Like this Craft: I love using my new scalloped hole punch/paper shapers.  I think it may be one of my favorite tools in my crafting closet.  Kids can easily punch the cutouts and glue them on.  The finished product looks like a wreath and with minimal meltdowns (from me or the kids).
    Step 1:
    Using the punch, punch out the pieces in the green paper.  Once the edges of the paper were used my son cut straight lines around the voids so he can move the tools towards the inside of the paper.


    Step 2:
    Using the red paper, trace a circle (using a cup as a guideline).

    Step 3:
    Using either a glue sticks or regular craft glue, encircle your traced line with glue.  I don't have a picture of this step, because my 2-year old started eating the glue sticks and gluing various items to my table. I brought out the craft glue, had my 5 year old draw the glue circle, then locked the glue up in the cabinet to avoid another meltdown.

    Step 4:
    Have you little ones place the green circles on the glue line. 

    Step 5:
    Decorate your wreath with pom-poms and stickers.

    
    Again, this isn't rocket science, but it is a nice little activity.  Enjoy! 
    -Rose @-}--

    Thursday, November 24, 2011

    Thanksgiving Pilgrim Mom and Baby Craft

    Here's a twist on the toilet paper tube aliens we made back in December 2010.  Pilgrims!  With babies! 

    Happy pilgrim playdate with two mommies and their babies
    Alien variation instructions are here:
    http://happycraftykids.blogspot.com/2010/12/more-aliens.html

    Why I like this craft:
    I went for the traditional Pilgrim (inspired by South Park and the WeeMee iPhone app).  My daughter copied mine and added a pink princess twist. 

    What you need:
    • toilet paper tubes
    • adhesive card stock
    • googly eyes
    • scissors
    • jewels for the princess look
    • glue stick
    • tape
    • crayons or markers 


    Widdy, biddy baby pilgwims
    For the pilgrim babies: 
    Cut a toilet paper tube in half to make a short body.  Cover in cardstock and tape it shut at the back.
    Cut a head out of card stock and tape it on the back side.
    The short cotton swab arms on the baby crack me up.  Make the slit for the arm extra big and poke one cotton swab all the way through the front of the toilet paper tube.

    For the pilgrim mommies:
    Cover a toilet paper tube in card stock and tape it shut in the back.
    Cut a head out of card stock and tape it on the back side.
    Cut out clothes and shoes and sleeves and attach them to the body. 
    Poke the hole in the toilet paper tube last and insert one end of the cotton swab.  Attach card stock sleeves with tape. 

    Now go eat some some turkey and pumpkin pie!

    Monday, November 21, 2011

    Indian Corn Thanksgiving Slice-N-Bake Cookies

    I recently found a new hobby of making my own slice-n-bake cookies.  Land O' Lakes' recipe for Sparkling Candy Corn Cookies sparked this inspiration.  You can make adorable cookies in vast amounts without having to spend a whole lot of time in the kitchen.  Plus, you hardly need any ingredients.  Ever since making Candy Corn and Frankenstein (see pictures at the end of this post) cookies for Halloween, I've started to conjure up ideas for Christmas cookies, but I still have a few weeks until I start that baking.  However, this week is Thanksgiving and I wanted to try out an idea I had.  Tonight my son and I made some Indian Corn cookies to share with his Kindergarten class.

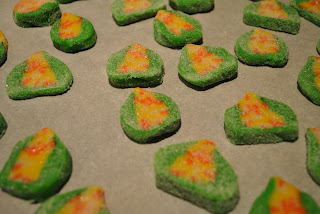
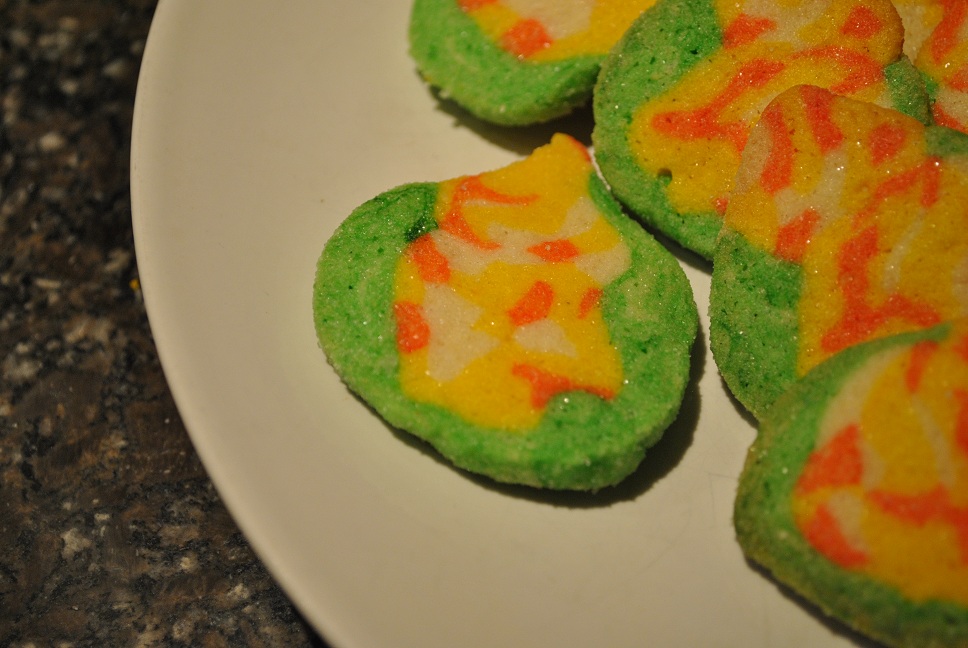
    I realize I really need to learn how to use my camera. But, you get the idea of how adorable these cookies are!

    Age: 5+

    Time: 10 minutes to make the dough, 35 minutes to assemble the 'dough canes', at least 2 hours to refrigerate the dough, and 8 minutes to bake.

    Cleanup: I think slice-n-bake cookies leave a whole lot less mess than your typical cutout cookies.  10 minutes to clean up the dishes, and a least 5 more minutes to get the food coloring off of your hands.

    What You Need:
    • Cookie dough (I really like this recipe from Land O' Lakes)
    • Green, yellow, and red food coloring
    • Plastic wrap
    • Knife
    • Oven
    • Sugar
    Why I Like This Craft:
    I am by no means a baker, as I always need recipes to bake sweet treats. However, I do love to get creative when making cookies.  My kids both love helping in the kitchen, but cutout cookies are a bit fragile in the hands of a 2 and 5 year old.  These slice-n-bake cookies let the kids play with the dough as if it was Play-Doh.  What kid doesn't like rolling snakes? 

    Step 1: Dye the Dough
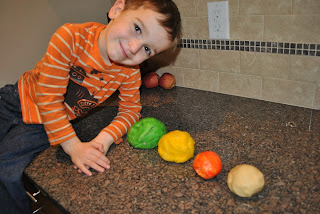
    My son now requests to pose in the pictures.
    Split the dough in thirds.  Dye 1/3 green and 1/3 yellow.  Divide the final 1/3 in half.  Dye 1 half orange, leave the remaining white.  I was a mean mom and didn't let my son dye the dough.  I like to use gel food coloring, and it's pretty potent.  I had visions of him sitting at the Thankgiving table with green dye still on his forehead.

    Step 2: Make a Bunch of Snakes
    My son did the majority of this step.  I did help him out, but he was more than eager and more than capable of making a bunch of dough snakes.  Roll the snakes about 10 inches in length with about 1/4 diameter.  Stack them randomly into 2 piles.
    It's ok if the snakes break.  Just pinch them back together.
    I know, these aren't pretty.
    Step 3: Smooth and Roll
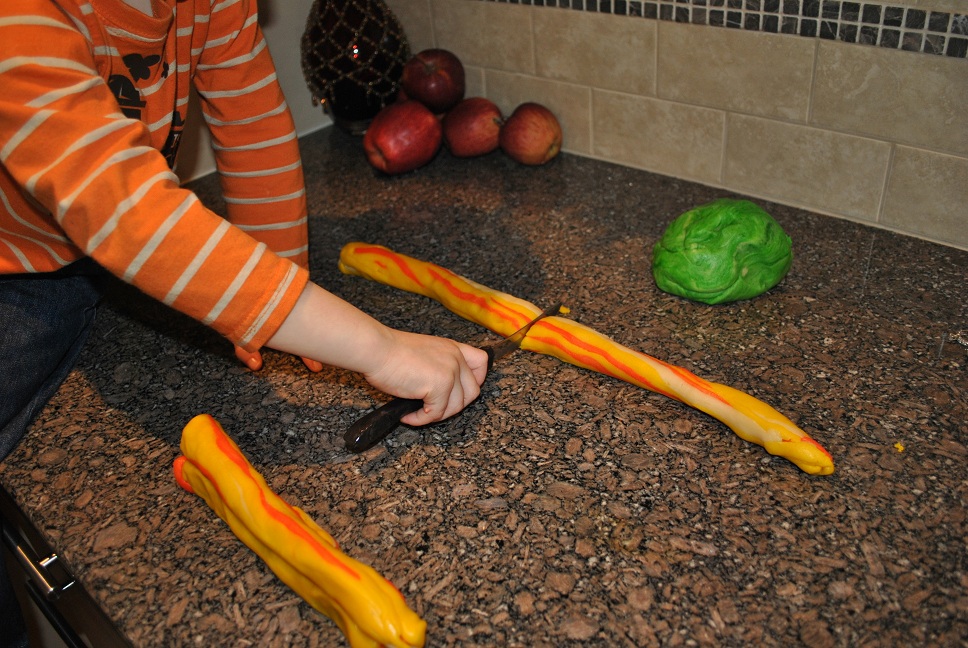
    Roll each of the logs (I think in the crafting world, these are referred to a 'canes') until the snakes become smooth and the log is about 18".
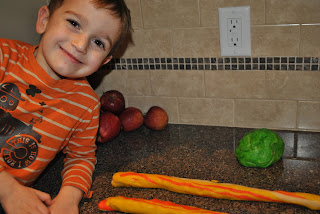
    See, he loves the model his masterpieces.
    Step 4: Cut & Stack the Corn Cobs
    Cut each of the logs in half and stack the halves on top of one another.  You should still have 2 logs when complete.
    2 not so pretty logs.  These are the corn cobs.
    Step 5: Add the Corn Husk
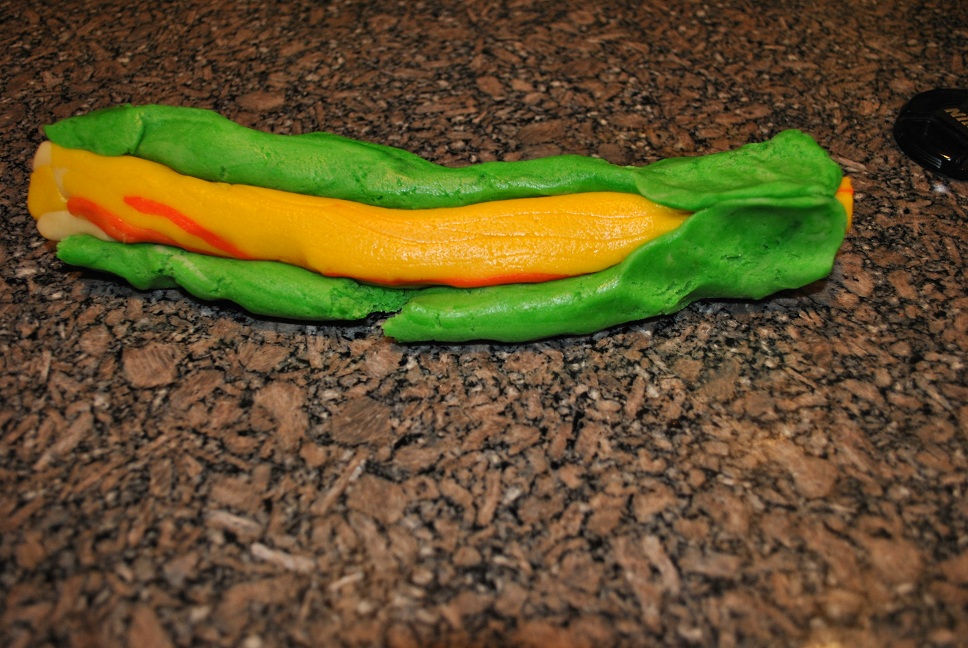
    Split the green dough into quarters.  Use 2 quarters per log.  Roll each out into a fat snake and attach it to the yellow corn cob.  Gently pinch the green dough so it completely covers the bottom of the yellow dough.  I also slighly pinched the yellow dough to form a ridge along the length of the log.
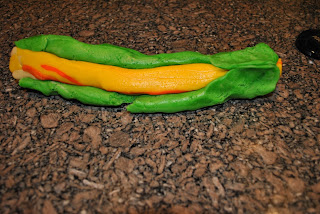
    Pinch the green dough


    Side view.  It doesn't look pretty now, but it looks better when cut.
    Step 6: Wrap the Logs of Dough
    Wrap the logs of dough in plastic wrap and store in the fridge for at least 2 hours.  You won't be able to easily slice the dough if it's not firmed up.  This dough is pretty soft.

    Step 7: Slice-N-Bake!
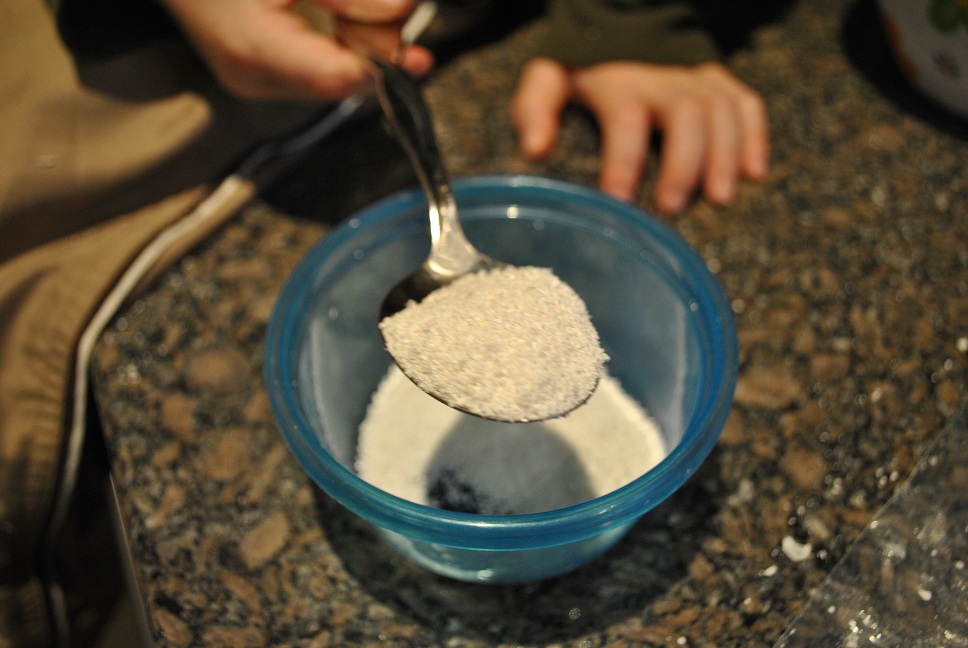
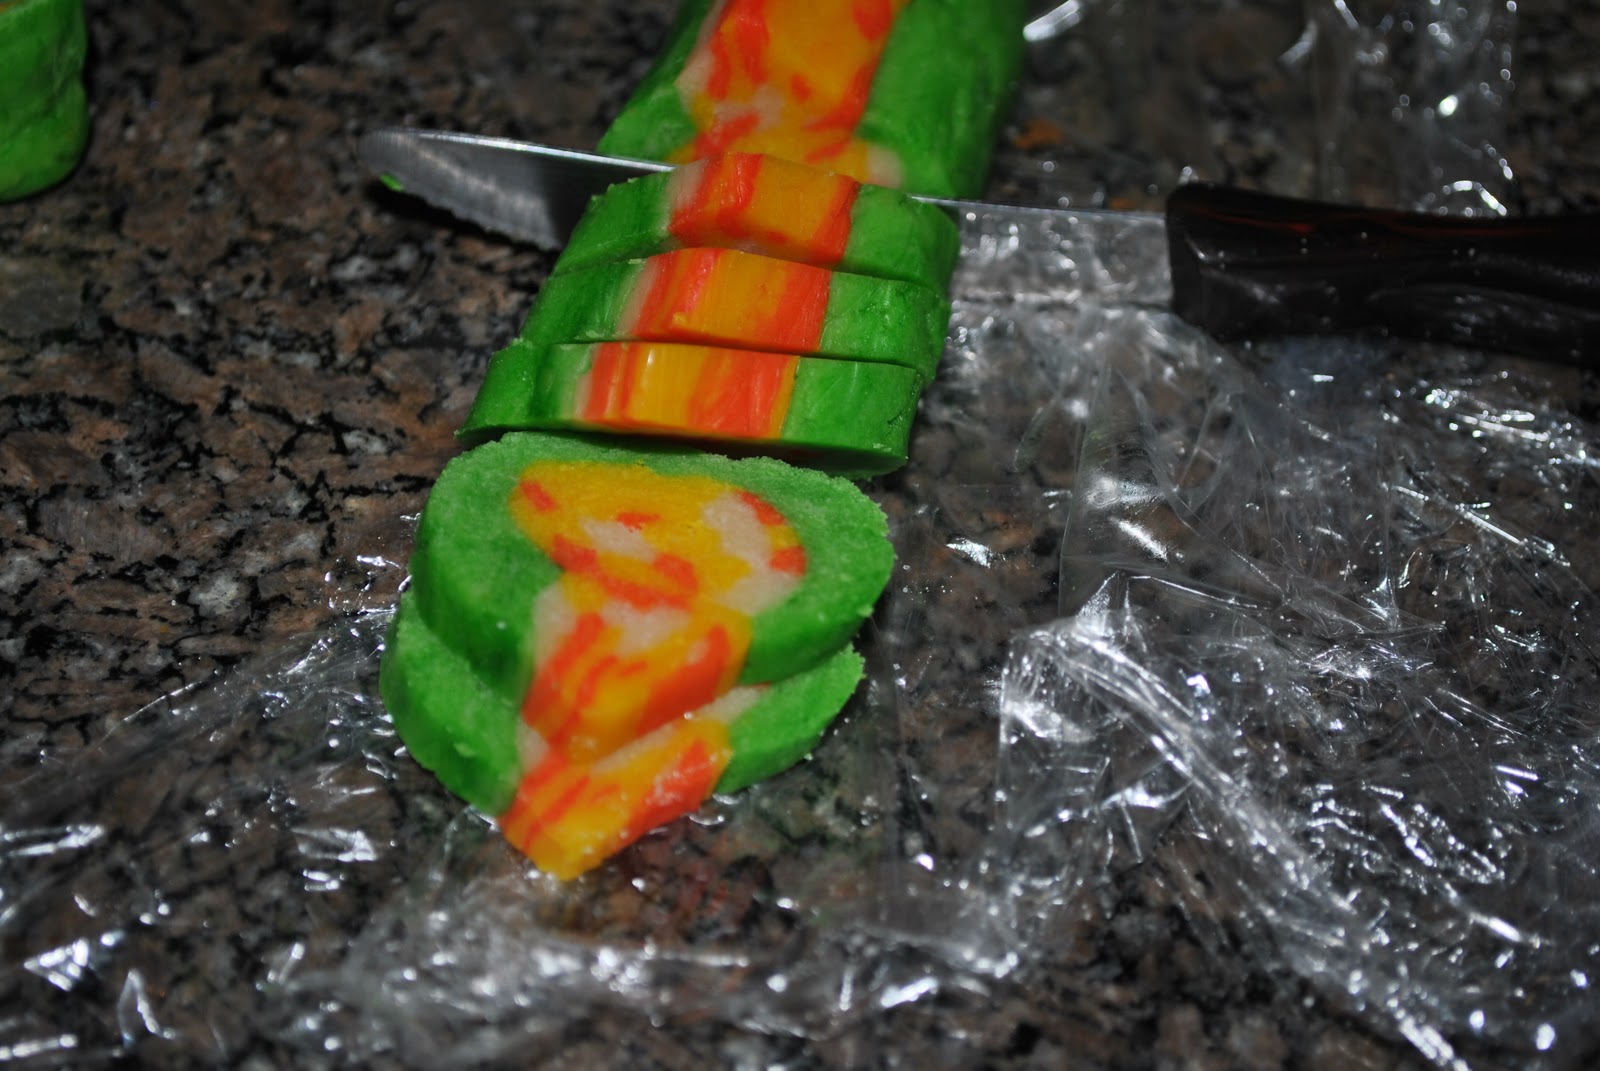
    With your oven set to 375 degree, pull the logs out of the fridge and slice them into 1/4 inch pieces.  Beware, the end pieces tend to look a little ugly.  Toss each cookie into sugar and place on a cookie sheet.  I like to use parchment paper to make sure the bottoms get perfectly golden.  This single recipe makes about 8 dozen mini-cookies.  I baked mine for 9 minutes.
    1/4 inch pieces
    Dusted in sugar and ready to bake.
    I might adjust my technique the next time I make these, but I think this was a good start.  I think I need better shaping for the husks.  Lesson learned for next time.  Now, I can't wait to try out my ideas for Christmas designs!  Here's what I did for Halloween:
    Frankenstein and Candy Corn Slice-N-Bake cookies!
    Have fun and good eats!
    -Rose @-}---

    Thursday, November 17, 2011

    Monster Dancing Clothes!

    Remember those days when you had a tiny little baby and you had to pack up or give away perfectly pristine clothes every three months?

    Those days are over at my house. 

    My kid has been climbing and running and falling down in some of her clothes for two years now and they are full of holes.  This past week I've found holes in three pairs of pants, two shirts, a dress, and a pair of shoes. 

    You know what that means.

    Time to get all Incredible Hulk and let her rip them off her tiny muscular body and bedazzle them!

    We busted out the scissors, glitter glue, and googly eyes to make some fancy ripped up clothes with monster faces.  I can't describe the fantastic dances that were inspired by the fluttering sleeves and exposed legs.  It was a whirlwind!

    Age:  3+ depending on how fancy you want the end product.  I don't mind if mine end up in the trash tomorrow.  What the heck, let the almost-2 year olds play, too!

    Time:  about half an hour plus time to dry the glue overnight.

    Cleanup:  pretty easy, about 5 minutes to wipe up the glue and wash hands.

    What you need:
    • Old clothes or shoes, the more stains and holes the better
    • Scissors
    • Glitter glue, acrylic paint or permanent markers
    • Paint brush or cotton swabs
    • Googly eyes
    • Privacy so your kid can strip off the clothes to paint after cutting them up

    Why I like this craft:
    1) It feels incredibly naughty and fun to rip up your own clothes (you will have to decide for yourself if your kid is capable of restraining herself from ripping up clothes you don't intend to turn into monster dancing apparel.  My kid is pretty trustworthy.  Famous last words, right?)
    2) I hate throwing away anything that might possibly ever maybe sort of have a useful crafty afterlife.  I don't mind throwing away finished preschooler craft projects.
    3) It was a great craft to do before bedtime so we could let the clothes dry undisturbed overnight. 

    Step 1:
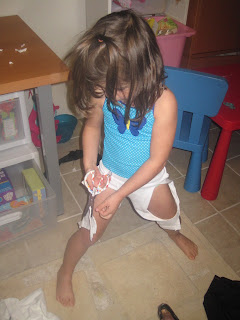
    Cut and rip up the old clothes.  It's particularly exciting to rip the clothes starting at the holes instead of using scissors.  But scissors add extra danger and excitement.  For heaven's sake don't give your kid pointy scissors to use next to their skin!  This calls for blunt tips.
    Make sure you rip at least one sleeve or leg up the side so it flutters around when they're dancing later. 

    Step 2:
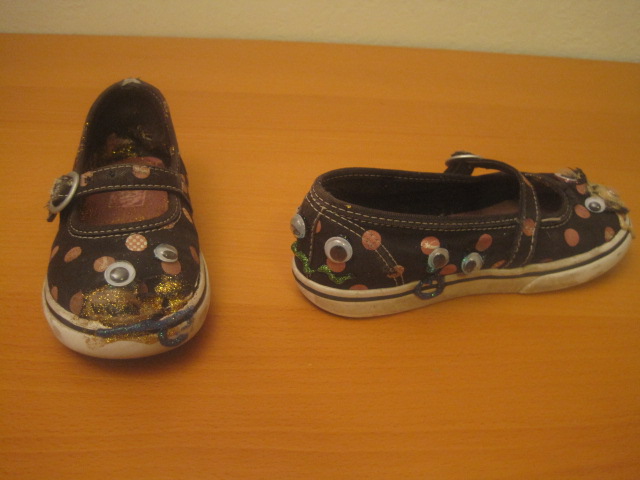
    Take off the clothes and start decorating!  My kid decorated the bejezus out of the inside of her shoe and filled it with glitter glue and googly eyes.  Cute and sparkly, but not very comfortable to walk on.  Plus I had to hide my chagrin at seeing our entire supply of googly eyes covered in glue so I started plopping pairs of them on the old clothes.  Then I added a mouth.  And some eyelashes.  And some eyebrows.  Then my kid started adding mouths.  And eyelashes.  And noses.  And big globs of pink glitter that she said looked just like brains (they really did!)  And big globs of blue that somehow ended up in her hair...

    Step 3: 
    Use the paint brush or cotton swabs to thin out the thickest globs of glue if you want it to dry quickly.  Leave the brain shaped globs if you have a full 24 hours or more to let it dry. 


    Step 4:
    Put the clothes back on and dance, dance, dance.