Last year I went to a Boy Scout dinner and had this super yummy treat. As soon as I got home I was googling to find the recipe. This is a very easy, almost no-bake, version of toffee. It's called mock toffe because it's not true toffee, but it is simply delicious. It's a great goodie to give as a thank you treat, bring to PTA meetings, or handout over the holidays. I hope you enjoy it as much as I do.
Age: 2+. My little one likes to sprinkle the toppings on top.
Time: 10 minutes to prep, ready to eat in about an hour.
Mess: For a kitchen activity, this is relatively clean with an easy clean-up. Hardly any dishes to wash - one pan, spatula, and a cookie sheet.
What I Like this "craft": I know this really isn't craft, but it is an easy activity that results in a yummy treat. Enough said :)
What You Need (recipe):
- 1 sleeve of Saltine crackers or Graham Crackers (both versions come out very good!)
- 1/2 cup butter
- 1/2 cup light brown sugar
- 3/4 cup bittersweet chocolate chips
- Toppings (pecans, peanuts, almonds, dried sweet cheeries, dried cranberries, dried blueberries, toffee bits, etc. Make you own combo!), about 1/4 cup each.
Step 1:
Preheat oven to 400 degrees.
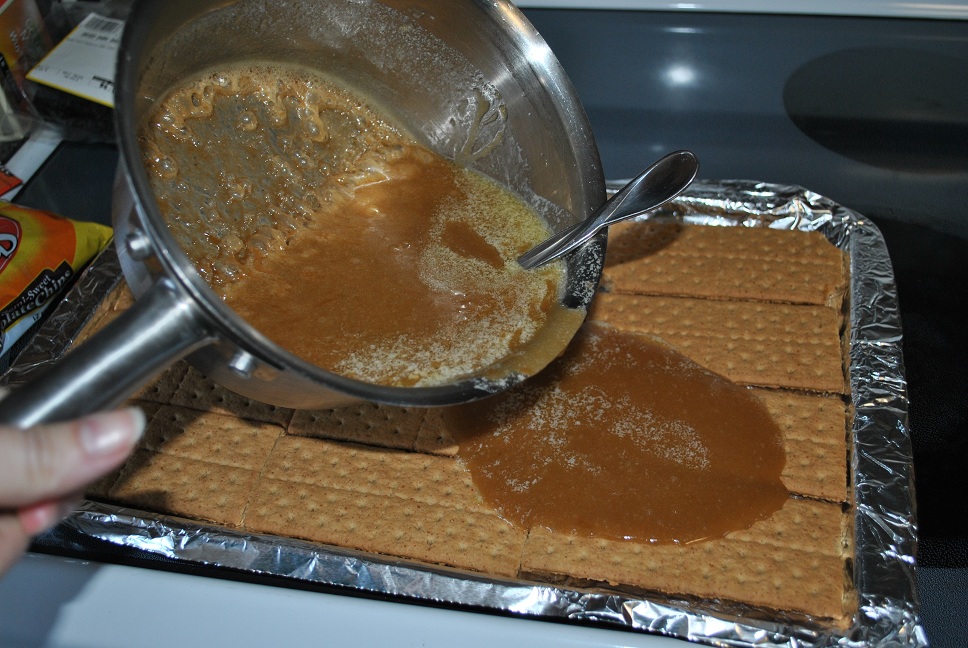
Line a baking sheet with foil. Lay the crackers into the pan as close together as possible without overlapping.
Step 2:
Bring the butter and sugar to a boil over medium heat. Boil for 2 minutes, stirring constantly. Remove sugar from heat and pour evenly over crackers.
Step 3:
Bake the crackers and sugar in the oven for 5 - 7 minutes, until very bubbly. Don't let the crackers get too browned! Remove pan from oven and let sit for 1 minute to set the sugar up slightly.
Step 4:
Sprinkle chocolate chips over crackers and let sit for 5 minutes to melt, then spread the chocolate evenly over the top when melted. Sprinkle nuts over the top (optional). I also like to press the toppings into the chocolate.
Note: On one variation, I used white chocolate chips for this step. The white chocolate did not melt with a smooth finish. I would only use what chocolate chips for the final topping or melted for a drizzle on top.
Step 5:
You can also make this extra pretty by melting some white chocolate, transferring to a plastic baggie, and drizzle the white chocolate all over the top.
Step 6:
Sprinkle a little salt (this makes it extra yummy) over the entire pan.
Cool at room temperature and then refrigerate. When the chocolate is set, cut or break into into pieces.
Yum! Yum!
~Rose @-}---